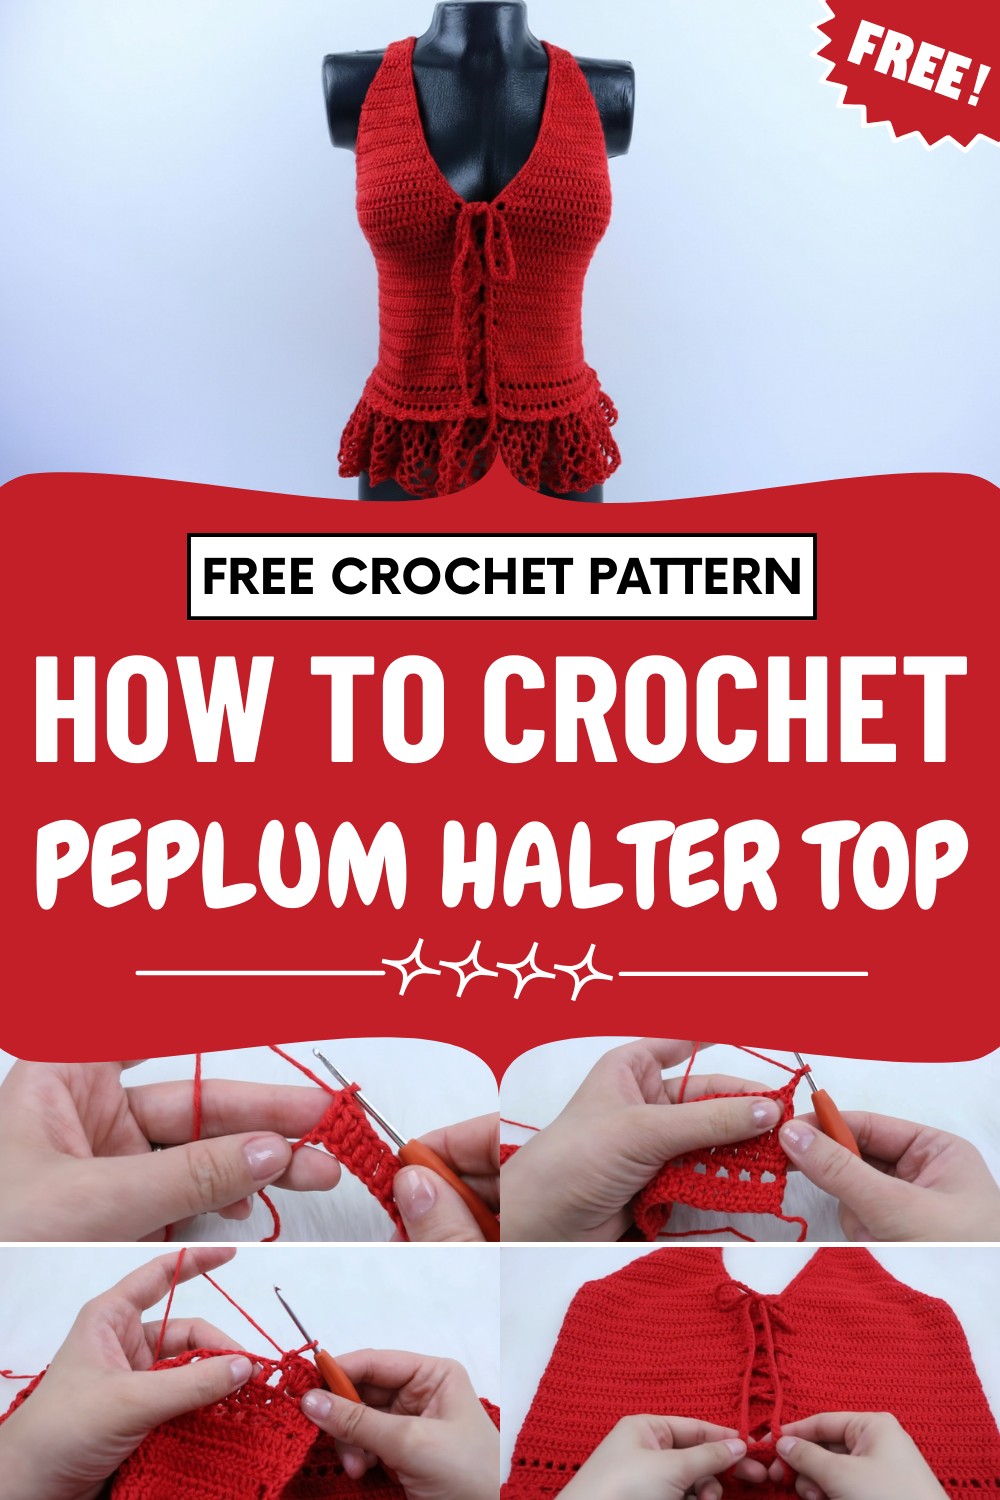
Personalize your wardrobe effortlessly with this Free Crochet Top Pattern that offering playful style and simple instructions for any season.
Perfect for enhancing any wardrobe, a crochet top pattern offers a versatile and stylish option that effortlessly transitions from casual afternoons to elegant evenings. With its intricate yet approachable designs, this freshly crafted garment brings a unique blend of comfort, artistry, and personalization to your everyday outfit choices. Whether layered over a sundress or paired with jeans, the lightweight texture and customizable details make it ideal for all seasons and occasions.
Minimalist Crochet Top Pattern for Everyday Outfits
Modern patterns often showcase beautiful stitchwork, flattering fits, and charming accents—letting every maker express their personal flair with endless color and yarn possibilities. The act of crocheting not only fosters creativity but also yields a practical, wearable piece that suits both gifting and self-expression.
Present-day enthusiasts appreciate how easy it is to adjust the size, length, and style, ensuring every finished piece is as unique as its creator. Enjoy the beauty and versatility woven into each handmade top.
Special Features
- Adjustable buttonhole ties for a customizable fit
- Simple openwork and shell stitches for visual appeal
- Easily adaptable to any size
- Beginner-friendly pattern with detailed guidance
- Works with any yarn style or color
Recommended Skill Level
Beginner – The pattern uses basic crochet stitches (chains, double crochet, single crochet) and straightforward construction. No advanced techniques required!
Tutor's Suggestions
- Use any yarn you prefer for a unique look; the sample uses a 50% cotton, 50% acrylic blend.
- Adjust the chain and row counts based on your measurements and tension.
- Try on your work as you go to ensure a good fit.
- Add extra length, adjust the back straps, or get creative with colors for a personalized top!
Uses
- Perfect for summer outfits
- Layer it for spring or fall
- Great as a handmade gift
- Ideal for festivals, beach days, or casual wear
Materials Needed
- Yarn (any style or color)
- 3 mm crochet hook (or recommended by yarn label)
- Measuring tape
- Stitch markers
- Wool needle
- Scissors
- (Optional) extra yarn for ties
- Your bust contour measurement and desired top length
Step-By-Step Pattern
1. Set Up and Foundation
- Make a slip knot.
- Crochet a chain as long as your bust measurement.
- Sample Size S: 88 cm (168 chains, but your count may vary!).
- Check your chain length without stretching for accuracy.
2. Row 1 (Double Crochet Row)
- Crochet 2 extra chains for turning.
- Work double crochet into the third chain from hook.
- Double crochet into each chain across.

- Ensure you have an odd number of double crochets (includes turning chains).
3. Row 2 (Square Stitch)
- Crochet 2 chains (counts as a double crochet), add 1 extra chain (separation).
- Pattern: Skip a stitch, double crochet in next, chain 1, skip one, double crochet.
- Repeat to end. The last double crochet goes into the second of turning chains.
4. Row 3 (Double Crochet Row)
- Crochet 2 chains, turn.
- Double crochet into the center of each square and on top of each double crochet.
- Repeat to end.
5. Row 4 (Double Crochet Row)
- Crochet 2 chains, turn.
- Double crochet into each double crochet across.

6. Row 5 (Buttonhole Row)
- Crochet 2 chains, turn, add 1 extra chain (separation).
- Form a buttonhole: Skip a stitch, double crochet in next.
- Double crochet across, repeating the square pattern.
- Form another buttonhole when 3 stitches remain before the row end.
From here, repeat rows as follows:
- Repeat two rows of double crochet (Rows 3 & 4).
- Repeat a buttonhole row (Row 5).
- Continue until you reach your desired top length (e.g., 21 cm = 20 rows for Size S).
7. Shaping the Neckline (Decreases)
- Start working decreases at the beginning and end of each row for the neckline area.
- Decrease: Start double crochet but only complete half, repeat in next stitch, then finish both together.
- Size S & M: 3 decrease rows; Size L & XL: 4 decrease rows.
- Mark approx. 18 cm for S & M; 18.5–19 cm for L & XL.
8. Creating Shoulder Straps
- Decrease only at each side, forming a triangle.
- Continue until 4–6 stitches remain; don’t make it too thin.
- Crochet straight rows with just these stitches for desired strap length (approx. 27–30 cm depending on size).

9. Making the Second Shoulder Strap
- Attach yarn above the second shoulder (mirror your first strap).
- Repeat decrease rows and then straight strap.
10. Joining the Back
- Mark the center back and align straps slightly towards the center.
- Sew the straps securely on the wrong side.
- Hide yarn ends as needed.
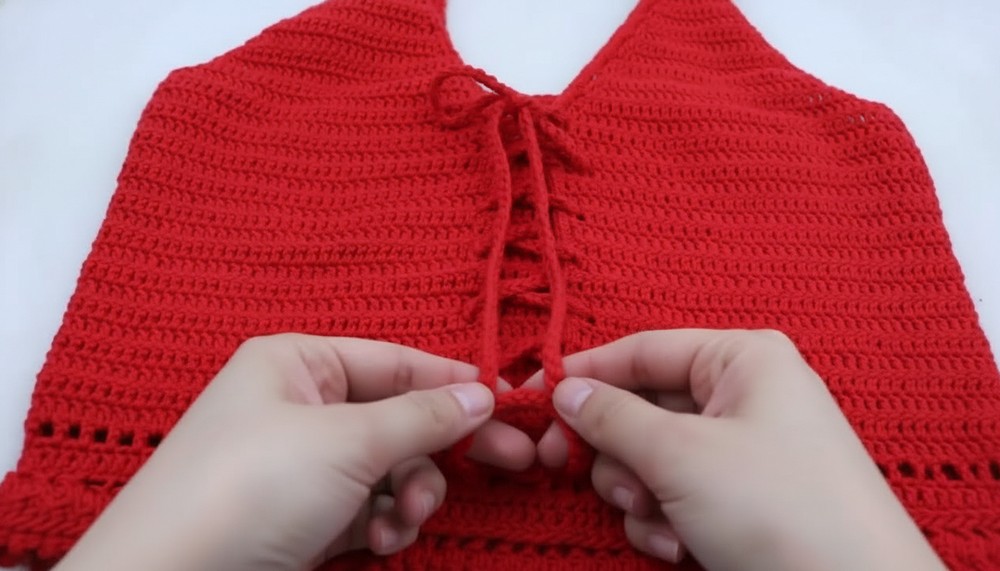
11. Reinforcing Buttonholes
- Crochet single crochet along the upper front edge.
- Add two single crochet into each buttonhole for strength.
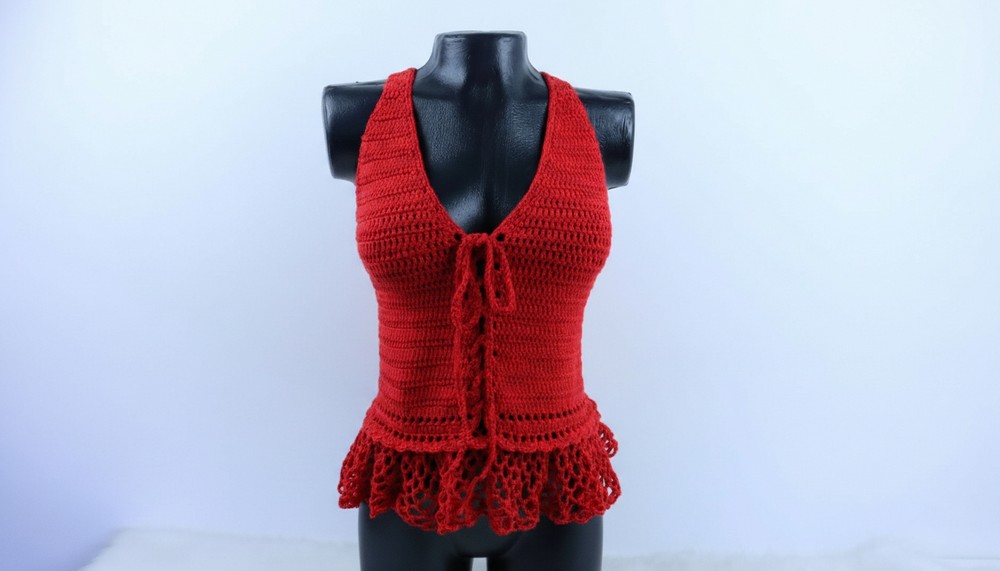
12. Crocheting the Bottom Edge
- Work a row of chain-separated double crochet (like square stitch).
- Repeat shell pattern: [5 double crochet in one square, single crochet in next] to end.
13. Finishing with Mesh Stitch
- Work mesh row: [Single crochet in square, 5 chains, single crochet in next square].
- Repeat for desired number of mesh rows (sample uses 7).
14. Making Front Tie
- Crochet a simple chain (use double strands for durability).
- Target length: approx. 145 cm.
- Thread through front buttonholes to tie the top.
Conclusion
You now have a trendy and comfortable crochet top, perfect for summer and easy to adapt in colors or sizes. The pattern is straightforward and can be personalized. Try to alternate stitches, adjust strap or body length, or use contrasting color ties for your own unique twist!
Tip
Try on your work often to ensure the best fit! Adjust as you go—crochet is easy to customize, so make the garment suit you perfectly.


Leave a Reply