
Layer stylish comfort with this Crochet Coco Vest Pattern, featuring airy stitches, relaxed fit, and playful textures for everyday outfits.
Minimal Crochet Coco Vest Pattern Perfect for Everyday Wear

Adjustable sizing and flexible stitch patterns allow for personalization, while soft yarn choices ensure comfort against the skin without sacrificing durability. Repetitive and rhythmic stitches provide a satisfying process, encouraging precision and experimentation with colors, textures, and finishing details. Beyond its aesthetic appeal, the vest adds functionality as a lightweight cover-up that enhances layering possibilities without bulk.
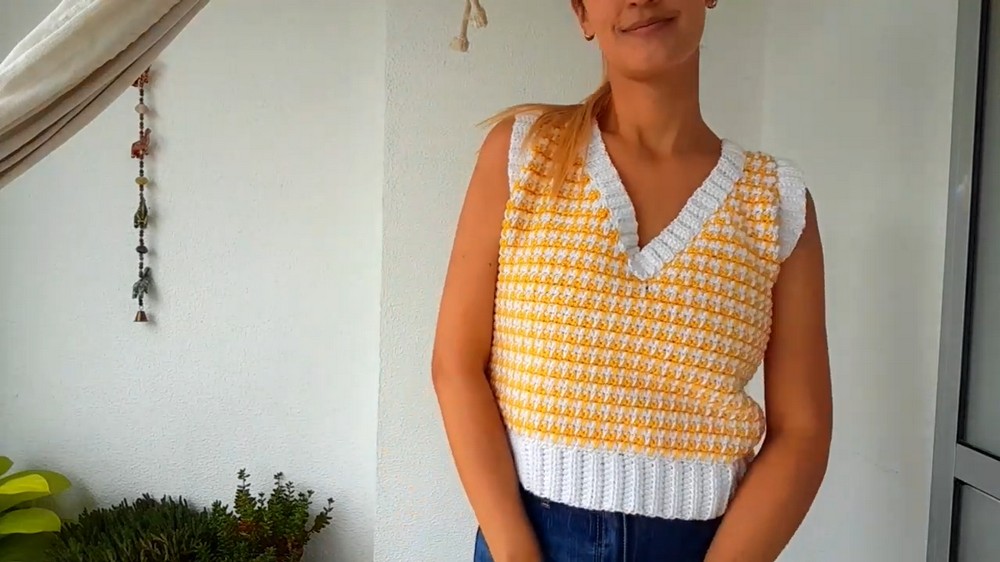
The finished piece balances style and practicality, blending timeless elegance with modern versatility. With its flattering shape and intricate design, this pattern transforms simple yarn into a wardrobe staple that is both chic and comfortable for everyday wear.
Special Features
- Uses the classic houndstooth stitch to create a chic look
- Features a V-neck and elastic ribbing at the bottom, sleeves, and neckline
- Color-block effect with two contrasting yarns
- Customizable for different sizes
Level of Difficulty
Intermediate – Some experience with crochet, color changes, and simple shaping is recommended, but the video and written guidance make it accessible to advanced beginners ready for a challenge.
Materials Needed
- Cisne acrylic yarn or equivalent:
- 200 grams yellow
- 300 grams white
- Crochet hook, size for your yarn (plus a 4mm hook for ribbing)
- Tapestry needle for sewing
- Stitch markers (optional)
- Scissors
Tutor’s Suggestions
- Keep your yarns separate when changing colors to avoid tangling.
- Do not cut the yarn between color changes, just carry the unused color up the side.
- Use stitch markers to align pieces before sewing.
- Leave long yarn tails for sewing pieces together.
Uses
This vest is great for layering in cooler weather or as a statement piece for any casual or smart-casual outfit. Its classic look works for everyday wear, the office, or special events.
Step-by-Step Pattern
1. Ribbed Elastic Band (Bottom)
- Using white yarn, make a slip knot and chain 10.

- Turn, and starting from the second chain, make 1 half double crochet (hdc) in each chain (10 hdc per row).
- Chain 1, turn, and continue hdc but only through the back loop for ribbed effect.
- Repeat until you have 38 rows.
- Make two identical ribbed strips (for both front pieces).
2. Creating the Body Panels
- With the ribbing finished, rotate your work (needle points up).
- Work along the side of the ribbing:
- For each rib row, work a sequence of increase (2 single crochets in one row end), single crochet, repeat all along (total 57 single crochets at the end).
- Work 1 row of single crochet evenly across, no increases.
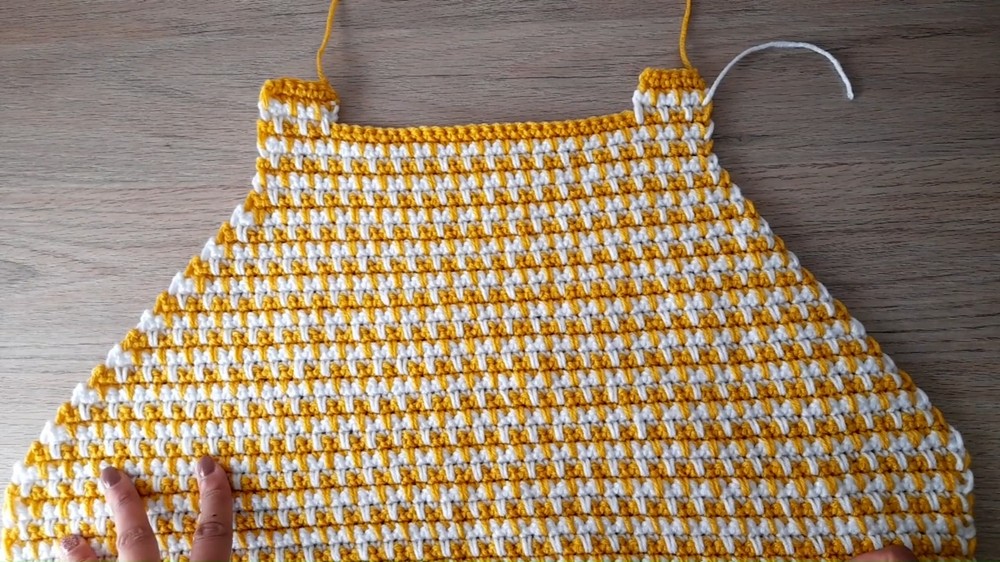
- Change colors: attach yellow without cutting white. Begin working houndstooth stitch as follows:
3. Houndstooth Stitch (Body)
- With yellow yarn:
- Row 1: Single crochet in first st, extended single crochet (esc) in next (insert hook into row below, pull up a longer loop), alternate across row.

- Row 2: Turn, chain 1, single crochet in each stitch (using same color).
- Row 1: Single crochet in first st, extended single crochet (esc) in next (insert hook into row below, pull up a longer loop), alternate across row.
- Change color and repeat, alternating colors every two rows.
- Continue alternating houndstooth rows until you reach 30 rows in total for each panel.
4. Shaping the V-Neck
- Find the exact center. Divide your work at this point—each side will now be worked separately.
- At the center, change to white and start working only 1 half of the vest.
- Begin decreases at the start and end of each single crochet row for V-neck shaping:
- To decrease: insert into first st, pull loop, insert into next st, pull loop (3 loops on hook), yarn over and pull through all loops.
- Continue decreases at each end of single crochet rows only (not houndstooth rows).
- Continue until just 6 stitches remain, then work 12 rows straight (no more decreases) to form shoulder strap.
5. Repeat for Other Side
- Rejoin yarn at the center and repeat the V-neck shaping for the other half.

6. Back Panel
- Make bottom ribbing as before (identical to front strips).
- Pick up stitches along one edge as before (57 sc).
- Work houndstooth pattern for 44 rows.
- Begin armhole decreases at both ends of each row:
- Decrease at each edge at the beginning and end of rows for 24 rows.
- Work 4 more rows straight (no decreases).
- Work the shoulder strap: 4 rows of 6 stitches each.
7. Joining the Pieces
- Place the two panels together, right sides facing in.
- Use a tapestry needle to sew the shoulder strips and side seams together. Align the stitches carefully.
- Use stitch markers to keep everything lined up.
8. Elastic Bands for Sleeves and Neck
- With 4mm hook, chain 6, turn, and hdc in 2nd chain and each chain (5 hdc).
- Work 50 rows for each sleeve, 34 rows for one side of neck, 32 rows for the other, and 16 rows for the back neck.
- Sew these strips neatly to their corresponding edges (around armholes and neck), overlapping at the neck to mimic a classic vest detail.
TIP
Carry your unused color up the edge of your work to avoid extra weaving-in and make color changes smoother and neater. Use stitch markers when sewing to keep your vest perfectly aligned!
Conclusion
The Coco Vest is a rewarding project that teaches you the beautiful houndstooth stitch while giving you a timeless piece you’ll love to wear. Its classic style and soft acrylic yarn make it perfect for cooler days or dressing up a simple outfit. Try personalizing the colors to match your style, and enjoy your gorgeous handmade garment.




Leave a Reply