
Embrace vintage charm with this Crochet Granny Bonnet Pattern, featuring classic stitches, cozy textures, and charming details for sunny days.
Emanating a sweet vintage charm and simple style, this cozy Crochet Granny Bonnet Pattern adds both warmth and beauty to any outfit. Loved by beginners and experienced makers alike, it offers the chance to play with different yarn colors and create special gifts for friends or family. The bonnet’s classic shape gently frames the face, keeping you comfortable on windy days or during outdoor walks.
Cozy Crochet Granny Bonnet Pattern Perfect for Cold Days

You can make it in any size, using up small amounts of leftover yarn from other projects, which makes it very practical and fun. Making this bonnet gives you time to relax and enjoy the creative process, and when finished, you have a lovely, handmade piece to wear or share.
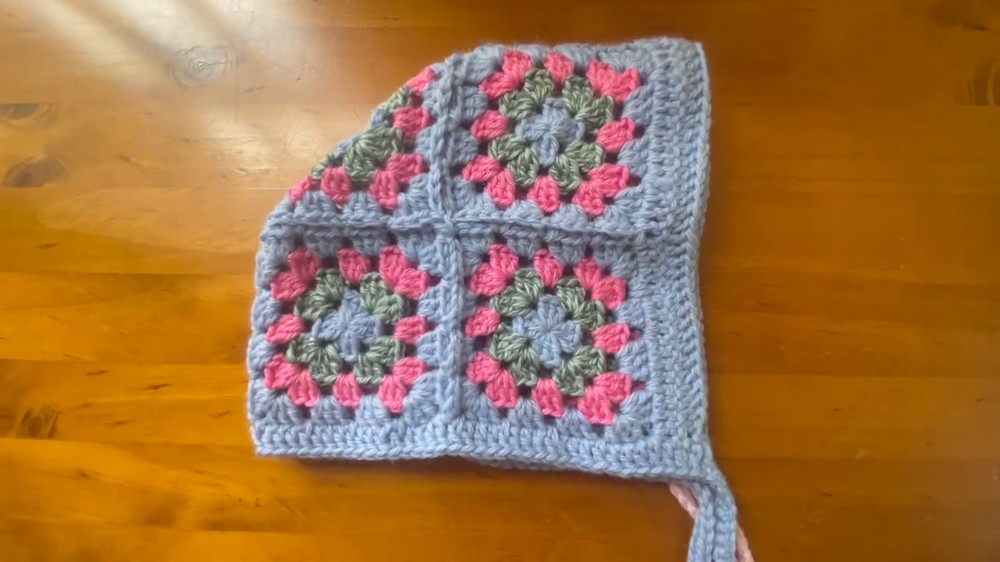
Its easy pattern, beautiful design, and useful nature make it a favorite choice in today’s world of homemade project. It’s both stylish and functional, perfect for makers of all skill levels.
Special Features
- Easy join-as-you-go assembly: Seam squares together as you crochet, saving time and yarn.
- Classic meets trendy: Timeless granny squares form a playful bonnet silhouette.
- Fully adjustable: Size can be customized easily by changing hook/yarn or number of squares.
- Clever edge & ties: Integrated ties and edging finish the look with polish.
- Colorful fun: Showcase any number of colors or keep it minimalist.
Level of Difficulty
Confident Beginner: You need to know the basic granny square skills, double crochet, chain stitch, slip stitch, and working in rounds. Join-as-you-go adds a tiny bit of extra challenge for new crocheters.
Tutor’s Suggestions
- Weave in your ends after each square to keep finishing manageable.
- Use a thinner DK yarn and smaller hooks for daintier granny squares.
- Use matching or contrasting yarn for joins, depending on your style.
- Wash your finished bonnet gently before wearing for best results.
Uses
- Wear as a playful, cozy accessory
- Make for gifts, costumes, or photo props
- Choose colors for seasonal or personal flair
Materials
- DK (light worsted) weight yarn in 3 colors (A, B, C—example: light blue, variegated green, bright pink)
- Color A: at least 50g
- Colors B & C: at least 25g each
- 4 mm crochet hook (main squares)
- 3.5 mm crochet hook (edges/ties)
- Scissors
- Yarn/darning needle
- Stitch marker (optional)
- Measuring tape (optional)
- Finished motif: Each square ≈ 10cm/4"; Bonnet fits head circumference 53–58.5 cm
Step-by-Step Pattern
1. Granny Squares
Granny Square (Make 7)
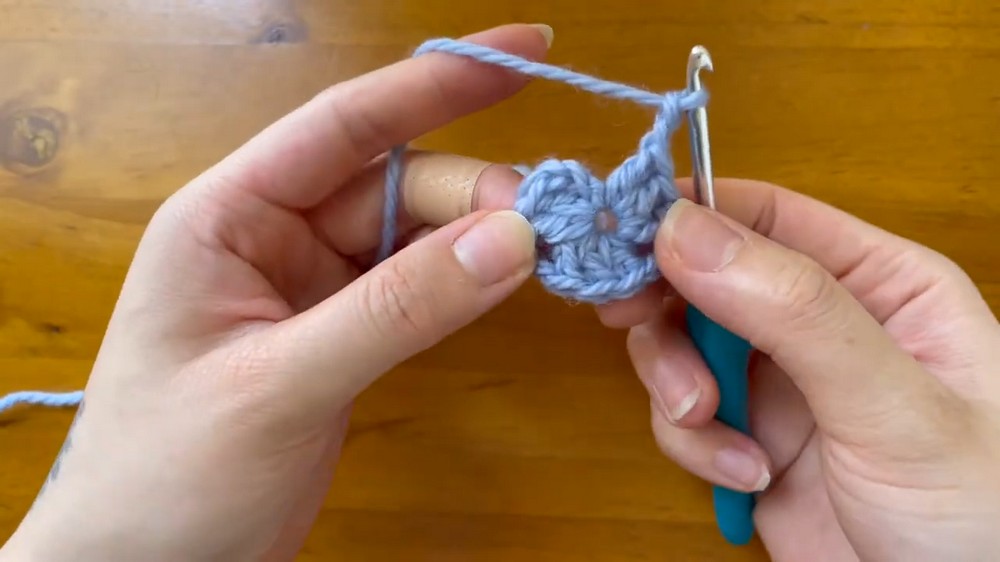
Round 1 (Color A):
- Make a magic ring.
- Ch 2 (counts as first dc), 2 dc into ring, ch 2.
- (3 dc, ch 2), repeat 3 more times into ring (total: 4 clusters of 3 dc and 4 ch-2 spaces).
- Join with sl st to initial ch-2. Tie off, leave 10cm tail.
Round 2 (Color B):
- Join yarn B into any corner ch-2 space with a standing dc (make slipknot, hold behind work, yarn over, pull up loop, finish dc).
- 2 dc, ch 2, 3 dc (all in same corner).
- Ch 1.
- Repeat: (3 dc, ch 2, 3 dc) in corner; ch 1 into every corner.
- Join with sl st to first dc. Tie off.
Round 3 (Color C):
- Join in a corner space with a standing dc; 2 dc, ch 2, 3 dc, ch 1.
- In each “side” ch-1 space: 3 dc, ch 1.
- Repeat pattern around (corners: 3 dc, ch 2, 3 dc, ch 1; sides: 3 dc, ch 1).
- Join, cut yarn, tie off.

Round 4 (Color A):
- Join in any corner with standing dc, 2 dc, ch 2, 3 dc, ch 1.
- In each “side” space: 3 dc, ch 1.
- Repeat round. Sl st to join, fasten off.
- Weave in ends immediately for neat finish.
2. Joining Squares (Join-As-You-Go)
- Squares will be joined in a specific arrangement for the bonnet.
- Follow the same granny square steps for each, but use join-as-you-go on connecting edges in the final round.
Join-As-You-Go Method:
- At corners to be joined: after 3 dc, ch 1, slip stitch into adjacent square’s corner; ch 1, 3 dc in same space, ch 1, continue.
- For edges to be joined: instead of ch 1, slip stitch into adjacent ch-1 space on the other square.
- Always line up squares back-to-back for seamless joins.

Square arrangement:
- Squares 1, 2, 3: will be the bottom row, joined horizontally.
- Squares 4, 5, 6: join vertically above the first three, mirroring joins.
- Square 7: closes the open top, joined to three adjacent squares with diagonal joins at corners.
3. Edging & Face Opening
Switch to 3.5 mm hook for a tidier finish.
- Start with standing dc in any ch-2 space along the edge opening.
- Work dc into every stitch and chain space across this edge (face opening).
- Ch 2, turn. Dc into every stitch to add second row for neatness.
- Fasten off.
4. Lower Edge and Ties
- Attach yarn to lower edge of the bonnet.
- Ch 2, then dc into every stitch across the bottom.
- Place stitch marker at one end to start tie.

First Tie:
- Ch 51 (includes 1 turning chain—do not work into first ch).
- Sc into each chain back to bonnet edge (work into back bumps for neat edge).
- When back at the bonnet, continue across bottom edge: dc as before.
Second Tie:
- When reaching the other bonnet end, work into side stitches: add 2 dc into side of each double crochet stitch for thickness.
- Begin chain 51 for the second tie (reverse of start).
- Sc along chain as before, finish with dc in side stitch at bonnet edge.
- Fasten off.
5. Final Touches
- Carefully weave in all ends with darning needle.
- Wash and block for optimal shape.
- Try on and adjust ties for comfort.
Tip
Weave in ends after each square: Tackling ends square-by-square is a massive time-saver compared to leaving them to the very end.
Conclusion
You’ve now crocheted a cute bonnet using classic granny squares, quick joins, and clean ties. Customize it with your favorite colors and enjoy a practical, stylish piece—all in just a few hours.




Leave a Reply