
Sport vibrant style with this Crochet Striped Headband Pattern that featuring colorful, comfy stretch, and playful details for everyday wear.
A versatile accessory that combines style and practicality the Crochet Striped Headband Pattern adds a touch of handcrafted charm to any outfit. Its soft yet sturdy construction keeps hair neatly in place while providing comfort for all-day wear. The alternating stripe design creates visual interest and allows for playful color combinations, making each piece unique and customizable.
Elegant Crochet Striped Headband Pattern for Everyday Wear

Ideal for casual outings, fitness routines, or cooler weather, it provides gentle warmth while maintaining breathability and flexibility. The pattern’s intricate crochet detailing enhances its aesthetic appeal, elevating a simple headband into a fashionable accessory suitable for a variety of personal styles.
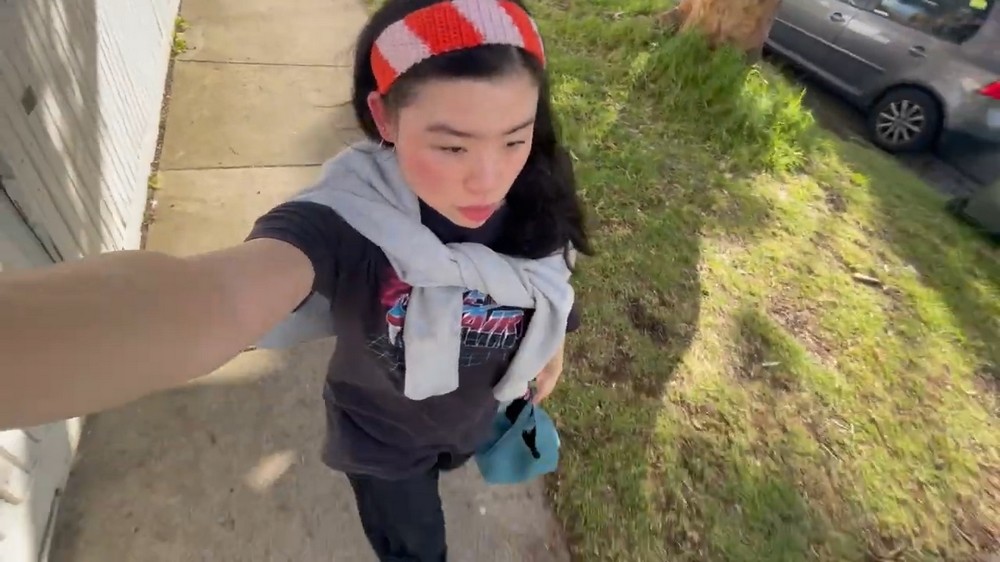
Its flexible design ensures a comfortable fit for all head sizes while highlighting the detailed craftsmanship and stripe pattern. Merging functionality with style, the Crochet Striped Headband Pattern turns a simple hair accessory into a charming, fashion-forward piece that enhances any outfit with a handmade, polished look.
Special Features
- Distinct diagonal stripes formed via colorwork
- Tapered, tie-style ends for an adjustable fit
- No seaming required—worked all in one piece
- Finished with minimal ends and a neat edge
- Easily customizable for colors and width
Level of Difficulty
Confident Beginner / Intermediate:
Techniques include single crochet, increasing, decreasing, changing colors, and carrying yarn for colorwork. If you’ve done color changes before or want a challenge, this is a smart project to try. Stitchwork itself remains easy!
Materials & Tools
- Two DK (4 ply) or light worsted weight yarns in contrasting colors (Color A and Color B)
- Sample uses white (A) and orangey-red (B), but any two colors work!
- 3 mm crochet hook
- Scissors
- Darning (yarn) needle
Tutor Suggestion:
Cotton yarn is recommended for durability, but acrylic works well too. Use scraps or new yarn.
Pattern Instructions
1. First Tie
- Using Color A, make a slip knot.
- Chain 41.
- Work 40 single crochets (sc) along the foundation chain (optional: work into back bumps for a neater edge).
- Do not chain 1 at the end.

2. Increasing to Headband Width
Row 1:
- Work 2 sc in last tie stitch (inc), for a total of 2 sts.
Row 2: - Ch 1, turn. 1 sc in first st, 2 sc in next st (inc) (3 sts).
Rows 3–9: - Repeat: Ch 1, turn, sc across to last st, 2 sc in last st (increase by 1 st each row).
- By Row 9, you should have 10 sts.

3. Headband Body (Straight Section)
Rows 10–13:
- Ch 1, turn. Sc in each st across (10 sts).
Note: The color change for stripes will begin in the next steps.
4. Stripe #1: Diagonal Colorwork Section
Row 14: (Introduce Color B)
- With Color A: Sc in first 8 sts.
- Switch to Color B on final yo of 8th sc.
- With B: Sc in last 2 sts.
- (Carry Color A under B for neatness.)
Row 15: (WS)
- With B: Sc in first 4 sts.
- With A: Sc in last 6 sts (carry B for 2–3 sts after switch for smooth color change).
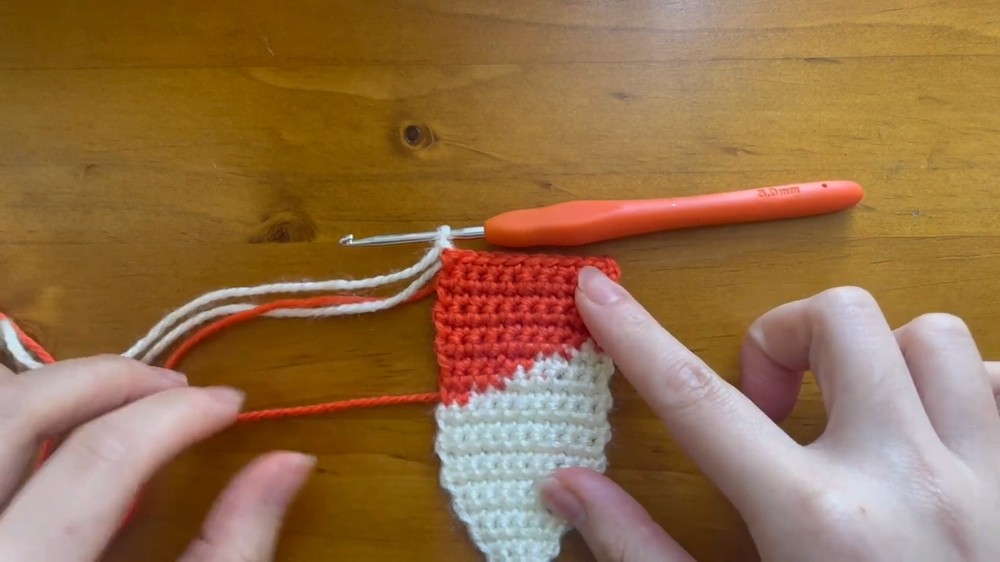
Row 16: (RS)
- With A: Sc in first 4 sts.
- With B: Sc in last 6 sts (carry A for 3 sts after switch).
Row 17: (WS)
- With B: Sc in first 8 sts.
- With A: Sc in last 2 sts (prepare for all B next rows).
Rows 18–22:
- With B only: Sc in all 10 sts.
- At end of Row 22, switch to Color A in last stitch. Cut Color A earlier if tidy ends are preferred.
5. Stripe #1: Returning to Color A
Row 23:
- With A: Sc in first 2 sts.
- With B: Sc in last 8 sts.
Row 24:
- With B: Sc in first 6 sts.
- With A: Sc in last 4 sts.
Row 25:
- With A: Sc in first 6 sts.
- With B: Sc in last 4 sts.
Row 26:
- With B: Sc in first 2 sts.
- With A: Sc in last 8 sts.
- At end, cut Color B with a 10cm tail.
Rows 27–32:
- With A: Sc in each st (10 sts per row).

6. Repeat the Stripe Pattern
Continue in this established pattern:
- After each completed stripe (Rows 14–32), work 5 rows in Color A before beginning the next stripe (starting with a shifted color change for that "diagonal" look).
- Repeat the full pattern (Rows 14–32) two more times, for a total of three stripes.
- Work to end of Row 68; finish with 5 rows of Color A.
Tip: Each stripe is created by moving the color change sequence over to maintain diagonal lines.
7. Decrease for Second Tie
From Row 69:
- Row 69: Sc in next 8 sts, sc2tog over last 2 sts (9 sts remain).
- Rows 70–76: Ch 1 and turn, sc across to last 2 sts, sc2tog in last 2 sts each row, decreasing by 1 st per row.
- End of Row 76: 2 sts remain.
8. Second Tie
Row 77:
- Sc in first st, chain 40.
- Sc in each ch back to headband edge (optional: use back bumps).
- Slip stitch into last st of Row 76 to finish.
- Fasten off, leaving a tail for weaving in.
9. Finishing Touches
- Weave in all ends securely with darning needle, changing directions at least 3 times for extra hold.
- Wash the headband in lukewarm, soapy water.
- Lay flat to dry. This sets the shape, softens the fabric, and removes any curling from the ties.
Tutor’s Suggestions
- Always carry the unused yarn neatly under your stitches for seamless color changes.
- Keep tension even while working color changes, especially in the diagonal rows.
- Block your finished headband for the very best shape and finish.
Tip
Carry yarn for 2–3 extra stitches after each color change.
This gives you a cleaner transition and sets you up for the next diagonal shift with ease.
Conclusion
This eye-catching, stripy diagonal headband is as enjoyable to make as it is to wear. With its clever colorwork, soft ties, and bold stripes, it’s sure to become a staple accessory or a perfect handmade gift.




Leave a Reply