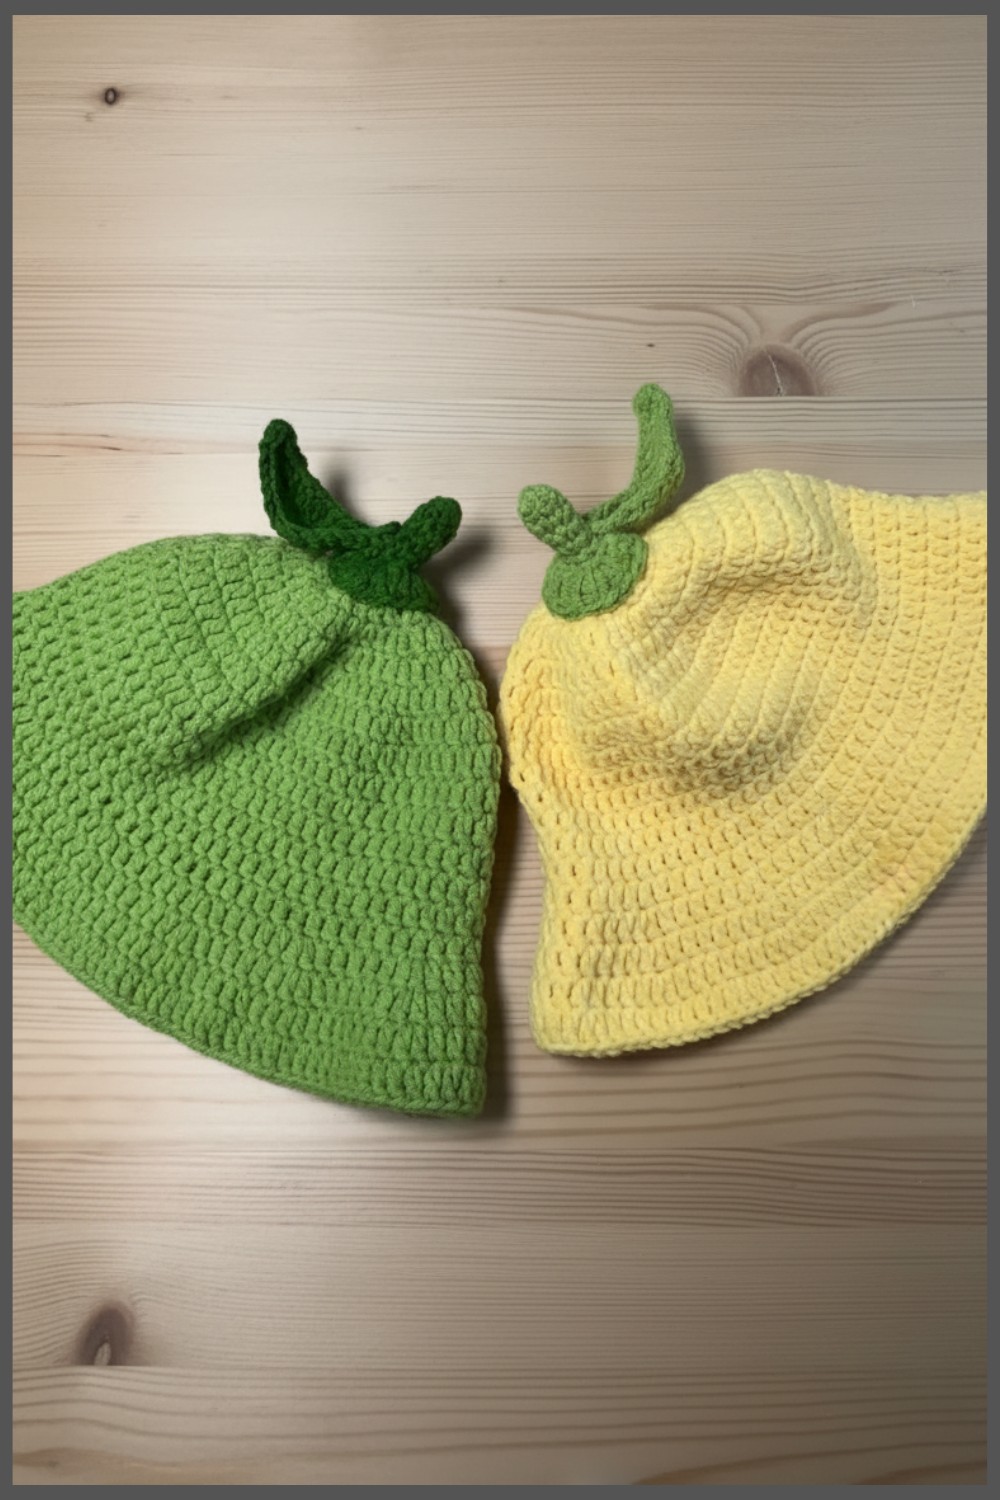
Bright and stylish crochet lemon bucket hat Pattern that's perfect for sunny days and adding a playful, unique handmade touch to any outfit.
Looking for a fun way to brighten your outfit and day? This cheerful lemon-themed bucket hat is the perfect accessory to bring style and personality to your look! With its sunny yellow color and adorable lemon-inspired details, it’s a wearable burst of happiness that stands out from the crowd. The soft, round design fits comfortably on your head, while its lightweight material keeps you cool and cozy.
Delightful Crochet Lemon Bucket Hat Pattern for Sweet Summer Touch

Whether you’re heading to the beach, enjoying a picnic, or strolling through the park, this hat is both fashionable and functional, protecting you from the sun while adding a playful touch to your outfit.

Its fresh and summery vibe makes it ideal for any casual outing or as a unique, handmade gift for someone special. This hat isn’t just an accessory—it's a statement piece that spreads joy wherever you take it.
Crochet Lemon or Lime Hat Pattern
Materials
- Yarn: Worsted weight yarn in yellow or lime green (main color), white (optional for details)
- Hook: 4.0 mm (G/6) crochet hook
- Tapestry needle: For sewing in ends
- Scissors
- Stitch marker: Optional, for marking rounds
Abbreviations
- ch: Chain
- st: Stitch
- sl st: Slip stitch
- sc: Single crochet
- hdc: Half double crochet
- dc: Double crochet
- tr: Treble crochet
- inc: Increase (work two stitches in one stitch)
- MR: Magic ring
Pattern Instructions
Hat
- Magic Ring
- Start with a magic ring.
- Round 1:
- Ch 2, work 12 dc into the magic ring.
- Pull yarn tail to close the ring.
- Sl st into the first dc to join.

- Round 2:
- Ch 2 (doesn't count as a stitch), work 2 dc in each stitch around (inc).
- Total: 24 dc.
- Sl st into the first dc to join.
- Round 3:
- Ch 2, work 1 dc in the first st, 2 dc in the next st (increase).
- Repeat the pattern around.
- Total: 36 dc.
- Sl st into the first dc to join.

- Round 4:
- Ch 2, work 1 dc in each of the first 2 sts, 2 dc in the next st.
- Repeat the pattern around.
- Total: 48 dc.
- Sl st into the first dc to join.
- Round 5:
- Ch 2, work 1 dc in each of the first 3 sts, 2 dc in the next st.
- Repeat the pattern around.
- Total: 60 dc.
- Sl st into the first dc to join.
- Round 6:
- Ch 2, work 1 dc in each of the next 4 sts, 2 dc in the next st.
- Repeat the pattern around.
- Total: 72 dc.
- Sl st into the first dc to join.
Note: At this point, the hat crown measures approximately 5.5 inches in diameter.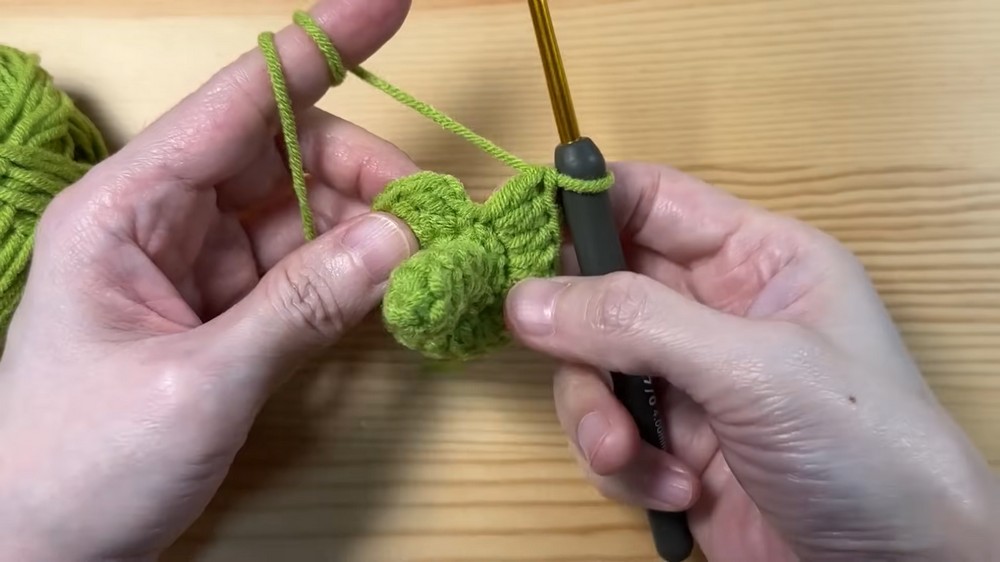
Customization Ideas
- For Larger Sizes: Continue working additional rounds, increasing by one more stitch between each increase (i.e., 1 dc in the next 5 sts, then increase).
Body of Hat
- Rounds 7-13:
- Ch 2, work 1 dc in each st around.
- Total for each round: 72 dc.
- Sl st into the first dc to join.
Note: The body should measure about 3 inches from the beginning of the body rounds.
Brim
- Brim, Round 1:
- Ch 2, work dc in next 5 st, 2 dc in next st (increase).
- Repeat pattern around.

- Sl st into the first dc to join.
- Next Rounds:
- Continue increasing in a similar manner by adding more single dc stitches between increases per round. Spread out increases to smooth out edges.
- Continue increasing in a similar manner by adding more single dc stitches between increases per round. Spread out increases to smooth out edges.
Conclusion
This hat can be customized into a lime hat by using green yarn. Follow the pattern to make it for toddlers or small children.
Pattern Correction & Tips
- Tip: Keep marking the beginning of your rounds to avoid confusion.
- Correction: Ensure that the dc counts are correct at the end of each round for a proper fit.
Special Notes
- Do not cut the yarn tail after making the magic ring; it will be used for finishing later.


Leave a Reply