Top off your outfit with Crochet Strawberry Bucket Hat Pattern that's perfect for a sweet and playful accessory that makes fun to any look.
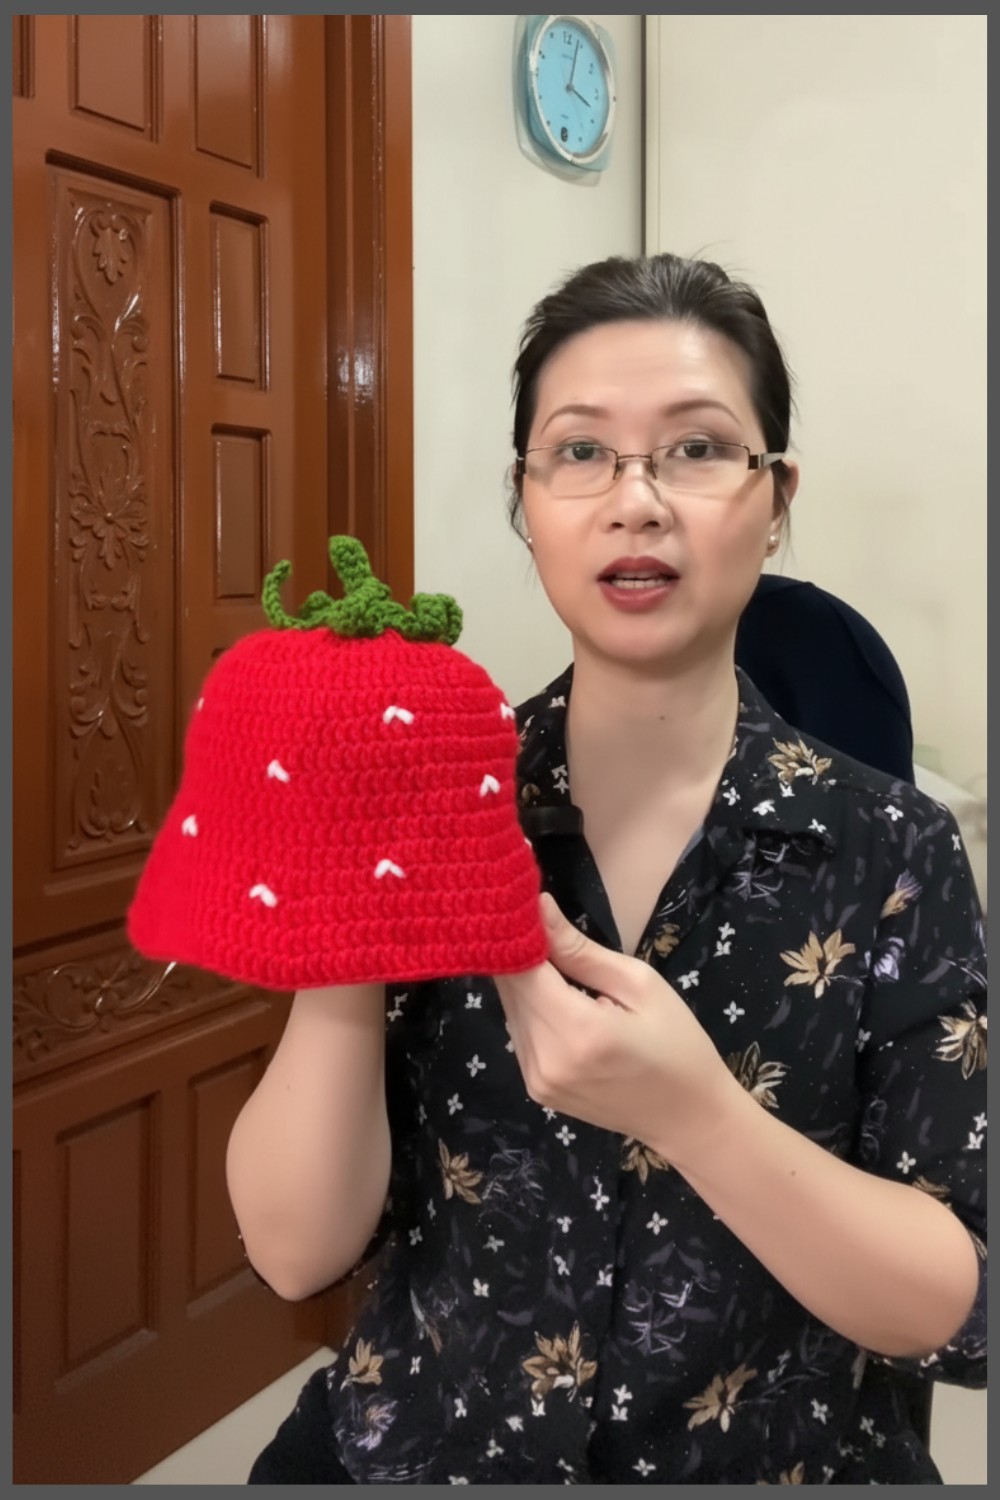
This adorable hat is a fun and eye-catching accessory that adds a playful touch to any outfit. Designed with a bright red color, dotted with small white "seeds," and topped with a cute green leafy detail, its unique look is inspired by the charm of a fresh strawberry. Perfect for anyone who enjoys making accessories, the Crochet Strawberry Bucket Hat pattern allows you to bring this delightful design to life.
Colorful Crochet Strawberry Bucket Hat Pattern Trendy Summer Accessory

Whether you're heading out for a picnic, a day at the beach, or just a stroll in the sunshine, this hat is ideal for keeping you stylish and protected from the sun. Its cheerful design makes it a great choice for both kids and adults, adding a pop of color and personality to your look.

Lightweight and comfortable, it’s easy to wear all day long. This pattern combines creativity and style, making it a perfect project and a fun gift idea.
Strawberry Bucket Hat Crochet Pattern
Materials List
- Yarn: 5-ply milk cotton yarn
- Main color: Red for the hat body
- Green for the stem and leaves
- White for the seeds (optional)
- Crochet Hook: 4 mm hook
- Darning Needle: For weaving in ends and joining sections
- Scissors
- Measuring Tape
- Optional Items: Stitch markers for tracking rounds

Key Abbreviations
- Magic Ring: MR
- Chain: ch
- Slip Stitch: sl st
- Double Crochet: dc
- Single Crochet: sc
- Half Double Crochet: hdc
- Extended Double Crochet: edc
- Treble Crochet: tr
- Increase: 2 dc in the same stitch
Pattern Instructions
Top of the Hat
-
Round 1:
- Create a magic ring (MR).
- Ch 2 (does not count as a stitch), then crochet 12 dc into the magic ring.
- Pull the tail of the magic ring to close tightly.
- Sl st into the first dc to close the round.
-
Round 2:
- Ch 2 (does not count as a stitch).
- Work 2 dc in each stitch (increase).
- Total stitches: 24 dc.
- Sl st into the first dc to close the round.

-
Round 3:
- Ch 2.
- Alternate: 1 dc in the first stitch, 2 dc (increase) in the next stitch.
- Continue the pattern around.
- Total stitches: 36 dc.
- Sl st into the first dc to close.
-
Round 4:
- Ch 2.
- Alternate: 1 dc in the first stitch, 1 dc in the second stitch, 2 dc (increase) in the third stitch.
- Total stitches: 48 dc.
- Sl st into the first dc to close.
-
Round 5:
- Ch 2.
- Alternate: 1 dc in each of the first 3 stitches, 2 dc (increase) in the fourth stitch.
- Total stitches: 60 dc.
- Sl st into the first dc to close.

-
Round 6:
- Ch 2.
- Alternate: 1 dc in each of the first 4 stitches, 2 dc (increase) in the fifth stitch.
- Total stitches: 72 dc.
- Sl st into the first dc to close.
Measure your hat diameter for accuracy:
- Small Child Size: 13.5 cm (5.25 inches).
- For larger sizes, continue rounds following the increase pattern:
- Round 7: 1 dc in the first 5 stitches, increase in the 6th stitch.
- Round 8: 1 dc in the first 6 stitches, increase in the 7th stitch, etc.
Body of the Hat
- Rounds 7–12:
- Ch 2, then work 1 dc in each stitch without increasing.
- Total stitches: 72 dc per round.
- Continue until the desired body height is reached (e.g., 6 cm or 2.5 inches for small size).
- Tip: Add additional rounds if you prefer a longer hat body.
Brim
- Round 13:
- Ch 2.
- Work 1 dc in the first 11 stitches; in the 12th stitch, crochet 2 dc (increase).
- Repeat this pattern around.
- Total stitches increase progressively with each round.
- Subsequent Brim Rounds:
- For the next round, increase after every 12 stitches; for the following rounds, increase after every 13 stitches, and so on.
- Stop at 17th round or when the brim is as wide as desired.
- Finish with an invisible join using the darning needle for cleaner edges.
Stem and Leaves
- Stem:
- Use green yarn and create a magic ring.
- Round 1: Work 6 sc into the MR, then sl st into the first sc.
- Round 2: Continue working 6 sc per round without increasing until the stem measures approximately 1 inch.

- Leaves:
- Ch 11.
- Skip the first chain, and work into the second chain:
- Sl st in the 2nd chain.
- Sc in the next 2 chains.
- Hdc in the next 2 chains.
- Dc in the next 3 chains.
- Edc in the next chain.
- Tr in the last chain.
- Skip 2 stitches at the base and sl st to the third.
- Repeat to create 6 leaves.
- Attach the stem and leaves to the hat’s top center using a darning needle.
Adding Seeds
(Optional)
- Cut several 10-inch strands of white yarn.
- Stitch small inverted “V” shapes randomly across the hat using a darning needle.
- Secure each stitch by knotting the yarn on the inside of the hat.
Customization Ideas
- Size Adjustments: For adult sizes, follow the same pattern but increase more rounds at the top until the diameter reaches 16–18 cm.
- Alternative Colors: Create hats in different fruit-inspired themes, such as tomato red without seeds or yellow for a lemon design.
- Brim Style: Flatten the brim completely for a Squid Game-inspired design or leave it slightly curled for a playful look.
Special Notes
- Chain 2 Does Not Count: Always begin each round with ch 2, but it does not count as a stitch.
- Use markers to track the first stitch of each round, ensuring accurate counts.
- Measure your hat often to avoid sizing issues.
Conclusion
This strawberry bucket hat pattern is versatile, playful, and easy to adjust for different sizes and styles. Whether you’re making it for a small child or an adult, this pattern guides you through every detail to create a charming, handmade accessory. Add your personal touch with seeds, stem styling, or alternative colors to match the recipient's personality!
Pattern Correction
- If your stitch count is off, double-check the increase rounds and ensure stitches are evenly spaced.
- If the brim looks wavy, avoid increasing too frequently in each round.
Tip
Keep your tension even throughout the project, especially for the brim and body. A loose tension can cause the hat's shape to warp, while overly tight stitches can make it difficult to form the brim properly.


Leave a Reply