Change your winter style by with this Crochet Spiral Beret Pattern to produce a thick and cozy hat that feels very soft on your head all day.
Choosing a lovely handmade accessory can instantly make your daily outfit look more elegant and graceful. This soft piece feels wonderful against your skin and keeps you feeling warm while you enjoy a quiet walk on a breezy day. Utilizing a Crochet Spiral Beret Pattern helps you craft a high-end hat that features beautiful swirling lines and a very smooth finish.
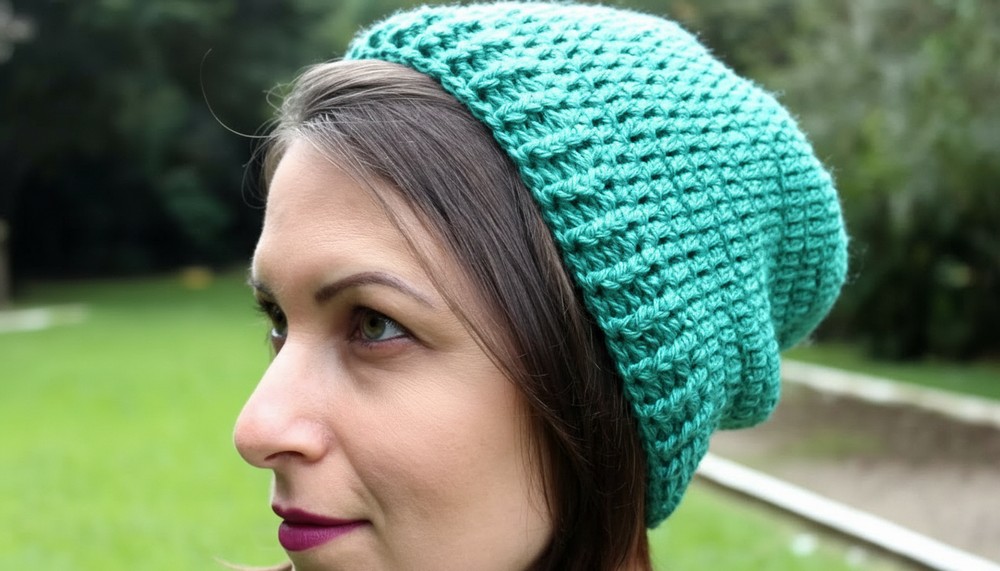
Unique Crochet Spiral Beret Pattern With A Very Special Twist

A great feature is the stretchy and light design, which allows the hat to sit comfortably on your head without causing any pressure or marks. The overall style is very smart and artistic, making it a top pick for a museum visit, a lunch with family, or even a day at the office.
It pairs perfectly with a long jacket or a simple knit top, helping you look your best in every situation. Making this item yourself is a fun way to be creative while wearing a classic look that stays in fashion.
Special Features
- Spiral Construction for an attractive, seamless look—no visible round joins.
- Customizable Sizing for both width and slouchiness of the beret.
- Textured Finishing Band using alternating relief stitches (front and back post).
- Works up quickly with medium-thick yarn and a 4mm hook, making it a satisfying project.
- Suitable for both everyday wear and party occasions, depending on yarn selection.
Level of Difficulty
Easy – Advanced Beginner.
You should be comfortable with basic crochet stitches (chain, single crochet, half double crochet, double/triple crochet) and understand increasing in the round. Some experience with front and back post stitches is helpful but explained in the pattern.
Suggested Materials
- Yarn: 100g skein (approx. 167 meters) of size #4 medium-weight (worsted or aran) yarn; 70% acrylic, 30% wool (for both warmth and smoothness). Example shown: Color 55611 (green).
- Hook: 4mm crochet hook.
- Tapestry needle for weaving in ends.
- Stitch marker or scrap of contrasting yarn – to keep track of round starts in the spiral.
- Scissors.
Step-by-Step Pattern
1. Start the Spiral Base
- Make a Magic Ring.
(If unsure, refer to basic crochet tutorials for "magic ring" or "adjustable loop.") - Round 1:
- Work 8 single crochets into the magic ring.
- Pull the ring tight to close.
- Do not join with a slip stitch; continue working in a spiral.

- Place Marker:
- Insert a piece of contrasting yarn or a stitch marker into the first stitch to mark the beginning of your round.
2. Begin Increases & Spiral Construction
- Round 2:
- In the first sc, work 1 sc.
- In the next, work 1 half double crochet.
- In the following 3 stitches, work one double crochet (dc) in each.
- Continue following the transcript’s alternating increases:
- One stitch: dc, next stitch: work three dc in the same stitch (increase).
- Continue this alternation, following the increases as you go: "one stitch single, next: three in one," etc.
- Move the marker each time you reach the start of a new round.
3. Continue Increasing
- Following Rounds:
- Round 3: Work 2 dc in each stitch around (= increasing in every stitch).
- Round 4: 2 dc in each stitch (or as needed to keep fabric flat).
- Round 5: [2 dc in every other stitch], or alternate as described.
- Use the marker to always identify the first stitch of the round.
- Establish a Consistent Increase Pattern:
- Continue with the following standard increase sequence:
- (6 dc, increase): Work 1 dc in each of the next 6 stitches, then 2 dc in the next st (increase). Repeat around.
- Next round: (8 dc, increase): Work 1 dc in each of the next 8 stitches, then 2 dc in the next st (increase). Repeat around.
- Continue this progression until the circle measures approximately 18 cm (7 inches) in diameter.
Tutor's tip: If you want a wider beret, add more rounds with increases (e.g., [10 dc, 1 increase], [12 dc, 1 increase], etc.).

- Continue with the following standard increase sequence:
4. Work the Main Body (No More Increases)
- Body Rounds:
- Stop increasing when you reach the desired diameter.
- Work evenly in dc (1 dc into each st) for 9 more rounds (for a total of 15 rounds of double crochet, counting from the start of dc rounds).
- Always move the marker up at the start of each round to keep your place.
- For a "slouchier" look, add extra rounds.
5. Shape the Band
- Last Spiral Row:
- To smooth out the spiral ending, finish the work with:
- A round of half double crochet (hdc),
- Then a round of single crochet (sc),
- End with a slip stitch round.

- To smooth out the spiral ending, finish the work with:
6. Create the Ribbed Brim (Bar Stitch)
- Transition Band:
- Ch 3 (counts as first dc).
- Work a round of double crochets (dc) around; join with a slip stitch to the top of the starting ch-3 (this is the only joined round).
- Ribbing (Front/Back Post Double Crochets):
- Row 1: Chain 3.
- Work front post double crochet in the next st, then back post double crochet in the next st. Alternate (FPdc, BPdc) around.
- Join with a slip stitch to ch-3.
- Rows 2 – 3: Repeat the FPdc and BPdc ribbing, working each stitch as it appears (front post in front post, back post in back post). Make at least three total rows of ribbing for a neat finish.
- Row 1: Chain 3.
7. Finishing
- Fasten Off.
- Use a tapestry needle to carefully weave in all ends on the inside of your beret.
- Pull thread through several stitches for extra security and to prevent unraveling.
- Trim any excess.

Suggested Uses
- Everyday wear: Keeps you warm and stylish in fall and winter.
- Party/festival accessory: Try metallic, shiny, or colorful yarns to match outfits.
- Great as a handmade gift, especially when customized to the recipient’s favorite colors.
- Fashion accent piece—dress up or down as you like.
Tutor's Suggestions & Customization
- Yarn Selection: Choose soft fibers for comfort and good stitch definition. A wool blend is both warm and smooth.
- Fit: If you want the beret to be wider or to "slouch" more, simply add rounds after your final increase.
- Customization: Adjust the number of rounds for length or the amount of ribbing, or add a decorative button, pompom, or brooch to the band.
- Markers: Use a contrasting thread or a proper stitch marker each round, especially important in spiral rounds, to keep track of where the round begins.
Tip
For a neater finish, especially with spiral crochet, always keep your last row of dc tidy by adjusting the last stitches to blend seamlessly into the band. Block your beret lightly (with steam or by dampening and shaping it over a plate or bowl) for a smooth, professional look.
Conclusion
You’ve just created a classic, seamless spiral beret—versatile, customizable, and perfect for showing off your love of crochet. Don’t forget to share a photo of your finished beret with fellow crocheters or on social media, and enjoy your new, handmade accessory.


Leave a Reply