Step into style with this Free Crochet Flower Granny Blouse Pattern and brighten your outfits with cheerful, handmade floral flair all season.
Blending timeless floral motifs with contemporary fashion, the crochet flower granny blouse pattern offers a standout piece for any wardrobe. Featuring intricate flower-centered granny squares seamlessly joined together, the blouse showcases airy textures and playful patterns that exude both romance and elegance. Lightweight and versatile, it transitions effortlessly from a relaxed summer top paired with jeans or shorts to a chic beach cover-up or a unique layering piece for cool evenings.
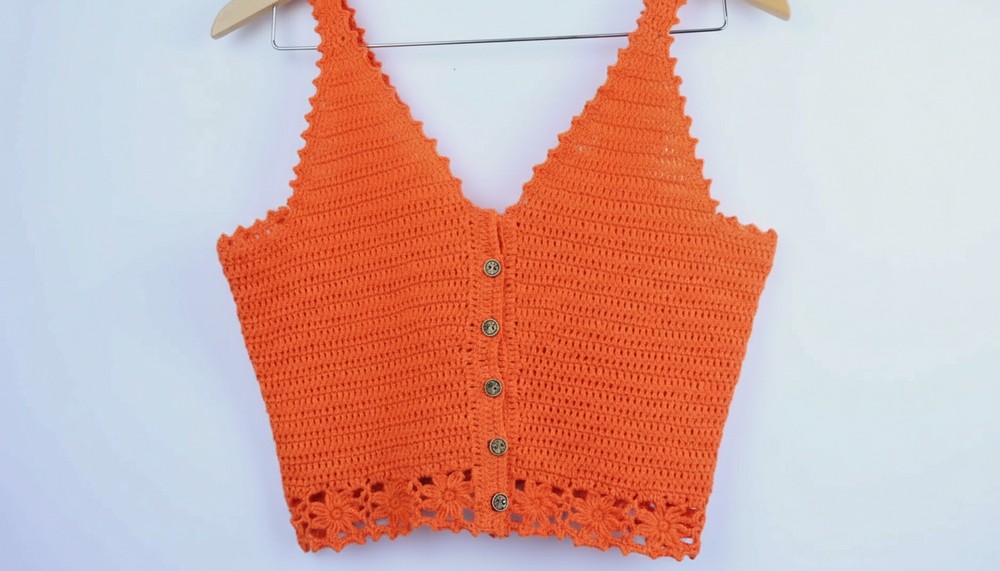
Chic Crochet Flower Granny Blouse Pattern for Effortless Summer Looks

Besides its aesthetic charm, the crochet flower granny square blouse pattern promotes creativity, as makers can easily customize the color palette or alter the length and fit for a truly personalized garment. With button closures and delicate picot edging, the blouse offers both function and flair.
Suitable for advanced beginners and intermediate crocheters, this satisfying make not only refines crochet skills but also results in a beautiful statement piece. The graceful silhouette highlights the joy of handmade fashion, making it a must-have for those who appreciate artisanal style.


Crochet Flower Granny Square Blouse Pattern
Introduction
This crochet blouse features a beautiful flower granny square motif joined to create a modern, airy summer top. The construction is modular, making it easy to customize for different body shapes and sizes. This project is suitable for advanced beginners or intermediate crocheters and produces a light, comfortable blouse that's perfect for layering or standalone wear.
Special Features
- Flower Granny Square Motif: Unique join-as-you-go technique.
- Custom Sizing: Easily adjustable by adding more granny squares or rows.
- Shaping: Includes increases for bust contour and a triangle-shaped front for a neat finish.
- Functional Button Closure: Buttonholes and reinforced edges.
- Decorative Picot Edge: Adds elegance to the finished piece.
Materials Needed
- Yarn (any kind, recommended: 50% acrylic, 50% cotton)
- Crochet hook (as recommended by yarn, e.g., 2.5 mm)
- Tapestry needle
- Measuring tape
- Buttons (about 6)
- Stitch markers or safety pins
- Scissors
Measurements to Take
- Bust Contour: Around the fullest part of the bust.
- Desired Length: From top of the bust (or armpit) to the desired hem length.
Difficulty Level
Advanced Beginner/Intermediate:
Familiarity with granny squares, joining motifs, basic increases/decreases, and simple shaping required. The project gives practice with foundation single crochet, double crochet, trebles, slip stitches, and picot edging.
Tutor’s Suggestions
- Measure as you go, since tension and yarn thickness affect gauge.
- Use a soft, comfortable yarn to ensure a nice drape.
- Adjust the number of squares or rows for correct fit.
Step-by-Step Pattern
Step 1: Crochet the Flower Granny Square
- Magic Ring: Make a magic ring, chain 1.
- Round 1: Work 8 single crochet into the ring.
- Pull yarn to close the ring tightly. Do not count the initial chain.
- Slip stitch into the first sc to close the round.
- Round 2 (Petals):
- Start Petal: Chain 3 (counts as first treble), work two more trebles into the same stitch, keeping the last loop of each treble on the hook. Yarn over and pull through all loops to cluster.

- Corner: Chain 6.
- Repeat: [In next single crochet, work a petal (3 trebles together), chain 3] for the sides and chain 6 for the corners.
- Continue until you have 8 petals (alternating: petal, 6 chains, petal, 3 chains), ending with 3 chains.
- Slip stitch to the top of the first petal cluster to join.
- Cut yarn and fasten off.
- Start Petal: Chain 3 (counts as first treble), work two more trebles into the same stitch, keeping the last loop of each treble on the hook. Yarn over and pull through all loops to cluster.
Step 2: Join Granny Squares
- For the second and subsequent squares, begin with 1 petal.
- For corners to be joined: After crocheting 3 of the 6 chains, slip stitch to the adjacent square’s corner and chain remaining 3.
- At sides to be joined: After crocheting 2 of the 3 chains, slip stitch to adjacent square’s side and chain remaining 1.
- Continue until you have a strip that measures approximately the bust contour minus 4–5 cm for closure.
- For size S (bust 88 cm), crochet enough squares to almost reach this measurement when slightly stretched.
Step 3: Form the Base of the Blouse
- Align the joined squares as the base.
- Attach yarn at a bottom corner, chain 2 (counts as first double crochet).
- In each corner space: Crochet 3 double crochets.
- At motif joins: 1 double crochet in each join, and 2 double crochet in 3-chain spaces.
- Continue this pattern along the entire edge.
Step 4: Build the Body
- Work rows of double crochet across the base, chaining 2 and turning at the end of each row.
- Repeat until the piece measures nearly half the desired blouse length (e.g., for S: 11 rows ≈ 12 cm).
Step 5: Shape the Bust (Increases)
- Determine how many stitches equal the 4–5 cm gap at the bust closure.
- Spread increases evenly over three rows:
- E.g., If 12 stitches = 5 cm, increase by 4 stitches per row for 3 rows.
- To increase: Work 2 double crochets in the same stitch as needed along the row.
- After increasing for 3 rows, continue straight in double crochet rows to the desired height (S: 24 rows ≈ 24 cm, M: 25 cm, L: 26 cm, XL: 27 cm).
Step 6: Create Button Bands
- On the closure edge, attach yarn.
- Row 1: Work 1 or 2 double crochets in each available space, making sure to count stitches. (e.g., S: 59 dc).
- Buttonhole Band: Space buttons evenly; for 6 buttons, alternate 9 double crochets, chain 1, skip 1 for buttonhole.
- Reinforce: Work a row of single crochet, placing a single crochet in every dc and in each buttonhole.
Step 7: Button Band (Other Side)
- On the opposite edge, crochet the same number of rows of double crochet but without buttonholes.
- End with a row of single crochet for a neat finish.
- Sew on buttons to match the buttonholes.
Step 8: Shaping the Neckline
- Triangle Panel: From the top of the bust seam, measure S: 13 cm, M: 14 cm, L: 15 cm, XL: 16 cm from center front and place a marker.
- Attach yarn, chain 2, and work double crochet across to the marker.
- At each row, decrease at both sides to shape a triangle:
- Decrease: Work 2 double crochet together at row starts and ends.
- When 4 stitches remain, continue straight until the triangle panel comfortably reaches the back (S: 25 cm, M: 26 cm, L: 27 cm, XL: 28 cm).
- Leave a long tail to sew the panel to the back shoulder.
Step 9: Assembly
- Align the triangle panel with the back and sew securely with a tapestry needle.
- Weave in all ends.
Step 10: Decorative Edge (Picot Stitch)
- With the right side facing, attach yarn at any edge.
- Work single crochet all around.
- After every 3rd single crochet, chain 3 and slip stitch into the first chain of 3 to create a picot.
- Continue this sequence all around blouse edges, armholes, and hem.
Uses
- Perfect for layering over a tank top, camisole, or dress.
- Wear as a summer top, beach cover-up, or light layering piece in spring and fall.
Conclusion
This elegant flower granny square blouse combines modular motifs and simple shaping to create a wearable piece that's easily customizable. Its join-as-you-go method makes for satisfying progress, while the picot edging and button closure provide delicate, finished details.
Crochet Tip
Block your squares before assembly for a neater, more even finish and easier joining!
Happy crocheting! If you enjoyed this pattern, don't forget to personalize with your favorite colors and button styles!


Leave a Reply