
Share sweet moments with this Crochet Heart Amigurumi Pattern that's perfect for bright accents, thoughtful keepsakes, and fun cozy details.
Handmade hearts add a touch of warmth and personality to everyday spaces and gifts. The Crochet Heart Amigurumi Pattern turns yarn into a soft, three-dimensional design that feels both playful and meaningful. Its small, cuddly shape makes it ideal for keychains, bag charms, desk decorations, or thoughtful keepsakes that bring joy to friends, family, or yourself.
Mini Crochet Heart Amigurumi Pattern Perfect for Little Surprises
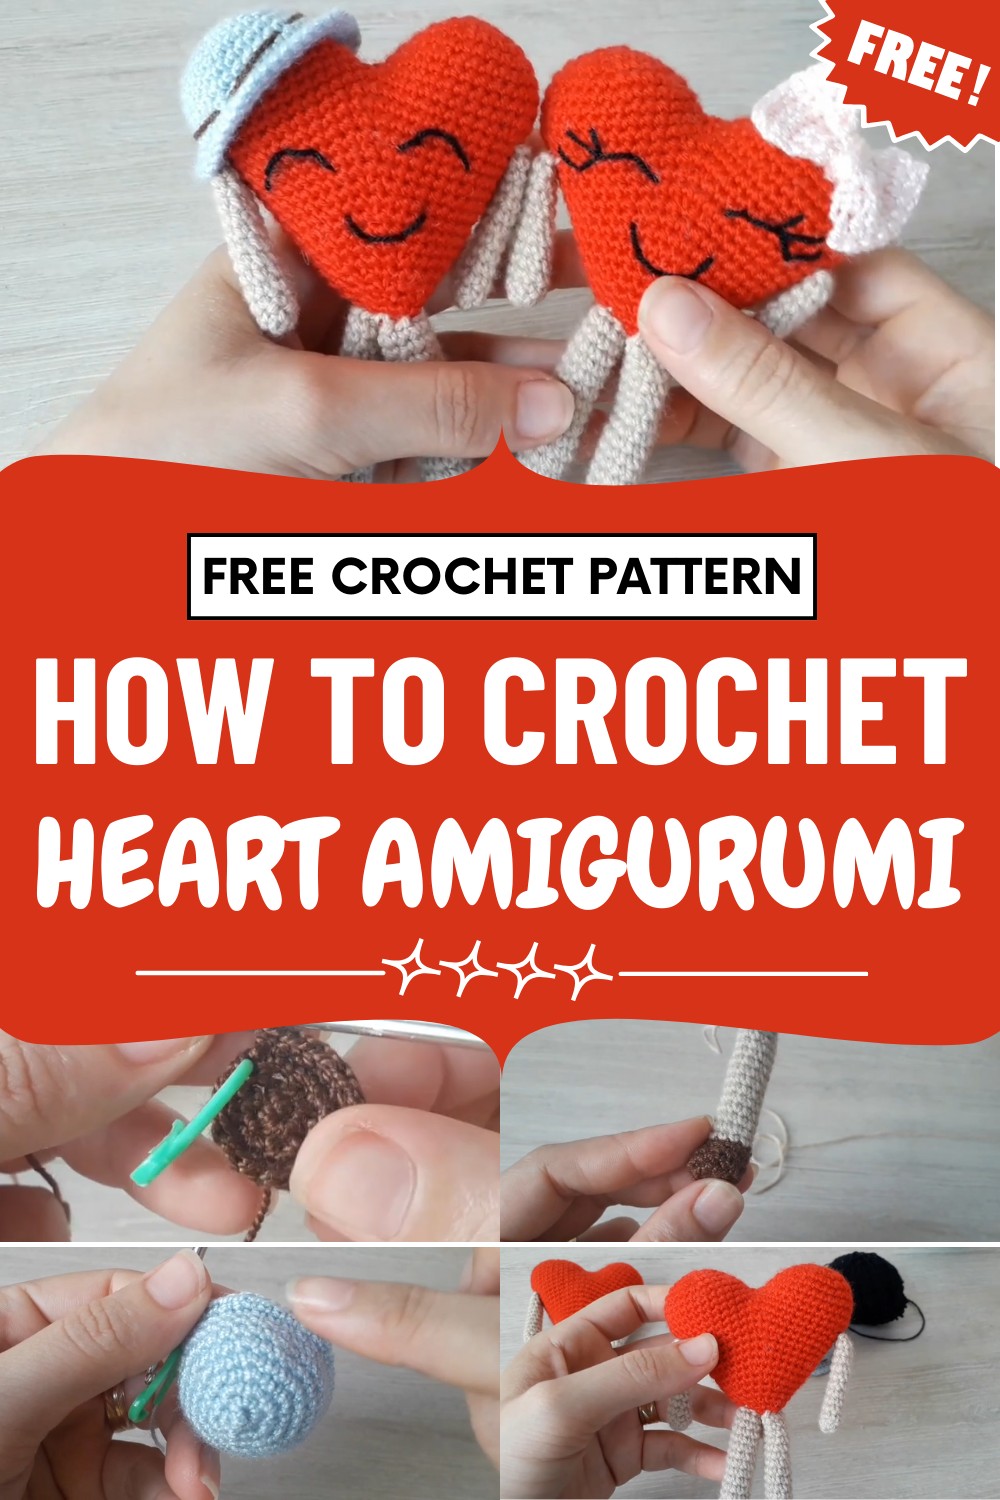
This pattern guides makers in shaping, stitching, and maintaining consistency, offering both a relaxing and skill-building experience suitable for all levels. Creators can explore different colors, textures, and sizes, giving each piece a unique character and style. The completed heart balances adorable charm with careful detail, presenting smooth contours, soft texture, and a polished, expressive look.
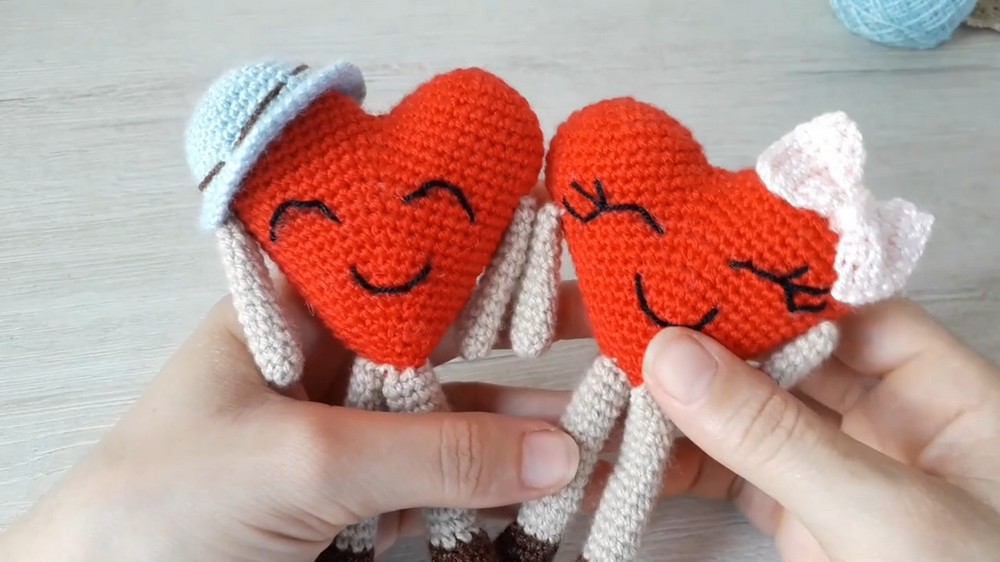
Engaging with this design provides a calming, mindful activity while producing a versatile and long-lasting item. Each finished piece delivers handmade beauty, emotional appeal, and a playful touch that brightens any space or gift.
Difficulty Level
Beginner to Intermediate.
Basic crochet knowledge is required (single crochet, magic ring, increases, and decreases). The project is straightforward but involves working in the round and some assembly.
Materials Needed
- Worsted weight yarn in:
- Red (main color for heart)
- Brown (for boots)
- Skin tone (for legs/arms)
- Light blue (for hat)
- Pale pink (for bow)
- Black (embroidery for eyes/mouth)
- Optional: contrasting color for hat decoration and bow
- 2.5mm or 3mm crochet hook (adjust according to yarn)
- Yarn needle (for sewing and embroidery)
- Stitch marker
- Scissors
- Fiberfill stuffing
- Pins (to position pieces before sewing)
- Hot glue (optional for accessory attachment)
- Pencil (to sketch face before embroidering)
Special Features
- Includes both a boy and girl version
- Sewn-on arms, legs, and accessories for durability
- Customizable facial features and colors
- Easily adjusted size with thicker or thinner yarn
Abbreviations
- MR: Magic Ring
- sc: Single Crochet
- inc: Increase (2 sc in the same stitch)
- dec: Decrease (sc 2 stitches together)
- ch: Chain
- sl st: Slip Stitch
Step-by-Step Pattern
PART 1: Little Boots (Make 2)
- With brown yarn:
- MR, ch 1.
- 7 sc in MR. (7)
- [Do not join, work in spirals]
- Round 2: 2 sc in each st around (inc in every st) (14)
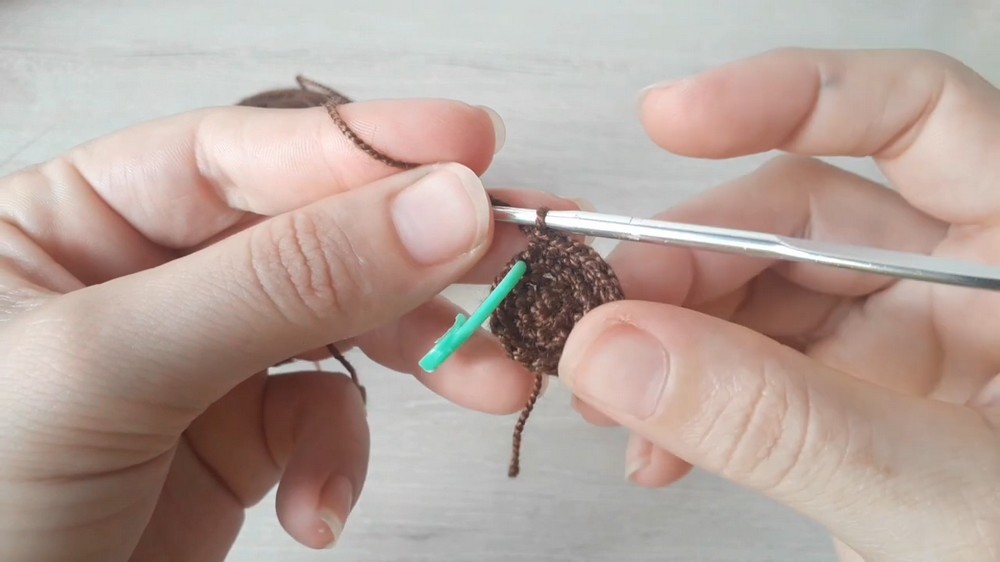
- Round 3: 1 sc in each st (14)
- Round 4: sc in next 5 sts (mark the first), then 2 dec, then sc in last 5 sts (12)
- Round 5: sc in next 4 sts, 2 dec, sc in last 4 sts (10)
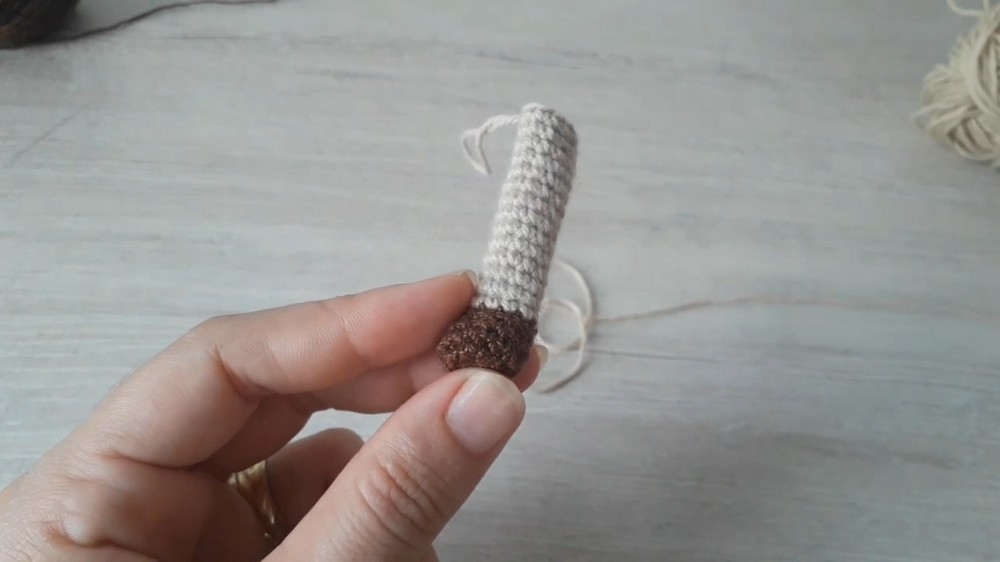
- Pull MR tight and tie off excess yarn on the inside of the shoe to close any further gaps.
PART 2: Legs (Make 2)
- Attach skin-colored yarn to last st of boot.
- Rounds 1-14: Sc 1 in each st around (10)
- You have already completed 1 round, so make 13 more rounds to have 14 rounds in total.
- At end of last round, sl st, ch 1, cut thread leaving a long tail for sewing to heart later.
- Stuff the boots lightly, do not stuff the legs for a soft, dangling effect.
PART 3: Arms (Make 2)
- With skin-colored yarn:
- MR, ch 1.
- 7 sc in MR. (7)
- From Round 2 and onwards, sc in each st around (7)—no increases or decreases.
- Continue for 12 rounds total.
- At end, sl st, ch 1, leaving a long tail for sewing.
PART 4: Little Hat (For Boy's Heart)
- Magic Ring, with blue yarn.
- Round 1: 6 sc in MR.
- Round 2: [inc] in each st around (12)
- Round 3: [sc, inc] around (18)
- Round 4: [2 sc, inc] around (24)
- Round 5: [3 sc, inc] around (30)
- Rounds 6-8: 1 sc in each st around (30) [3 rounds total]
- Round 9: [4 sc, inc] around
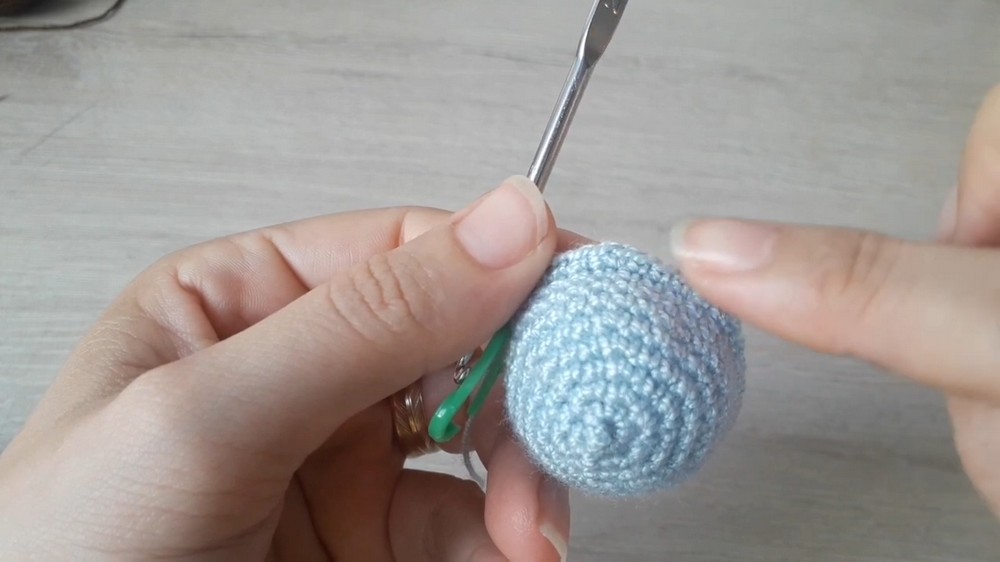
- Round 10: [5 sc, inc] around
- Round 11: [6 sc, inc] around
- Fasten off, hide yarn tail. Fold and shape to form hat.
PART 5: Bow (For Girl’s Heart)
- With pale pink yarn:
- Ch 8 plus 1 (turning ch).
- Row 1: Starting from 2nd ch from hook, 8 sc back. (8)
- Rows 2-7: Half double crochet (hdc) in each st, turning after each row.
- Do 6 total rows; first row was sc.
- Row 8: Finish with one final row of 8 sc.
- Fasten off, weave in ends.
- Cut a separate short piece of yarn and wrap it around the center to cinch the bow. Tie firmly and weave in the ends.
PART 6: Assembly
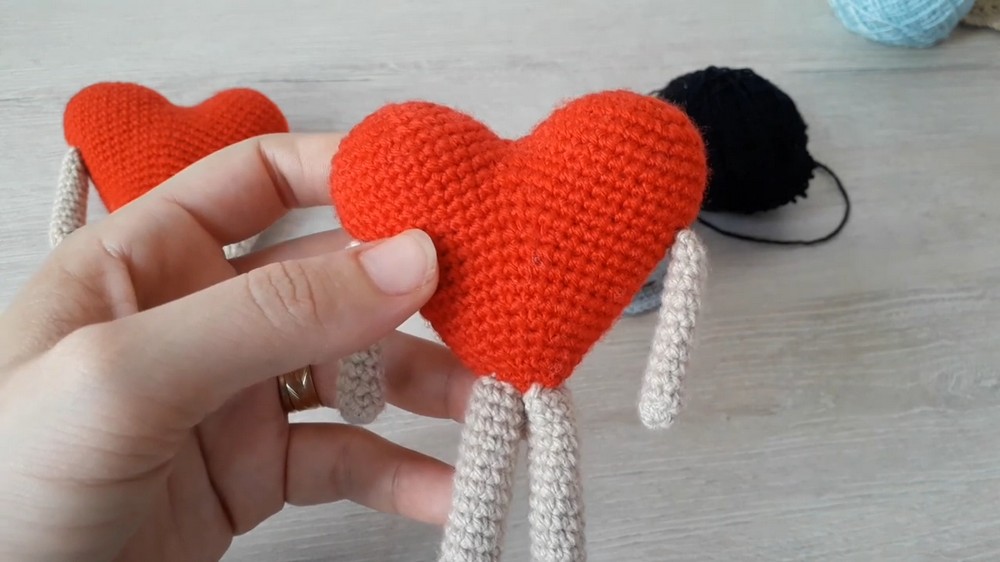
Sewing Legs & Arms:
- Pin legs at desired position at base of heart, toes pointing forward.
- Sew legs in place using yarn tail and yarn needle.
- Repeat with arms: position at sides and sew firmly.
- Tip: Only stuff the boots (not the legs) for a soft, movable look.
PART 7: Face Embroidery
- Lightly sketch eyes and mouth with a pencil on heart.
- For girl: embroider closed eyes with eyelashes.
- For boy: just eyes, no lashes, or as desired.
- Embroider using black yarn and yarn needle, following your guide.
- Hide all thread ends inside the heart.
PART 8: Hat & Bow Attachment
- Boy: Place hat on top of heart and stitch or hot glue in place.
- Optionally, add a colored band around the hat for detail.
- Girl: Attach bow above the face (side or center).
- Sew or glue securely.
- Sew or glue securely.
Tutor’s Suggestions & Uses
- Tutor’s suggestions: Use sharp contrasting colors for accessories to make them pop. Personalize your hearts with different facial expressions. Don't overstuff arms/legs for the softest, cutest result.
- Uses: Ideal as Valentine’s Day gifts, wedding or engagement tokens, keychains (crochet smaller), or room décor.
Tip
Mismatched yarn tension can make your heart uneven.
Be sure to check your tension as you crochet the two sides of the heart, as well as the limbs, for even and adorable amigurumi!
Conclusion
You’ve now finished your adorable “Hearts in Love” amigurumi, a delightful project perfect for gifts or decorations. Play with colors, facial expressions, and accessories to make each heart unique.




Leave a Reply