
Show off style and cozy vibes using this Free Crochet Chunky Bucket Hat Pattern, perfect for adding warmth and color to any outfit all season.
Bringing together modern style and cozy appeal Crochet Chunky Bucket Hat Pattern offers both warmth and a fashionable edge. The plush texture and chunky stitches make for a distinctive accessory that enhances any casual or streetwear look with playful confidence. Its flared brim adds a bold silhouette, providing not only a trendy touch but also practical sun protection and a cozy shield against crisp weather.
Style Crochet Chunky Bucket Hat Pattern You'll Adore This Season

With a crochet chunky bucket hat pattern, endless combinations of bold or subtle colors are possible, allowing you to suit any personality or wardrobe. Those who enjoy working with quick and satisfying projects appreciate how swiftly the super bulky yarn transforms into a finished accessory.
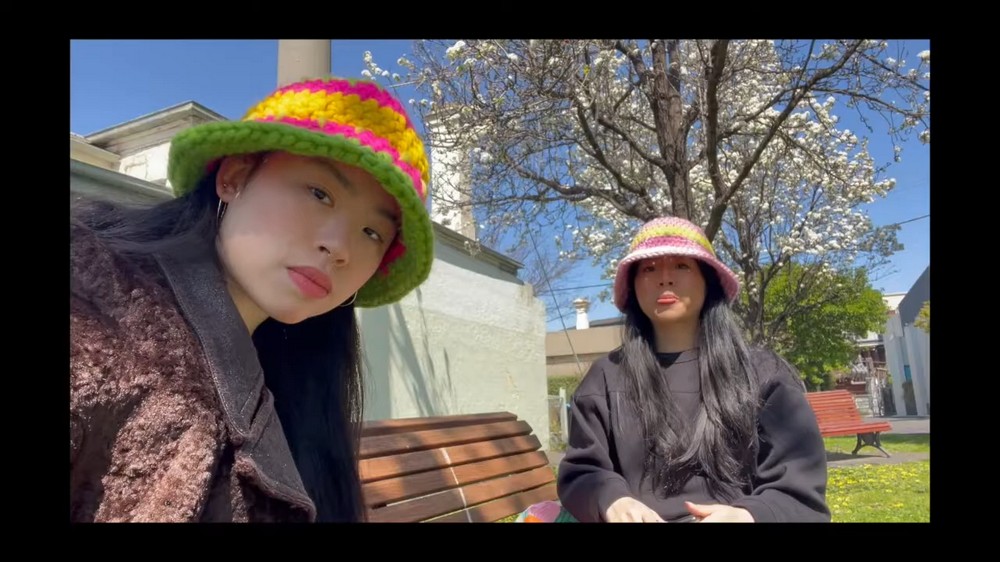
Not limited to winter wear, this accessory is a chic choice for festivals or everyday outfits, offering both comfort and standout flair. Whether selected as a thoughtful personalized gift or a unique wardrobe upgrade, this bucket hat infuses style, function, and cheerful energy into daily life.
Special Features
- Super-chunky, patchwork-style design for maximum impact
- Four-color construction for playful, eye-catching combos
- Entirely crafted with half double crochet (hdc) stitches—easy to memorize!
- Optional ornamental stitching for extra flair, mimicking “mushroom hat” accents
- Built-in flexibility: adjust size with extra rounds or use reference measurements for a personalized fit
Level of Difficulty
Confident Beginner / Easy
You should know how to crochet in the round, change colors, and use half double crochet. The hat works up quickly thanks to large yarn and hooks, making it both accessible and rewarding.
Materials
- Super bulky/super chunky weight yarn (suggested: Knitpicks Tuff Puff or Rowan Big Wool), in 4 colors
- Crochet hook: 7mm or 10mm (use what suits your yarn best)
- Scissors
- Stitch markers
- Measuring tape or a well-fitting bucket hat for size reference
- Yarn needle
Pattern Steps
Crown of the Hat
- Magic Ring:
- With Color A, create a magic ring, chain 1.
- Place 8 hdc into the ring (chain 1 does NOT count).
- Slip stitch to first hdc, chain 1.
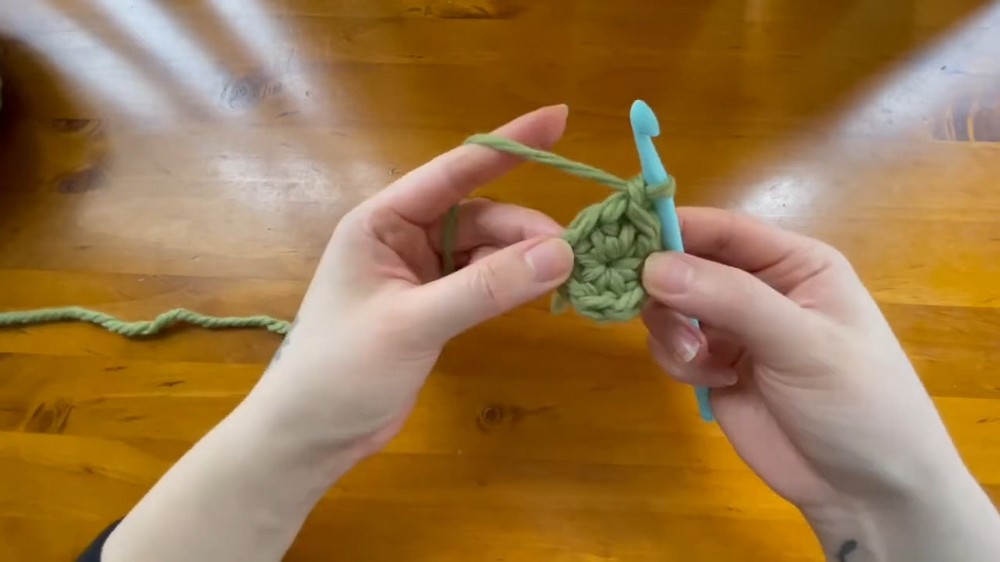
- Round 2 (Increase):
- 2 hdc in each stitch around (total: 16).
- Place a stitch marker in your first st for ease.
- Slip stitch to join, chain 1.
- Round 3 (Increase):
- [1 hdc in next st, 2 hdc in next st] repeat around.
- Slip stitch to join, chain 1.
- Round 4 (Increase):
- [1 hdc in each of next 2 st, 2 hdc in next st] repeat around.
- Slip stitch, chain 1.
- Round 5 (Increase):
- [1 hdc in each of next 3 st, 2 hdc in next st] repeat around.
- Slip stitch, fasten off Color A.

Tip: Use your reference hat or measuring tape to achieve a crown diameter of ~14cm. Adjust as needed!
Body of the Hat
- Round 6 (Color B):
- With a standing hdc and Color B, hdc into back loop only of each stitch around.
- This creates a helpful shaping ridge.
- Slip stitch to join, chain 1.
- Rounds 7–9:
- Work hdc in each stitch around, normally (through both loops).
- Continue until desired body height (~8.5cm or as your reference).
- Rounds 10–12 (Color C):
- Change to Color C with a standing hdc.
- Work hdc in each stitch around for 3 rounds.

Tip: Try the hat on as you go. When the body just touches the tops of your ears, you're ready for the brim!
Brim of the Hat
All Brim Increases Are Worked in the Front Loop Only (FLO).
- Round 13 (Color B):
- [4 hdc, inc in 5th st (2 hdc in 5th)] repeat around in FLO.
- Slip stitch to join, chain 1.
- Round 14:
- [5 hdc, inc in 6th st (FLO)] repeat.
- Slip stitch, chain 1.
- Round 15:
- [6 hdc, inc in 7th st (FLO)] repeat.
- Slip stitch, chain 1.
- Round 16:
- [7 hdc, inc in 8th st (FLO)] repeat.
- Change to Color D at end of round.
- Round 17 (Color D):
- [8 hdc, inc in 9th st (FLO)] repeat.
- Slip stitch, chain 1.
- Round 18:
- [9 hdc, inc in 10th st (FLO)] repeat.
- Slip stitch, chain 1.
- Round 19 (final round):
- Hdc in each stitch around (no increasing).
- Check flare and length—add more rounds if desired!
- Fasten off and weave in all ends using a yarn needle.
Ornamental Stitches (Optional Hallmark Detailing):
- Use Color D (or any color) and a yarn needle.
- Mark placements around the start of the body and brim (e.g., 12, 3, 6, 9 o’clock positions).
- Cut a piece of yarn ~1.5 times the circumference; sew simple straight stitches at marked points, being careful to keep tension loose for aesthetics.
- Secure and weave in ends.

Tutor's Suggestions
- Try on frequently. Adjust the brim/body for a perfect fit.
- Use contrasting colors for bold, patchwork statements.
- Feel free to add/remove rounds in the body or brim to better fit your head shape or style preferences.
Uses
- The ultimate statement accessory for chilly weather or festivals
- Makes a vibrant, fun gift for friends and family
- Ideal stash-busting project with leftovers of different colors
Tip
For a seamless look at color changes: Use a standing hdc and change color away from increase points to keep your circles smooth, not polygonal.
Conclusion
This chunky bucket hat is an absolute delight—quick to work up, highly customizable, and sure to bring joy whether you’re wearing it yourself or spreading handmade cheer. With playful color changes, sculpted shaping, and easy stitches, it’s a rewarding make for beginners and pros alike.




Leave a Reply