
Kick-off your next project with this trendy crochet bucket hat pattern, easy, fun, and perfect for Crochet chic handmade accessories.
Radiating charm and functionality, a crochet bucket hat project a perfect blend of artistry and practicality. This handmade creation redefines casual elegance, borrowing from tradition while embracing modern versatility. Originally envisioned as protective wear for sunny weather, it has transformed into an iconic fashion staple for all seasons and occasions.
Playful Crochet Bucket Hat to Your Wardrobe

What sets a crochet bucket hat apart is its boundless potential for customization. Each stitch is an opportunity to experiment with colors, textures, and patterns, ensuring the finished piece is as unique as its creator. Its lightweight structure and breathable design make it a comfortable yet stylish addition to any outfit, seamlessly transitioning from beach outings to city strolls.
More than just an accessory, this hat represents the thoughtful art of handmade. A crochet bucket hat isn’t simply a statement piece; it’s a labor of creativity, attention, and heart. Whether worn as a personal favorite or gifted to a loved one, its timeless essence stands as a celebration of individuality and sustainable beauty.
Materials Needed
- Yarn: 2 skeins of Dishie Yarn in Linen (100grams/3.5oz, $3–$5 per skein)
- Crochet Needle
- Markers (optional)
- Scissors
- Measuring Tape

How to Crochet a Bucket Hat: Step-by-Step Guide
Crocheting a bucket hat is a fun and rewarding crochet project that combines creativity with practicality. The pattern provides a detailed and easy-to-follow pattern for making a stylish and adjustable crochet bucket hat. Perfect for beginners and seasoned crocheters alike, this pattern balances elegance and functionality.
Step-by-Step Instructions
Base of the Hat
- Step 1: Start with a magic circle, chain 1.
- Step 2: Single crochet (SC) 6 stitches inside the circle.
- Step 3: Tighten the magic circle, slip stitch the last and first stitch together, and chain 1.
- Row 2: Crochet 2 SC in each stitch around the circle. Slip stitch and chain 1 at the end.
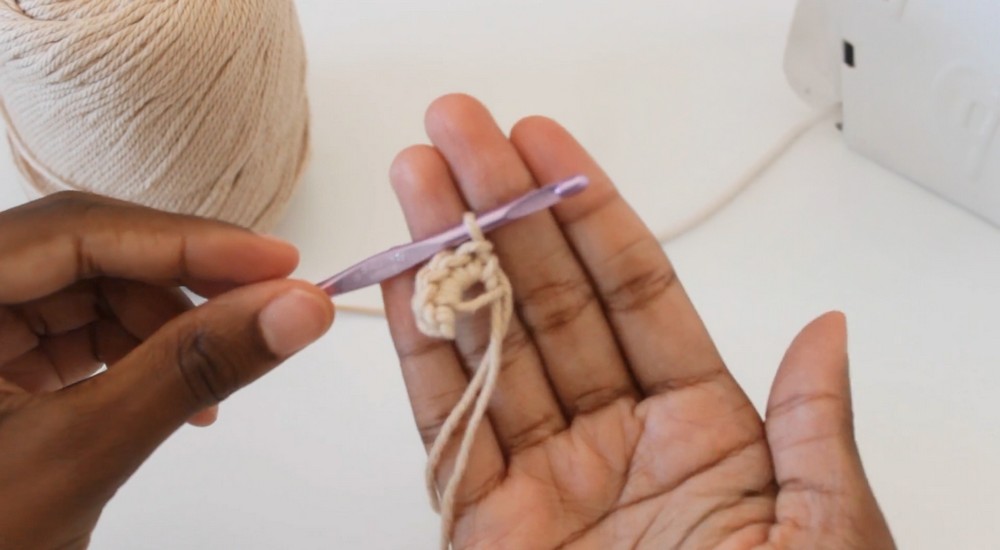
- Row 3: Alternate 1 SC in the first stitch and 2 SC in the next for the row. Slip stitch and chain 1.
- Row 4: Begin with 1 SC in the first stitch, then repeat the following pattern: 2 SC, 1 SC in the next 2 stitches. Continue to the end. Slip stitch and chain 1.
- Row 5 and onwards: Gradually increase by alternating SC stitches per row in a systematic pattern (e.g., 1 SC in 3 stitches, then 2 SC for Row 5; 1 SC in 4 stitches, then 2 SC for Row 6, etc.). Continue until the base measures approximately 19 cm/7 inches.
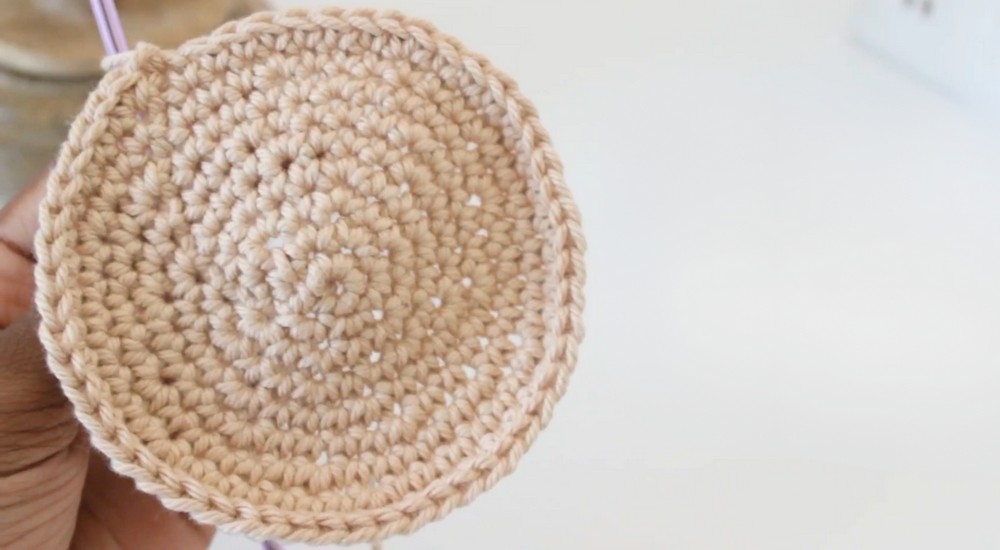
Sides of the Hat
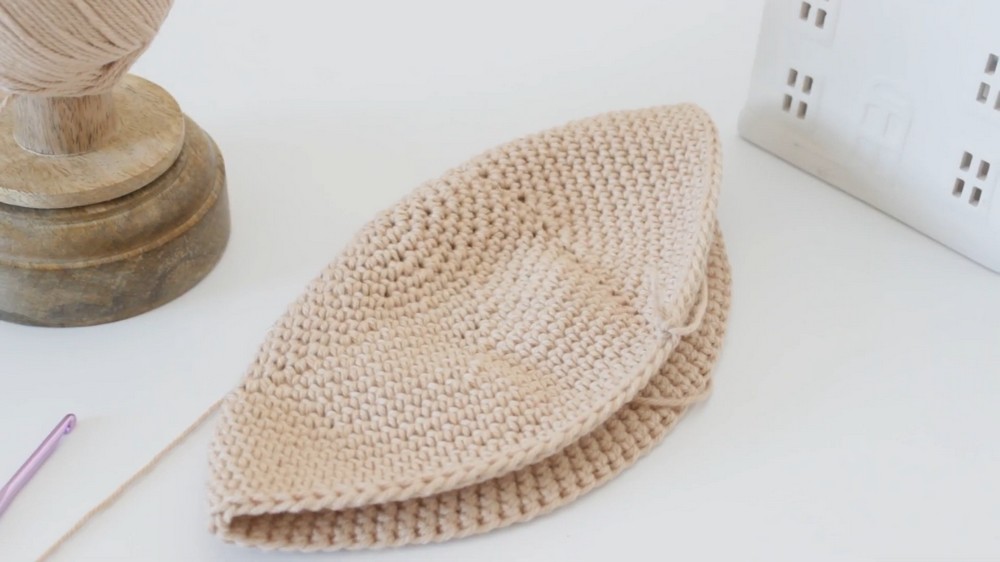
- Row 17–24: SC in every stitch for 8 rows to form the sides. The tutor suggests using markers to keep track—it’s optional but highly recommended for organization.
Decorative Stitches
- Row 25–26: Switch to the "Crossed Double Crochet Stitch" (DCS):
- Chain 3, double crochet in the previous stitch.
- Skip one stitch, double crochet in the next skipped stitch, and repeat.
- Slip stitch and chain 1 at the end.
Brim of the Hat
- Row 1: SC in the next 7 stitches, then 2 SC in the next stitch. Repeat for the row. Slip stitch and chain 1.
- Row 2: SC in the next 8 stitches, then 2 SC in the next (9th stitch). Repeat, then slip stitch and chain 1.
- Row 3: SC in each stitch for 4 rows. Add an optional DCS row for decoration, or continue SC for 2 more rows (8 rows total).
Final Touches
- Row 7: Add another row of DCS at this stage if desired. Slip stitch and chain 1.
- Rows 8–14: Alternate SC and increase stitches for finishing touches, as detailed in the steps.
- Secure Loose Ends: Cut yarn, tie off, and tuck in or sew loose ends.
Adjustable String for the Hat
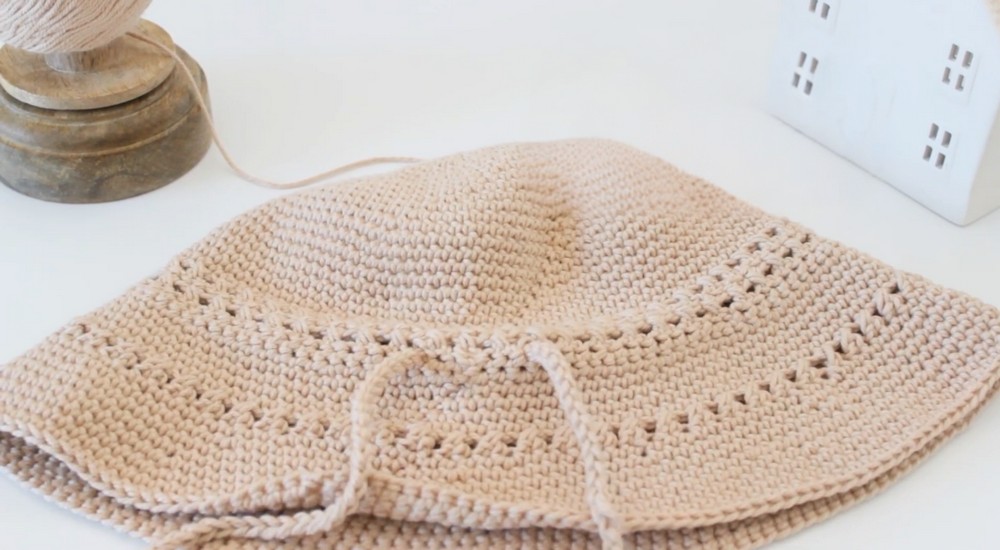
- Create the String: Chain until it measures roughly 24 inches or any preferred length.
- Secure the String: Knot off the loose ends twice, cut excess, and feed the string into the back of the hat three "Double Crossed Stitches" apart.
- Finish: Tie the string into a bow for both style and adjustability.
Special Features
- Adjustable Fit: The string allows the hat size to be fine-tuned for a custom fit.
- Decorative DCS Rows: Adds intricate texture to both the brim and body of the hat.
- Versatility: Perfect for sunny days or as a fashion statement in any season.
- Beginner-Friendly: The pattern is straightforward, with clear step-by-step instructions.
Tutor’s Suggestions
- Use Yarn Spinner: Prevent yarn tangling and save time during your project.
- Markers: Optional but helpful for managing rows efficiently.
Uses
This crochet bucket hat is multifunctional:
- Styled as a casual accessory for summer outfits.
- Protective yet chic headwear for sunny outdoor days.
- A thoughtful handmade gift for friends or family.
Level of Difficulty
Beginner to Intermediate
The pattern is simple enough for beginners yet offers variety through stitches like the "Crossed Double Crochet Stitch" to challenge more experienced crocheters.
A Helpful Tip
Before starting, ensure you measure your head circumference and adjust the pattern accordingly. This is especially important for creating a hat tailored to your size.
Conclusion
With its adjustable fit, decorative accents, and ease of creation, the crochet bucket hat is a versatile and stylish project. Whether for personal use or gifting, this pattern empowers you to bring creativity and practicality together in your wardrobe.




Leave a Reply