
Charming Style Crochet Bunny Dress Pattern for Adorable Looks

This pattern is not only practical but also fun, allowing you to enjoy the process while refining your crochet skills. Handmade dresses elevate the look of your crochet bunnies, making them ideal for special occasions like Easter, baby showers, or just as heartwarming tokens of love. Since most patterns are simple to follow, it’s a delightful project for both beginners and experienced crocheters alike.
Uses and Materials
Uses:
- The crocheted dress and ribbons add a whimsical touch to your handmade bunny, making it perfect as a gift, decoration, or keepsake.
Materials:
- Yarn (color of your choice)
- Crochet hook 8mm
- Scissors
- Glue (to secure the ribbons)
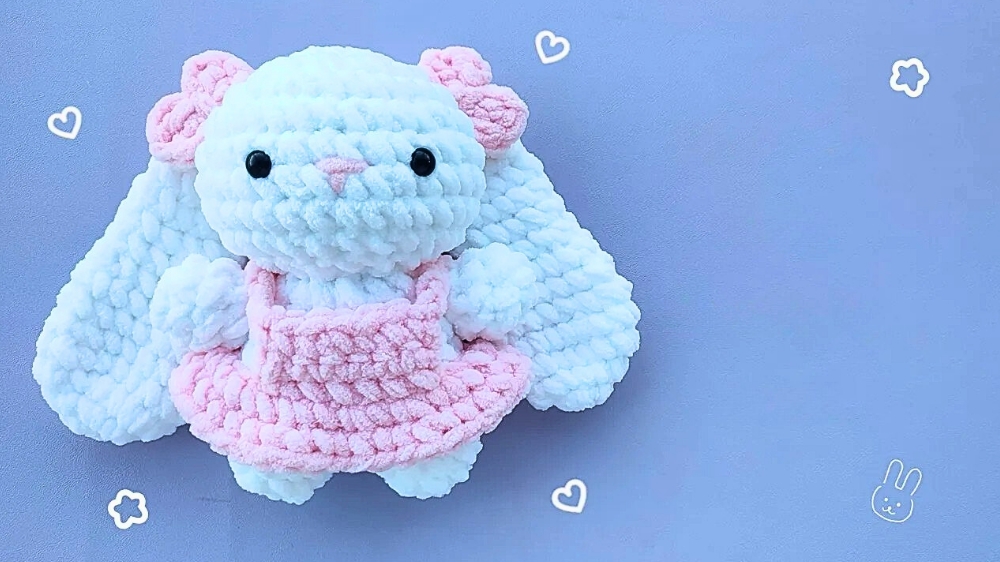
How to Crochet a Bunny Dress and Ribbons
Introduction
In this tutorial, we’ll go through the process of crocheting a delightful dress and ribbons for a crocheted bunny, as explained by the tutor in the video here. This tutorial builds upon a previous project, the "Bunny in Onesie." If you’ve already made your bunny, you’re ready to move forward. This project adds a finishing touch to make your bunny even cuter with a beautiful, handmade dress and ribbons.
Step-by-Step Instructions
1: Making the Dress
- Prepare the Yarn:
Start by making a slip knot.
- Create the Base:
Slip stitch, cut the yarn, and hide the tail neatly for a clean finish. - Identify the Center Point:
Locate the place where the slip stitch was made. The opposite loop to this spot will be the center point.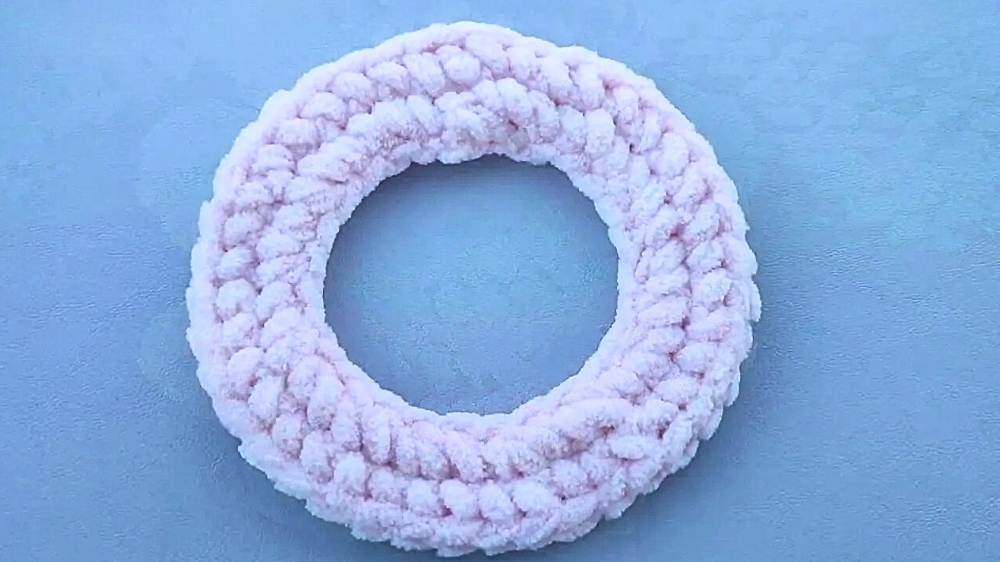
- Start Stitching:
Move 3 loops forward from the center point and begin making this loop. Take the yarn in and crochet 1 chain stitch. - Turn and Crochet Rows:
Turn your work and go forward 9 loops (or adjust to 7-8 loops if you prefer a tighter dress).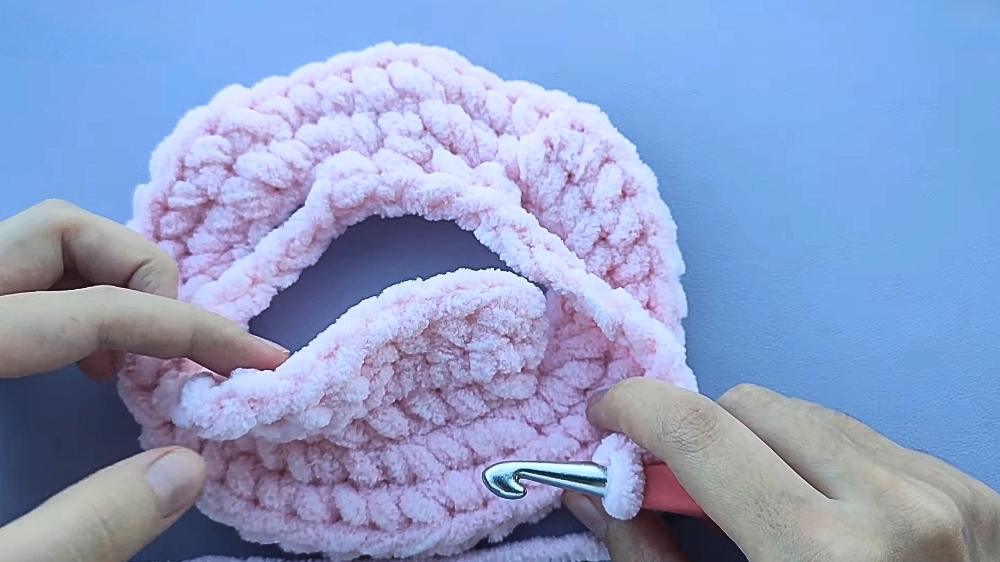
- Secure and Complete:
Slip stitch at the end of the row, cut the yarn, and hide the tail to complete the dress.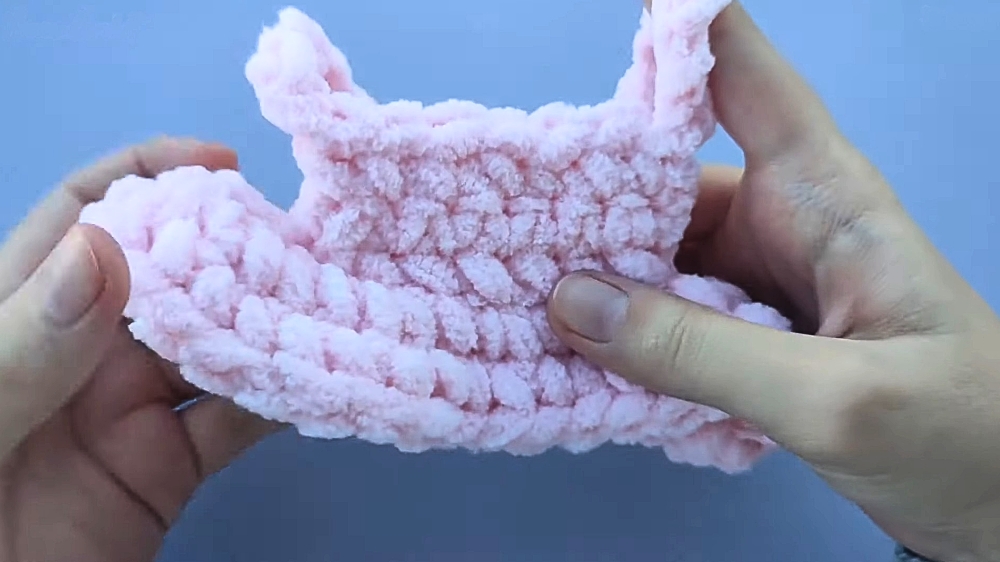
2: Making the Ribbons
- Cut the Yarn:
Cut small strands of yarn to make ribbons. - Create and Secure the Ribbons:
Make a second ribbon following the same steps. Once created, you can place and glue the ribbons onto the bunny wherever you wish. This personal touch allows you to customize your bunny’s look.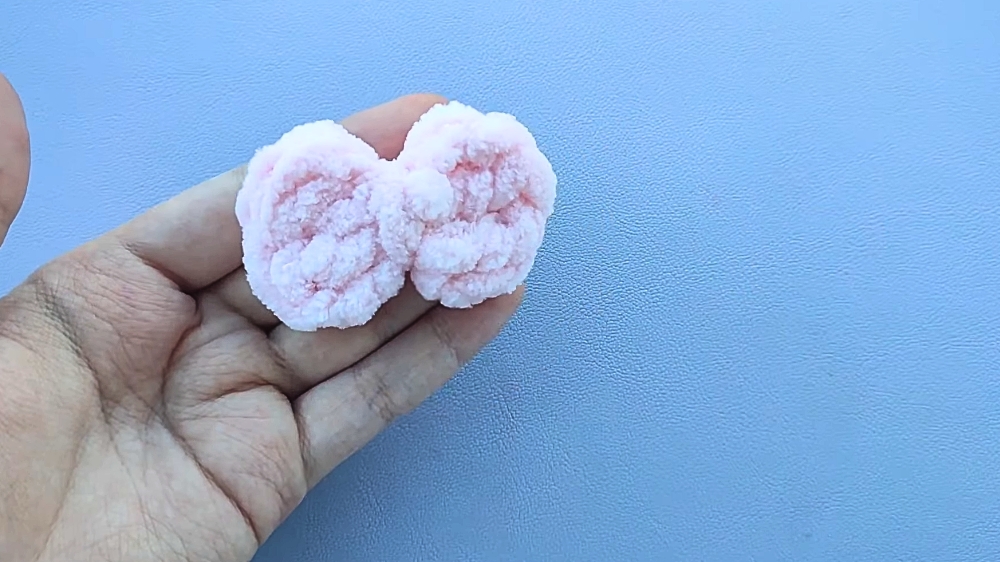
Special Features
- Customization: You can adjust the number of loops for the dress to make it looser or tighter, allowing you to style your bunny just the way you want.
- Personalized Ribbons: The placement of the ribbons adds a unique flair, making every bunny creation one of a kind.
Level of Difficulty
This project is beginner-friendly, especially for those with some prior crocheting experience. If you’re new, the clear, simple steps make it easy to follow along. The tutor also provides helpful tips for customization, making it suitable for all levels of crochet enthusiasts.
Tutor’s Suggestions
- For a tighter dress, reduce the loop count to 7 or 8 instead of 9.
- Be creative with the placement of ribbons. You can glue them wherever you feel adds the most charm to the bunny.
Tip
To give the bunny a polished and neat look, ensure all yarn tails are tucked and hidden properly. This avoids a messy finish and highlights the intricate detailing of your work.
Conclusion
This crocheted bunny dress and ribbon project is a fantastic way to elevate your bunny design. It offers easy-to-follow steps and room for creativity, making it fun for crocheters of all skill levels. Once complete, your bunny will not only be adorable but also personalized in a way that reflects your own artistic touch.




Leave a Reply