
Step-by-step crochet Teddy Bear Keychain pattern for a Fun Gift
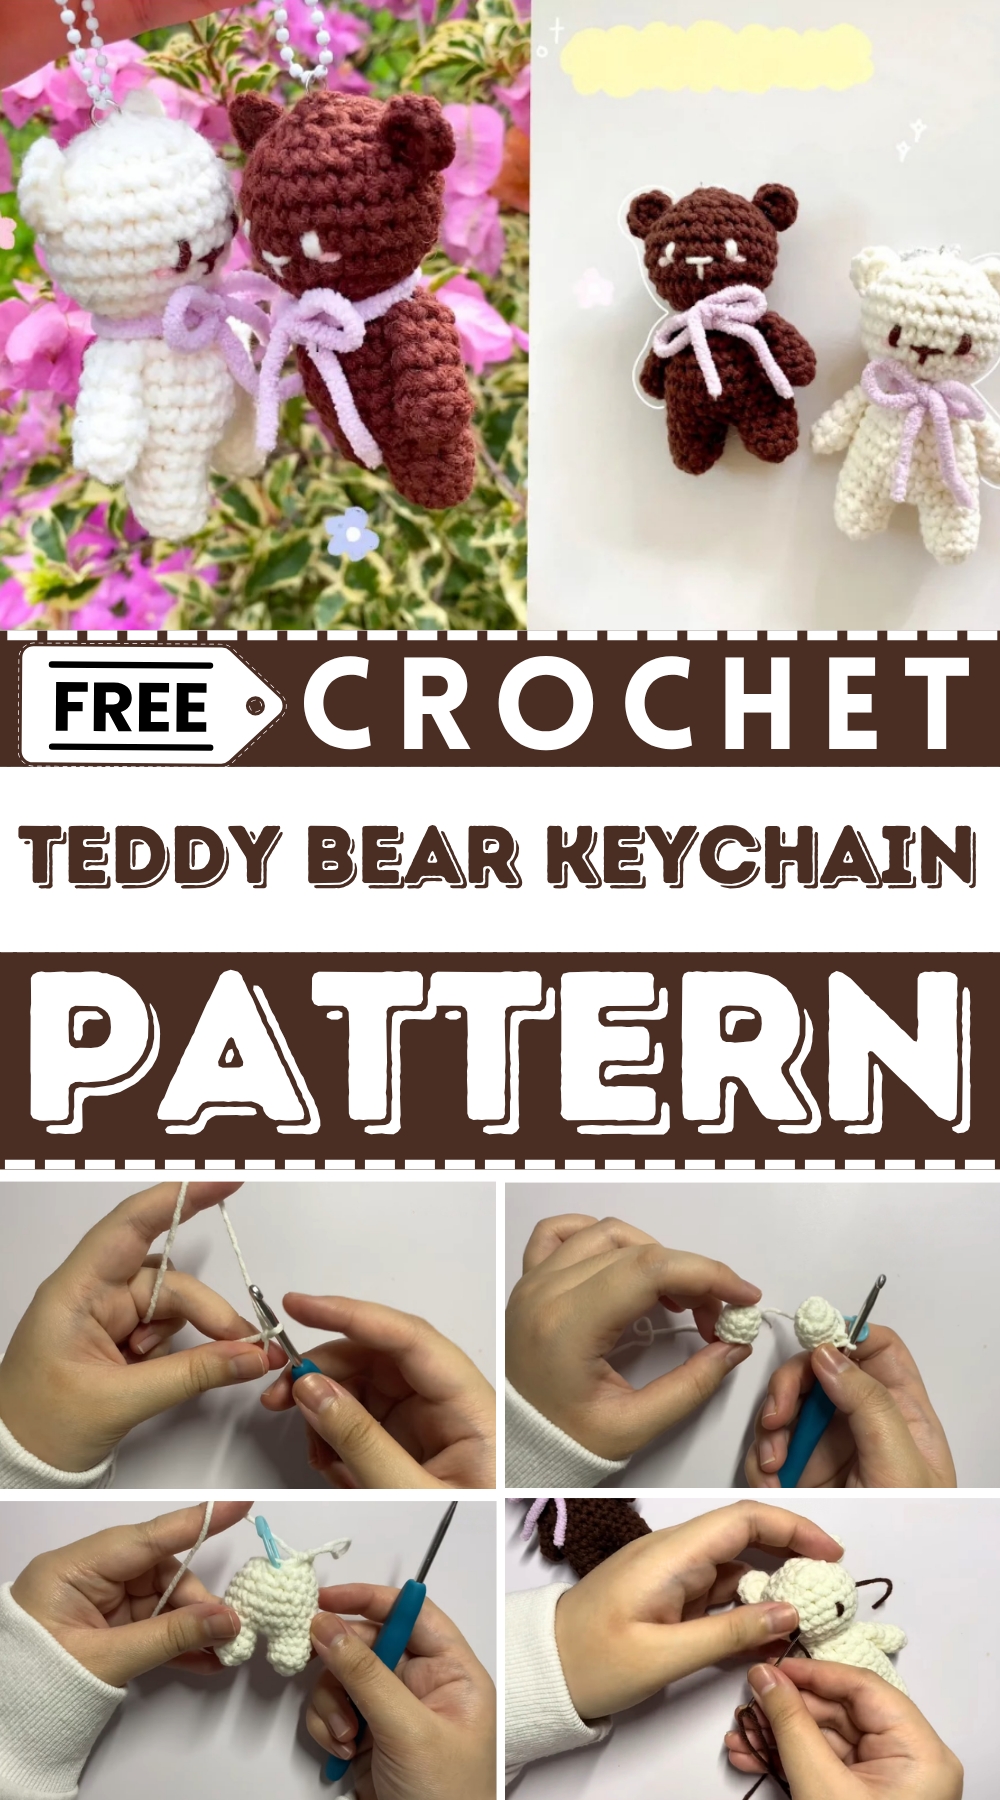
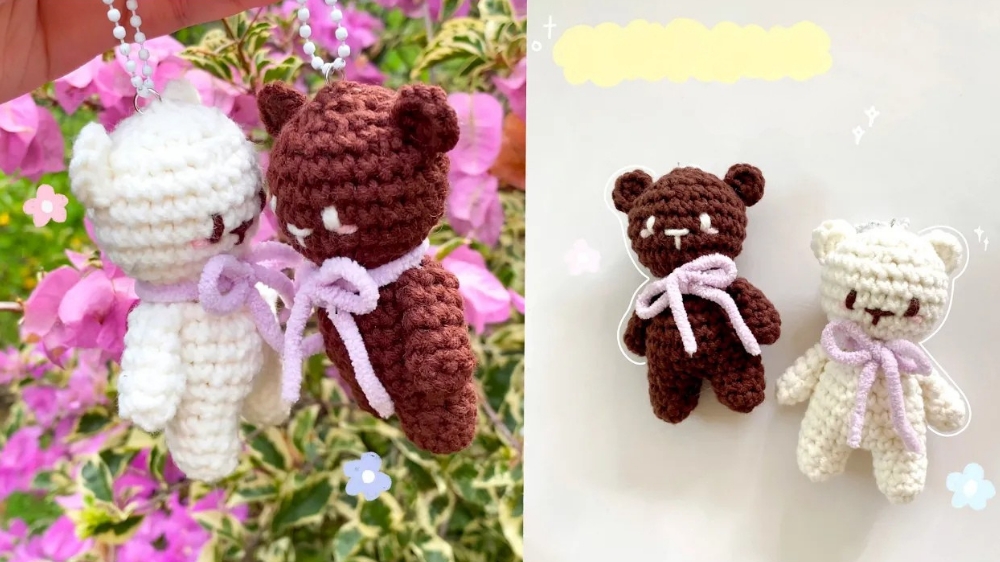
These keychains are not only practical but also versatile. You can customize them with your favorite colors, add bows, or experiment with expressions to give your teddy a distinct personality. It also serves as a thoughtful gift for friends, family, children, or even groups at special events like baby showers or birthdays. Beyond its cute appeal, each keychain is a miniature piece of art reflecting patience, love, and dedication.
Pair your handmade teddy bear with a keychain attachment or let it double as a decorative plush for bags and purses. Whether shared with others or kept as a personal treasure, this tiny creation holds immense charm and purpose, all while being easy and fun to make.
Materials Needed
To crochet a teddy bear keychain, you’ll require the following items:
- 5-ply yarn:
- White (for the body)
- Pink (for the blushers)
- Brown (for the eyes)
- Chunky purple yarn: For making the bow
- 4 mm crochet hook
- Stitch markers (preferably two colors)
- Scissors
- Darning needle
- Polyester stuffing
- Keychain (optional; an alternative technique is included)
Step-by-Step Instructions
1. Crocheting the Bear’s Legs
- Start with a Magic Ring:
- Wrap the yarn around two fingers to create an “X” shape. Insert your hook, pull up yarn, and chain one.
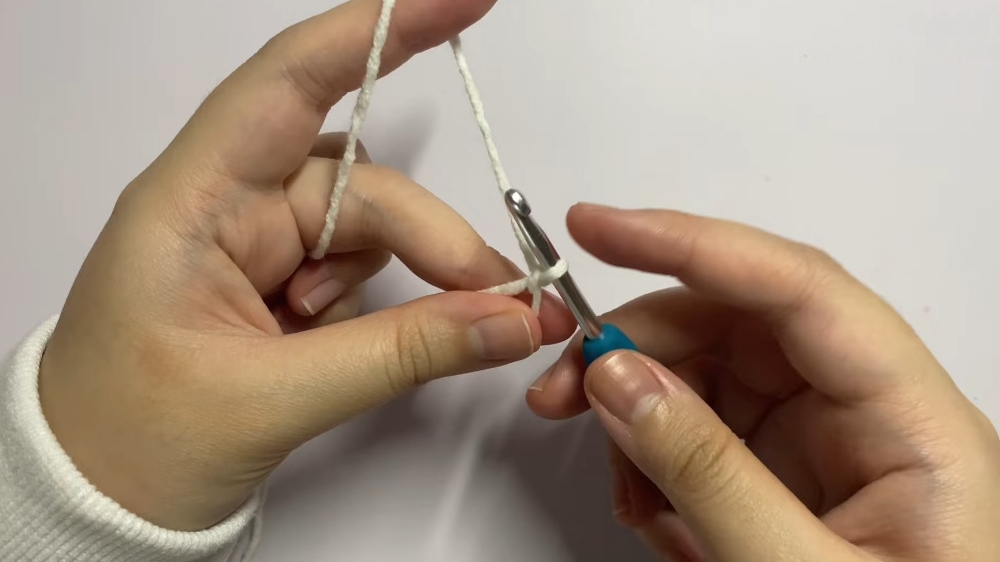
- Work 8 single crochets (X stitch) into the magic ring. Tighten the circle by pulling the loose thread.
- Wrap the yarn around two fingers to create an “X” shape. Insert your hook, pull up yarn, and chain one.
- Build the Leg:
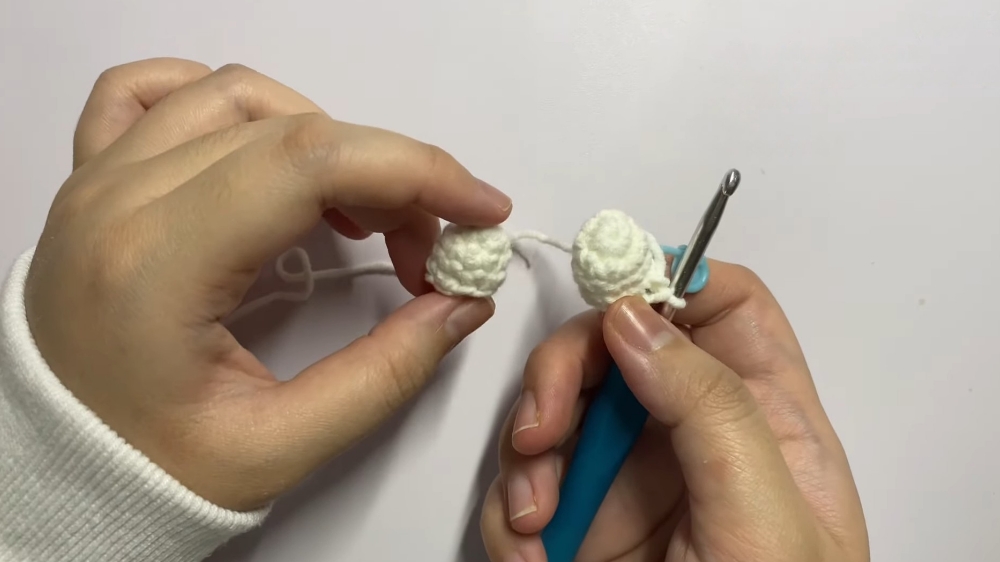
- Insert one single crochet into each stitch for three additional rounds. Use a stitch marker to keep track of the first stitch of each round.
- After completing the first leg, cut the yarn and secure it.
- Repeat for the Second Leg:
- Crochet the second leg similarly, but do not cut the yarn.
- Join the Legs Together:
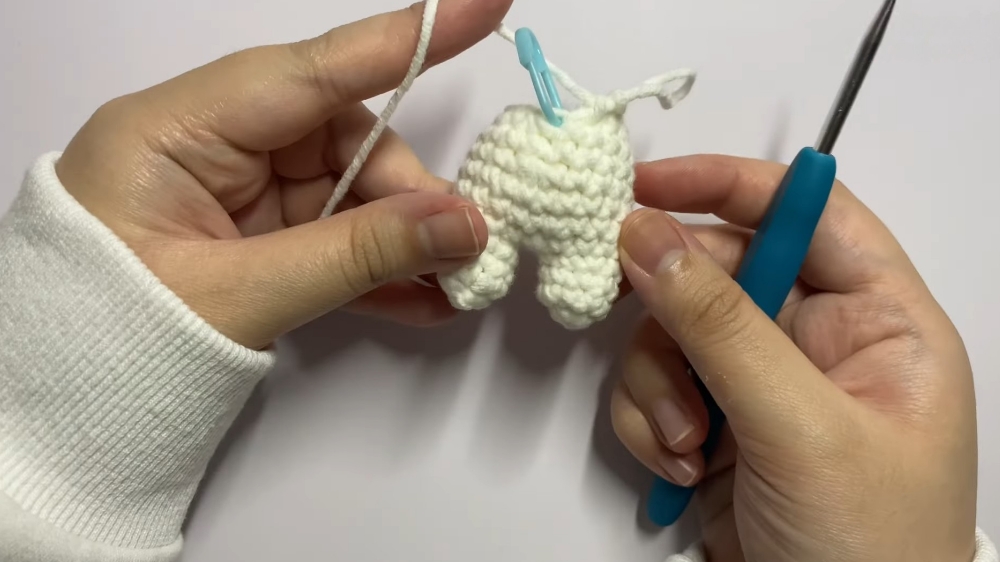
- Chain one from the second leg. Use stitch markers to track key points, and crochet connecting the two legs.
2. Building the Body
- Crochet the Body Rounds:
- Insert single crochets into each stitch for several rounds. Use increases and decreases as needed to shape the body structure.
- After completing the shaping rounds, stuff the body evenly using polyester stuffing.
3. Creating the Head
- Increase for a Full Shape:
- Add rounds with increases to give the head its circular puff.
- Single Crochet Rounds:
- Work, continuous rounds to build the height.
- Decrease for Closure:
- Gradually decrease stitches to close off the head, leaving a small opening to stuff it. Once stuffed, close the hole completely using a darning needle.
4. Making Hands and Ears
- Hands:
- Start with a magic ring and work 6 single crochets in the circle. Crochet single stitches for six rounds. Secure and leave a long tail for sewing.
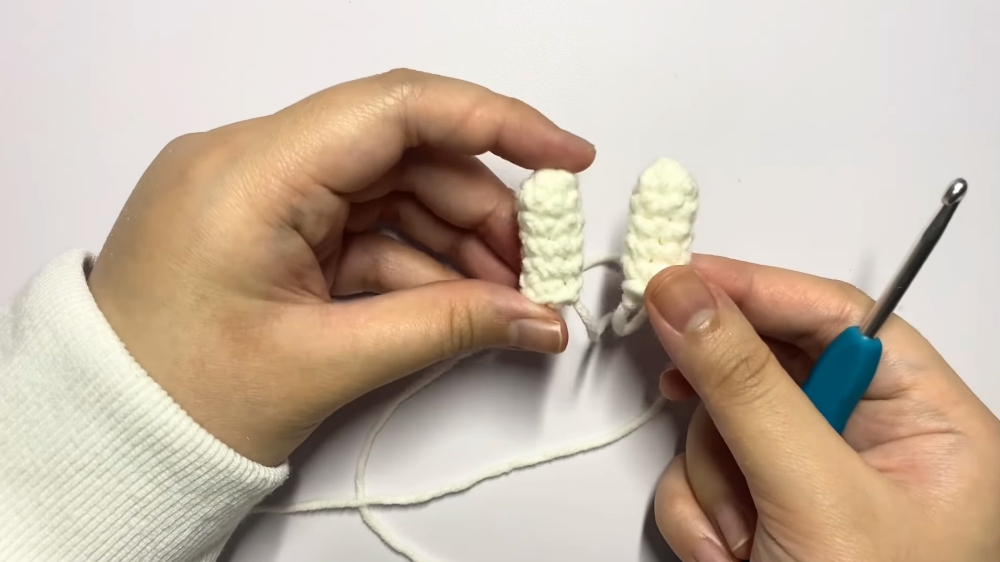
- Start with a magic ring and work 6 single crochets in the circle. Crochet single stitches for six rounds. Secure and leave a long tail for sewing.
- Ears:
- Create a magic ring with 6-8 single crochets. Pull tight and secure the yarn.
5. Assembly
- Sew Hands and Ears Onto the Body:
- Align the hands and ears on the body/head and sew them into place using a darning needle.
- Add Eyes, Nose, and Mouth:
- Count five rows from the top of the head and embroider the face with brown yarn. Space the eyes evenly apart (4 spaces in between).
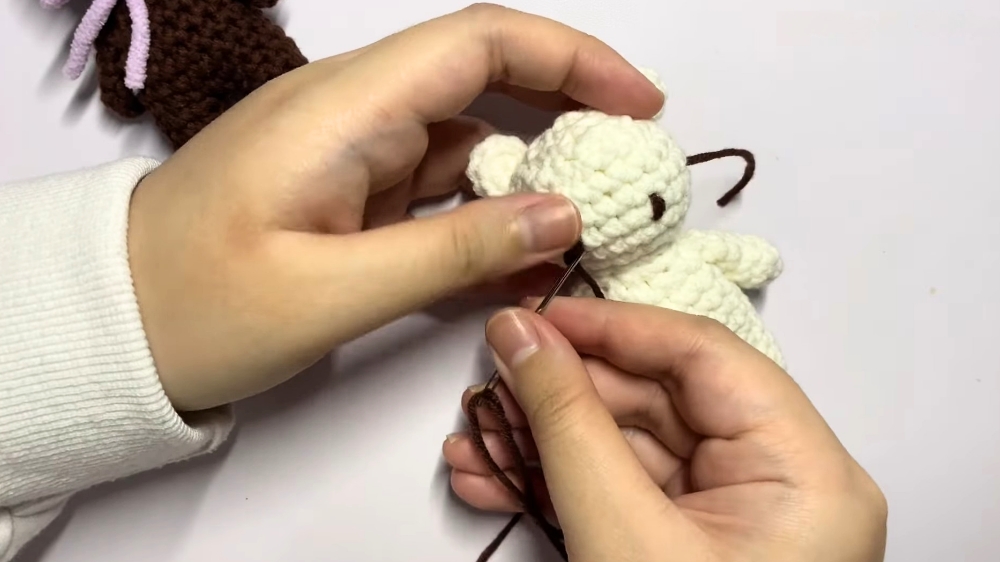
- Count five rows from the top of the head and embroider the face with brown yarn. Space the eyes evenly apart (4 spaces in between).
- Optional Bow:
- Tie a bow using chunky purple yarn around the teddy’s neck to enhance its look.
6. Attaching the Keychain
- With a Keychain Hook:
- Insert the keychain loop into the top of the teddy bear’s head.
- Alternative DIY Option:
- Pull a yarn through the top of the head using a darning needle and tie a secure knot. Push the knot inside the bear for a seamless look.
Special Features
- Uses simple and beginner-friendly stitches like the X-Stitch single crochet.
- Option for a keychain attachment or a small plush decoration.
- Easily customizable with different yarn colors or accessories (like bows).
Level of Difficulty
- Beginner to Intermediate: The pattern is straightforward and includes basic stitches. However, assembling and joining the legs may require patience for beginners.
Tutor’s Tips and Suggestions
- Use Stitch Markers: Always mark the first stitch of every round to avoid losing track.
- Take It Slowly: If parts feel tricky (like the leg assembly), re-watch or repeat slowly.
- Customize: Experiment with different yarn and bow colors to give your bear a unique personality.
- Practice Sew-As-You-Go: Carry the excess ends while crocheting to save time on weaving later.
Uses of the Crochet Teddy Bear Keychain
- A cute keychain accessory for keys, bags, or zippers.
- A handmade gift for friends or loved ones.
- Great as party favors, giveaways, or small plush toys.
Conclusion
Crocheting this teddy bear is a delightful way to spend your creative time. Whether you’re making it as a keychain or just a decorative plush, this project is sure to bring smiles! With a little yarn, patience, and love, you can create something both charming and functional.
Crochet Tip
When stuffing small parts (like the body or head), use the blunt end of a crochet hook or scissors to push the stuffing evenly into hard-to-reach areas.




Leave a Reply