"Add some fun to your crafting with the Free Crochet Cute Chicken Pattern, featuring an adorable design that's sure to bring a smile to anyone's face."
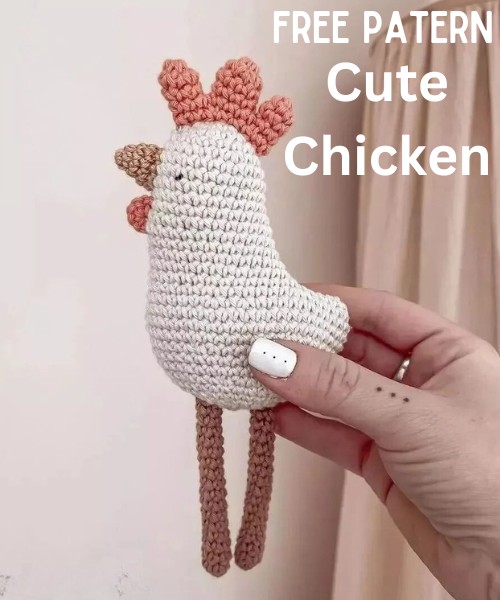
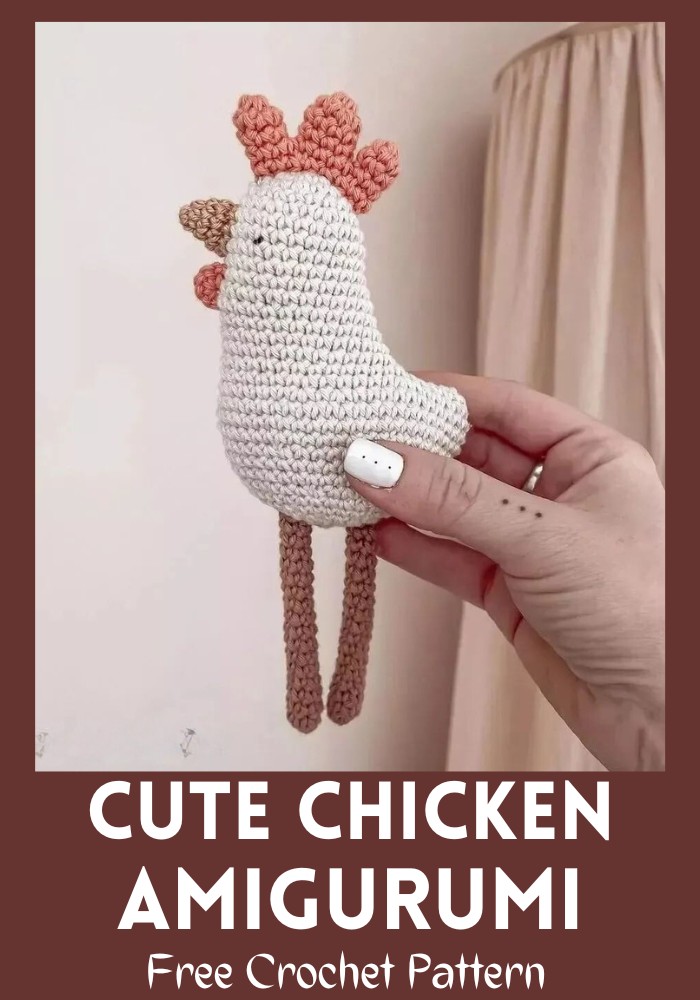
Chickens are fluffy farm animals known for their feathers and the 'cluck-cluck' sounds. Now, with our easy amigurumi pattern, there's a fun way to make your little chicken without visiting a farm. This little chicken can be a toy for kids or a charming decoration for your home. It has a chubby, huggable body perfect for cuddling, and while it doesn't come with wings, you can add them if you like. It stands on long legs without claws and features a bright red comb and a beak, complete with a small wattle. This cuddly chicken can brighten any room or become a child's favorite new toy. The pattern explains each step simply, so even people new to crochet can make their adorable chicken friend.
Meet Your New Crochet Cute Chicken Friend
Introduction
Transform your space or delight a child with the Free Crochet Cute Chicken Pattern, designed to add a touch of whimsy and charm to any setting.
Appearance and Look
- Adorable and Huggable
- Chubby Body: The chicken features a chubby, huggable body, making it perfect for cuddling and giving lots of love.
- Customizable Features:
- Optional Wings: While the pattern doesn’t include wings, you have the option to add them for a personalized touch.
- Charming Details:
- Long Legs Without Claws: The chicken stands on long, slender legs without claws, giving it a unique and endearing look.
- Bright Red Comb and Beak: A vibrant red comb and beak, along with a small wattle, add character and a splash of color to the chicken's appearance.
Versatility and Use
- Wonderful Toy: This cuddly chicken can quickly become a child's favorite toy, offering endless hours of imaginative play and companionship.
- Charming Decoration: Brighten any room in your home with this delightful chicken, perfect for adding a touch of whimsy and warmth.
Easy-To-Follow Pattern
The pattern is designed to be simple and accessible, ensuring that even newbies to crochet can successfully make this adorable chicken friend.
Conclusion
With the Free Crochet Cute Chicken Pattern, you’re crafting more than just a toy or decoration; you’re creating a charming character that can bring joy and warmth to any space or person.
Making Your Crochet Cute Chicken
Material:
- Ricorumi, cotton color 061 (off-white), 25g ricorumi, cotton color 056 (brown), 25g ricorumi, cotton color 071 (camel), 25g
- Ricorumi, cotton color 068 (orange), 25g
- pearl cotton size 8, black (to embroider the eyes)
- 12.5 mm crochet hook
- 1 embroidery needle
- Fiberfill
Abbreviations:
- Rd = round
- St = stitch
- Ch = chain
- Sist = slip stitch sc single crochet dec = invisible decrease
- Inc = increase
- Repeat until the end of the round
Step by step Pattern
Body:
- Color 061
- Rd 16 sc in a magic ring- 6 rd 2:1 inc in each st- 12 rd 3: *1 sc, 1 inc* (x6)- 18 rd 41 sc in each st- 18
- Rd 5*2 sc, 1 inc*(x6) - 24
- Rd 6 to 9 (4 rounds): 1 sc in each st- 24
- Rd 10 1 inc, 23 sc - 25
Rd 11 1 sc, 1 inc, 23 sc - 26 - Rd 12: 2 sc, 1 inc, 23 sc - 27
- Rd 13:3 sc, 1 inc, 23 sc - 28 rd 14:3 sc, 1 inc, 24 sc - 29
- Rd 15:3 sc, 1 inc, 25 sc - 30
- Rd 16:4 sc, ch 7, insert your hook in the 2nd st from the hook and make 26 sc - 36
- Rd 17: 5 sc, 1 inc* (x6) - 42
- Rd 18:3 sc, 1 inc, *6 sc, 1 inc* (x5), 3 sc - 48 rd 19 to 21 (3 rounds): 1 sc in each st- 48 rd 22: "6 sc, 1 dec*(x6) - 42 stuff.
- Rd 23 and 24 (2 rounds): 1 sc in each st- 42 rd 25: *5 sc, 1 dec*(x6) - 36
- Rd 26: 1 sc in each st- 36
- Rd 27: 2 sc, 1 dec, *4 sc, 1 dec*(x5), 2 sc - 30 rd 28: *3 sc, 1 dec*(x6) - 24
- Rd 29: *2 sc, 1 dec*(x6) - 18
- Rd 30: *1 sc, 1 dec*(x6) - 12
- Finish stuffing.
- Finish with a slst, then fasten off and close your work: using your tapestry needle, go through the blo of each st from the last round with the tail, then pull firmly.
- Hide the rest of the tail inside.
Legs x2 :
- Color 056
- Rd 16 sc in a magic ring- 6
- Rd 2 to 16 (15 rounds): 1 sc in each st- 6
- Do not stuff the legs.
- Finish with a slst, then fasten off. Ensure you keep a long enough tail for the assembly (about 30 cm).
Comb:
- Color 068
- Big comb 1:
- Rd 16 sc in a magic ring- 6
- Rd 2: *2 sc, 1 inc* (x2) - 8
- Rd 3 and 4 (2 rounds): 1 sc in each st- 8
- Fasten off and mark the last stitch.
Small combs 2 and 3:
- Rd 16 sc in a magic ring- 6
- Rd 2 and 3 (2 rounds): 1 sc in each st- 6
- Fasten off and mark the last stitch.
- For the third and last small comb, do not fasten off but assemble combs 1 and 2 as follows.:
- 4 sc on comb 1, 6 sc around comb 2, 4 sc on comb 1 again, then finish with 6 sc around comb 3, so 21 sc in total.
- Continue the comb with one last round with 1 sc in each st- 21
- Finish with a sist, then fasten off. Ensure you keep a long enough tail for the assembly (about 20 cm).
- Do not stuff the comb.
Wattle:
- Color 068
- Rd 16 sc in a magic ring- 6
- Finish with a sist, then fasten off. Ensure you keep a long enough tail for the assembly (about 20 cm).
Beak:
- Color 071
- Rd 16 sc in a magic ring- 6 rd 2: *2 sc, 1 inc* (x2) - 8 rd 3: *3 sc, 1 inc*(x2) - 10
- Rd 41 sc in each st- 10
- Finish with a slst, then fasten off. Ensure you keep a long enough tail for the assembly (about 20 cm).
Assembly:
- Place the comb on the top of the head. Sew the legs at the bottom, 1cm apart.
- Place the beak vertically on rounds 6 to 8.
- Place the small wattle vertically on rounds 10 to 12.
- Embroider has two small eyes on each side of the beak between rounds 7 and 8.
- To use your hen as a table decoration, you can omit the legs and simply place her at the center of the table or on each guest's plate as a nice gift.
Design and pattern @annab.shop


Leave a Reply