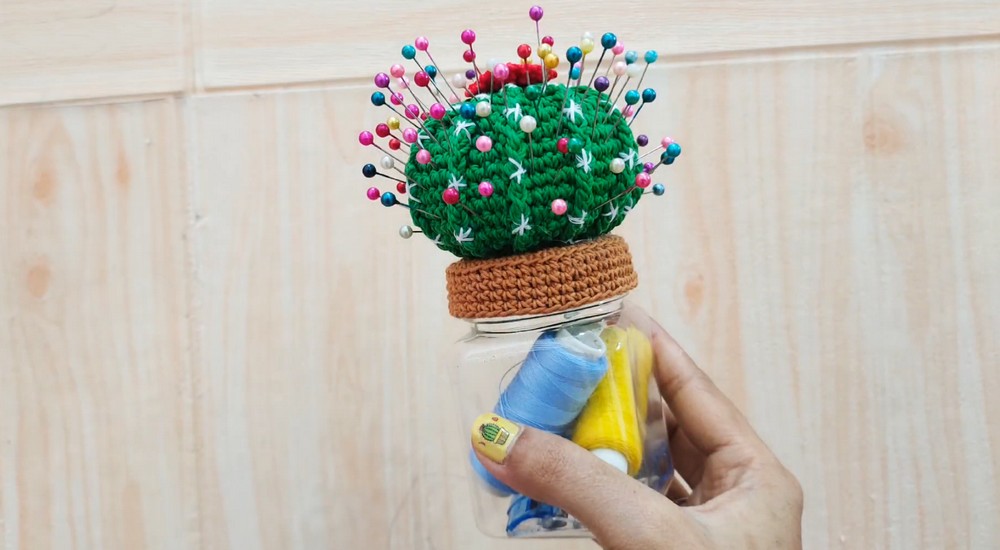
Organize creatively with this Crochet Pin Cushion Jar Pattern, combining storage, charm, and practicality in one delightful piece.
Tucked away in the realm of functional decor, the crochet pin cushion jar pattern offers a clever solution for organizing and brightening your crochet space. This charming design turns an everyday jar into a dual-purpose tool—combining a soft pin cushion lid with a compact storage container. Ideal for keeping sewing pins secure while stashing buttons, beads, or other small essentials, it’s a thoughtful way to keep your workspace tidy and stylish at the same time.
Easy Crochet Pin Cushion Jar for Boutique Organization

With endless possibilities for design, from playful shapes to elegant textures, the lid becomes a canvas for creativity, allowing you to personalize it to suit your style. Beyond its practical merits, the pattern encourages reimagining common objects, bringing freshness to how you interact with your surroundings. The benefits extend further, promoting sustainability by repurposing jars and minimizing waste through upcycled materials.
Perfect for hobbyists or as a handmade gift, the pin cushion jar combines aesthetics with utility. It’s lightweight, portable, and adds a splash of color and charm wherever it’s placed. Whether nestled in a sewing corner or gifted to a fellow crocheters, this inventive design proves that even the smallest items can hold a touch of brilliance.
Tools and Materials
- Green polycherry thread
- Crochet hook size 3
- Small jar
- Dacron (stuffing)
- Stitch marker
Step By Step Guide
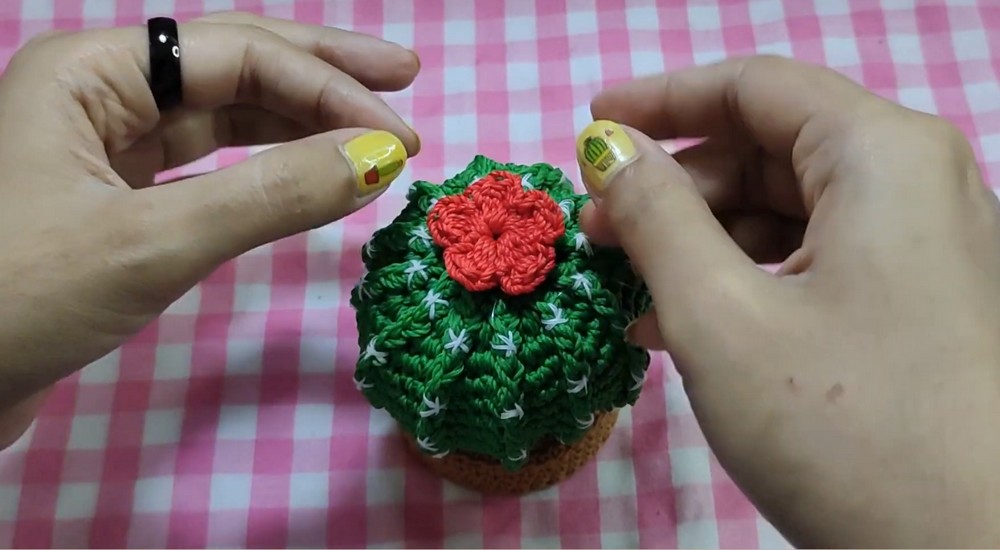
Welcome to this pattern, where we transform an ordinary used snack jar into a useful and decorative item. This project is ideal for crocheters who enjoy upcycling and creating charming crochet items. We will be making a crochet cactus pin cushion jar, following a step-by-step guide suitable for both beginners and intermediate crocheters.
Step-by-Step Instructions
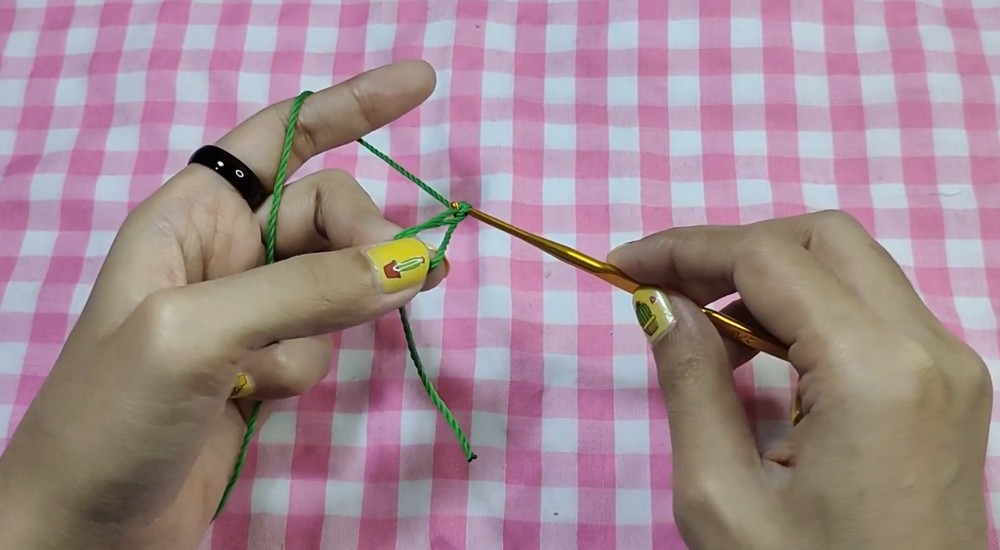
1. Starting with the Magic Ring
- Create a magic ring.
- Make a foundation with 3 chains.
- Crochet 11 double crochets into the magic ring (the first 3 chains count as the first double crochet, making a total of 12 stitches).
2. Forming the Base
- Pull the magic ring thread to make it smaller.
- Slip stitch into the top of the chain three.
- In the same hole, make a single crochet.
- Place a stitch marker to keep track of your starting point.
3. Increasing Stitches
- Continue with a front post double crochet.
- In the third hole, make one single crochet.
- Repeat the pattern: one single crochet, one front post double crochet.
- Complete the round with 24 stitches.
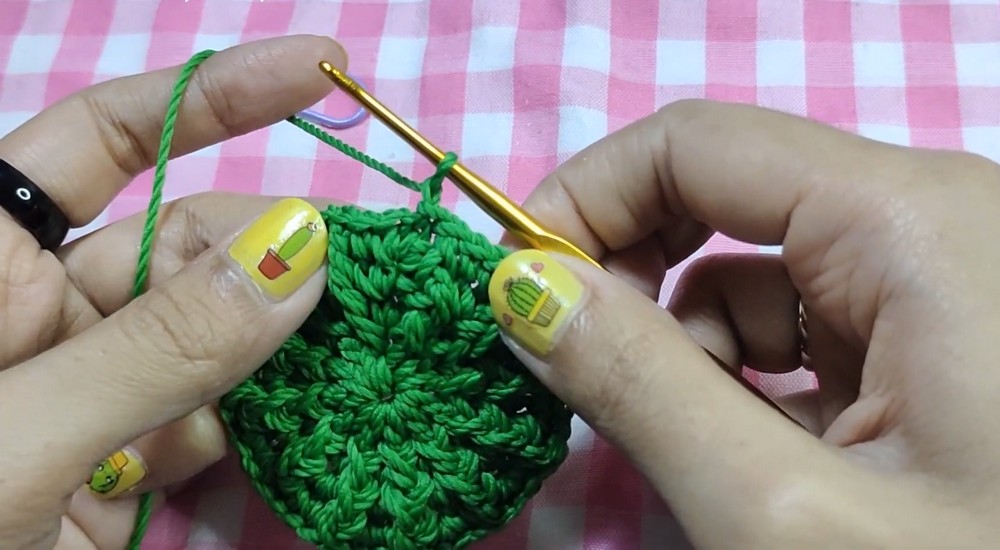
4. Building Up the Rows
- Round 3: Start with one chain, make two single crochets in one hole, mark the first single crochet, then make a front post double crochet. Repeat the pattern (single crochet increase, front post double crochet) to reach 36 stitches.
- Round 4: Make a single crochet increase followed by one single crochet in the next hole and a front post double crochet. Repeat the pattern to get 48 stitches.
- Round 5: Single crochet in the first hole, single crochet in the next two holes, then a double crochet. Repeat the pattern for 60 stitches.
- Round 6: Single crochet 4 times, repeat the pattern to maintain 60 stitches, then continue this pattern up to Row 11.
5. Shaping the Cactus
- Round 12: Start with a decrease. In the next two holes, make one single crochet each, then a front post double crochet. Repeat the pattern for 48 stitches.
- Round 13: Decrease once, then front post double crochet. Repeat to get 36 stitches.
- Round 14: Decrease followed by front post double crochet. Repeat, finishing with 24 stitches.
6. Filling and Finalizing
- Fill the cactus with dacron stuffing.
- Round 15: Decrease 12 times.
- Final round: Decrease 6 times.
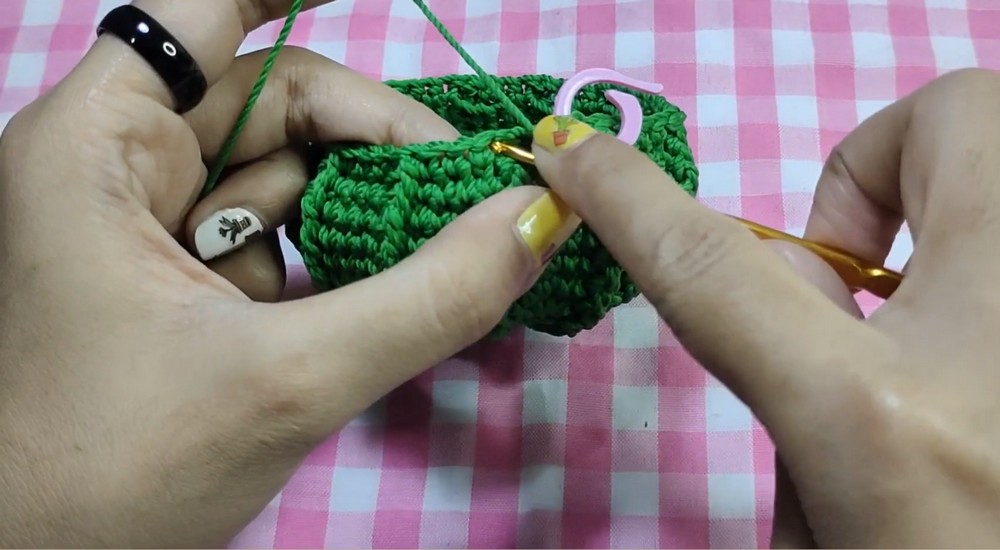
7. Creating the Lid Cover
- Follow the base pattern provided in the video, adjusting to the lid size.
- Add edges: Work single crochets in the back loop only, repeating the pattern up to Row 10.
8. Adding Finishing Touches
- Add thorns around the cactus to enhance the look.
- Top the cactus with flowers to make it more appealing.
Special Features
- Upcycled project: Reuses a snack jar.
- Functional: Serves as both a pincushion and a small storage jar.
- Decorative: The cactus pattern adds a charming, handmade touch.
Level of Difficulty
This project is suitable for crocheters with basic crocheting skills, but the pattern is detailed enough that a beginner with patience can also tackle it.
Tutor's Suggestions
- Ensure to mark the first stitch of each round to avoid losing count.
- Adjust the base pattern according to the size of your jar lid.
Uses and Materials
- The jar can be used for storing small items and the lid serves as a pincushion.
- The materials are easily accessible and inexpensive, making this project budget-friendly.
Tip
If you find the cactus pattern too challenging, you can simplify it by using basic crochet stitches and focusing on the shape to create a similar project without the intricate details.
Conclusion
We hope you enjoyed making this crochet cactus pin cushion jar. It’s a creative and functional way to repurpose materials and add a handmade touch to your crochating space.


Leave a Reply