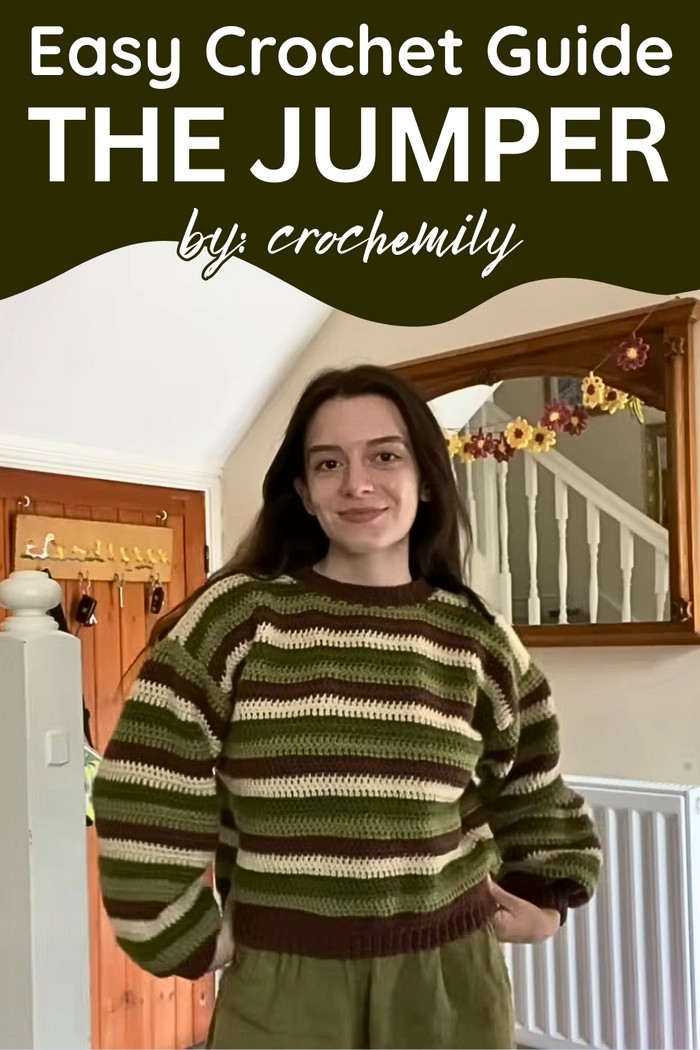
Crochet cozy elegance with this unique Crochet Jumper Pattern for creating a timeless wardrobe staple that's perfect for any season.
Decades of tradition have woven crochet jumper into both practicality and fashion. Renowned for their intricate textures and timeless appeal, this garments have become staples for those seeking comfort with a touch of elegance. Designed to suit every season, they offer warmth on chilly days while remaining light enough for transitional weather. Their Skill speaks volume, offering wearers a blend of functionality and personality that stands out in any wardrobe.
Timeless Crochet Jumper for Fashion Enthusiasts
Beyond their visual appeal, crochet jumper come packed with benefits. Their durability outlasts many mass-produced alternatives, ensuring long-term use without compromising quality. Breathable fabrics and customizable designs make them suitable for a diverse range of styles, letting individuals showcase creativity through pattern, colors, and fits. Furthermore, they provide a sustainable clothing option by embracing natural fibers and mindful production methods.
Whether worn casually or as part of a more thoughtful ensemble, crochet jumper transform outfits into expressions of individuality. Their ability to combine comfort and aesthetics makes them ideal for versatile use, from cozy nights at home to outings that require effortless sophistication. A crochet jumper is more than just an article of clothing—it’s a unique way to bring practicality, sustainability, and beauty together.
1. Materials Needed
Before starting, gather the following materials:
- Yarn: Preferably DK yarn or any yarn of your choice. The creater used Fab Finds Magic Aran Yarn. Additional brands include Signet and Paintbox Yarn (specific colors).
- Hook: A 4.5 mm hook (or one that corresponds to the yarn you choose).
- Measuring Tape: To tailor the jumper to your desired size.
- Stitch Markers: For marking key measurement points.
- Darning Needle: For weaving in ends.
- Scissors: To cut yarn as needed.

Step-by-Step jumper pattern
Crocheting is a timeless and versatile craft that caters to a wide range of projects, from accessories to clothing. In this tutorial, you’ll learn how to make a custom crochet jumper adaptable to any size, yarn type, or hook. The tutor simplifies the process and introduces techniques that are both beginner-friendly and practical. If you've ever admired a handmade jumper and wondered where to start, this guide has you covered!
2. Special Features of the Jumper
- Size Customization: The jumper is adaptable to any size, and exact measurements can be taken to ensure the perfect fit.
- Construction Simplicity: It consists of four rectangles sewn together.
- Added Ribbing Details: Single crochet stitches (back-loop-only) are used to create ribbing at the collar, hem, and sleeves, giving the piece a polished finish.
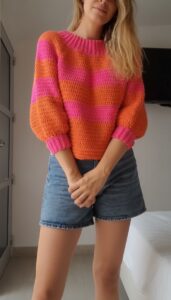
- Striped or Solid Option: The tutorial explains switching colors for stripes but accommodates single-color projects, offering creative flexibility.
3. Taking Measurements
- Use an existing jumper you like to measure the width and length of your panels.
- Alternatively, measure your body:
- Width: Shoulder to shoulder or widest part of the torso. Add a couple of inches for an oversized fit.
- Length: Collarbone to desired length. Allow extra inches if adding ribbing.
- Sleeves: Measure from the top seam to where you want the sleeve ribbing to sit.
4. Making the Panels
- Front and Back Panels:
- Chain the desired width. Add stitches for a turning chain (e.g., 1 for single crochet, 3 for double crochet).
- Crochet rows until the panel reaches your desired height.
- For neckline shaping, decrease stitches evenly on either side for a curved neckline.
- Sleeve Panels: Measure the armhole circumference, then crochet rectangles to match. Adjust sleeve length to personal preference.

5. Adding Ribbing
- Bottom Hem: Create a chain for the ribbing length (adjust based on your preference). Attach to the jumper edges while crocheting single-crochet, back-loop-only rows for the desired ribbed effect.

- Cuffs: Crochet the ribbing separately and then attach it to the sleeves. Skip a few stitches during attachment to create a gathered, fitted cuff look.
- Neckline: Attach yarn at the neckline and crochet in the same back-loop-only technique. For a cinched look, add decreases by skip-stitching.

6. Assembly
- Place panels with the right sides facing each other.
- Join the panels by sewing or crocheting:
- Shoulder Seams: Leave a neck hole while joining the top edges.
- Side Seams: Decide on armhole size, then join the rest of the sides.
- Sleeves: Join the sleeve edges to form a tube, then attach to the armholes.
- Turn the jumper inside out to ensure seams are hidden.

Tutor's Suggestions
- Use a favorite jumper as a sizing guide if you’re unsure about measurements.
- Opt for acrylic yarn for more stretch, especially for the neckline.
- Start with stripes to practice color changes, or stick with a single color for simplicity.
- Weave in ends as you go to avoid tedious finishing work later.
- If using stiffer fibers like cotton, avoid excessive decreases, as their lack of stretch may limit adjustments.
Level of Difficulty
Beginner-Friendly
- The project is approachable for beginners because of its simple rectangular construction.
Uses of the Jumper
- A cozy and stylish wardrobe addition for fall and winter.
- Makes for a thoughtful, handmade gift.
- An excellent way to practice and perfect basic crochet techniques like stitching, color changes, and ribbing.
Tip for Best Results
Customize Creatively!
Play around with the yarn colors and experiment with stripes or pattern. Choosing different yarn textures can also enhance the overall look and feel of the jumper. Be fearless in making it unique – it's a reflection of your creativity!
Conclusion
This crochet jumper project is more than a crochet it’s an opportunity to create something functional, stylish, and wholly personal. Whether you’re making it to stay warm or as a gift, the customizable nature of this pattern ensures a beautiful end result no matter your skill level.


Leave a Reply