
Enchant your wardrobe with this Crochet Granny Neckwarmer Pattern, an irresistible blend of timeless tradition and modern handmade flair.
A quiet charm lies in accessories that are as functional as they are stylish. The granny neckwarmer pattern brings together warmth and simplicity in a compact design that’s perfect for colder days. Its roots in traditional crochet methods offer a nostalgic touch, while its modern twist makes it an elegant addition to any wardrobe. This delightful neckwarmer promises comfort while adding a pop of texture and personality to your outfits.
Quick Crochet Granny Neckwarmer for Cold Weather Comfort
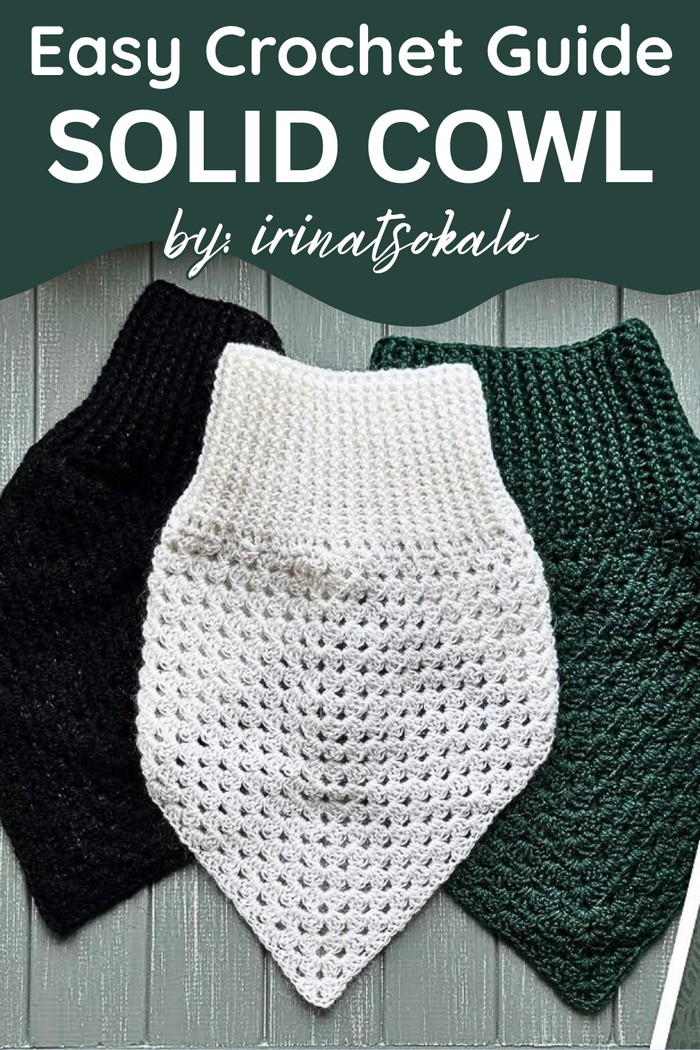
Perfect for cooler months, the neckwarmer serves as a reliable shield against chilly winds while remaining lightweight and easy to carry. Whether layered over a favorite jacket or paired with casual attire, its versatility shines in both style and practicality. Designed to complement a variety of clothing, it becomes a go-to choice for any occasion, blending seamlessly with different looks.
Ideal for crocheters of all skill levels, this pattern encourages a creative outlet while producing a meaningful and functional result. Whether made for personal use or gifted to brighten someone’s day, the granny neckwarmer is a beautiful way to embrace the colder seasons. Combining coziness with timeless appeal, it’s a piece that offers warmth in both its physical presence and its thoughtful creation.
1. Materials Required
- Two types of yarn: Combination of one mohair yarn and a second yarn of your choice.
- Crochet Hooks:
- 5 mm for the body of the neck warmer.
- 4 mm for the neck part.
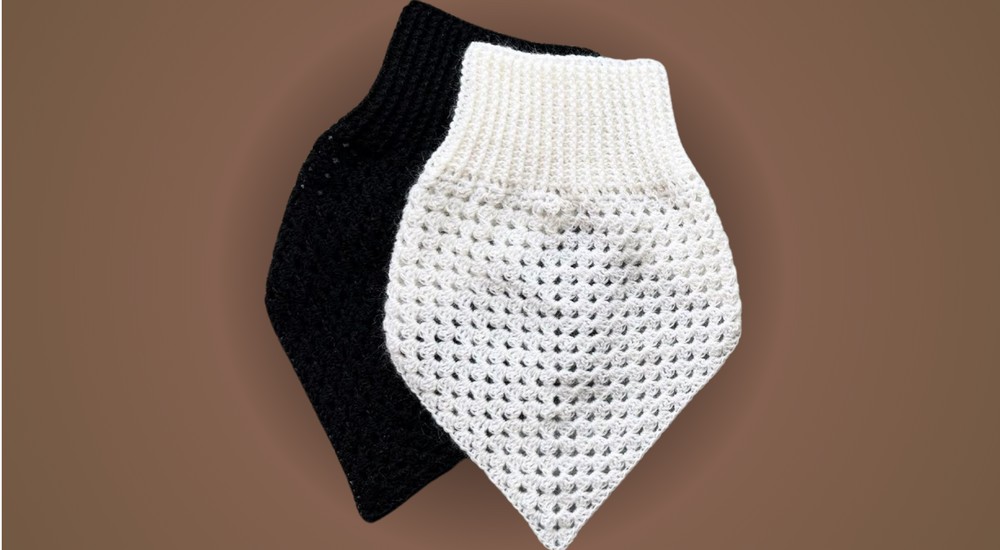
Step-by-Step Guide Crochet Granny Neck Warmer
This pattern provides a concise and easy guide to crocheting a "Granny Square Neck Warmer" (also called a cowl). The design involves using soft yarn, two crochet hooks of different sizes, and a classic granny square technique. Ideal for crocheters of varying levels, it offers a stylish and cozy accessory for winter that can be customized in color and design. The creator explains the process step by step, making it accessible even for beginners.
Step-by-Step Instructions
2. Starting the Project
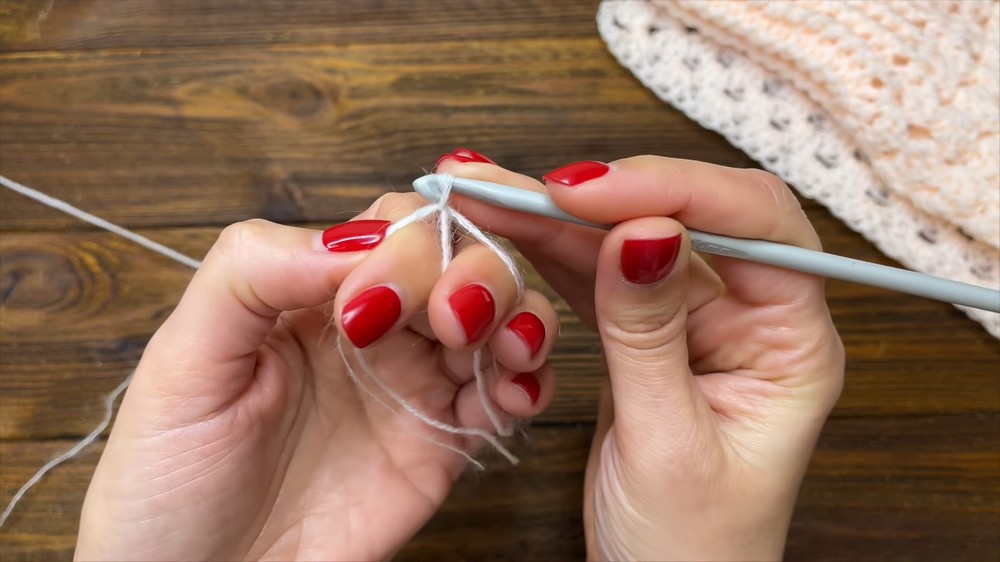
- Magic Ring & Foundation Round:
- Begin with a magic ring and chain three.
- Add two double crochets (DC) into the ring. This forms your granny square starting point.
- Chain two, then repeat three double crochets into the ring. Pull the magic ring closed.
3. Second Row
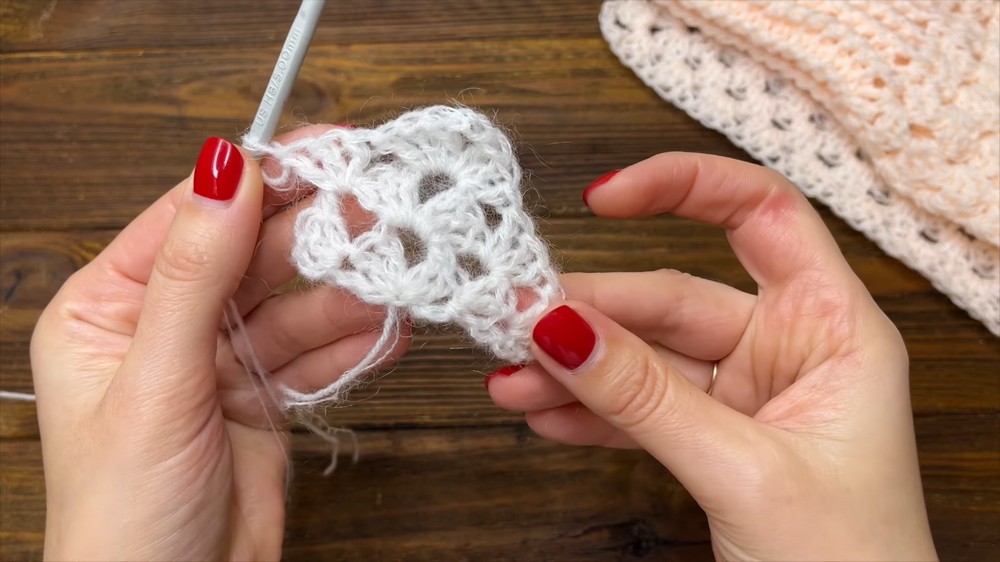
- Increase and Shape the Square:
- Chain three and turn your work. This chain counts as the first double crochet.
- Add two double crochets into the first loop.
- Move to the top angle and do: Three DC – Chain Two – Three DC.
- Finish the row with three double crochets at the top of the last double crochet.
4. Third and Subsequent Rows
- Growing the Granny Square:
- Chain three and turn the work. Add two double crochets into the first stitch.
- Continue this sequence across each row, going into the top angle with:
Three DC – Chain Two – Three DC. - Repeat to extend the granny square to your desired length. In this tutorial, the tutor worked 20 rows to achieve a width of 68 cm.
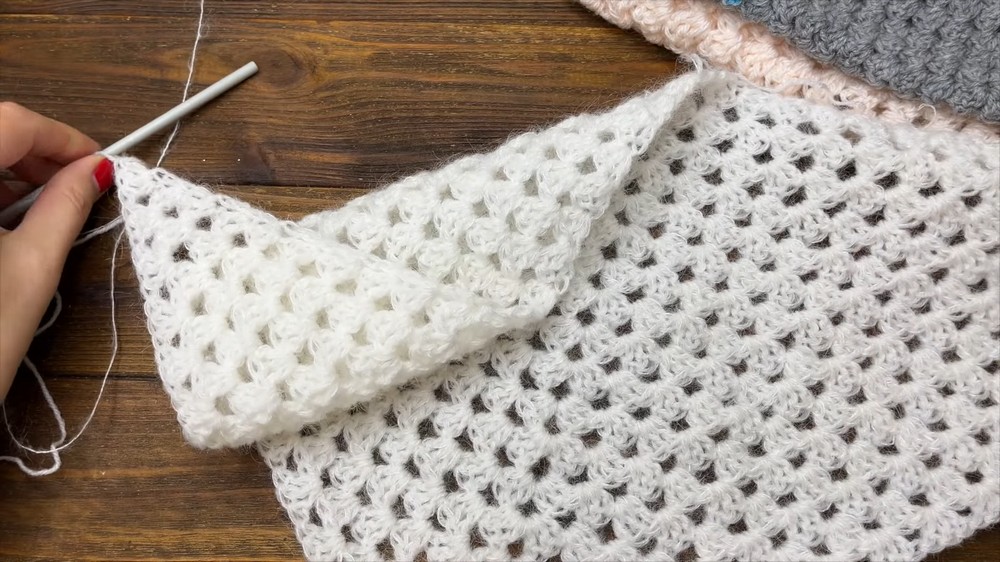
5. Joining the Granny Square
- Slip Stitch to Connect the Sides:
- Fold the square into a loop and join the two ends with a slip stitch under each post. Ensure the stitches are tight and secure.
- Complete the connection with a chain three, which counts as the first double crochet of the next segment.
6. Creating the Neck Section
- Double Crochet Round:
- Work all double crochets around the top, alternating between:
One double crochet under the post and one into the stitch. - If the stitches feel too tight, add more double crochets to balance the tension.
- Work all double crochets around the top, alternating between:
- Front Post and Back Post Section:
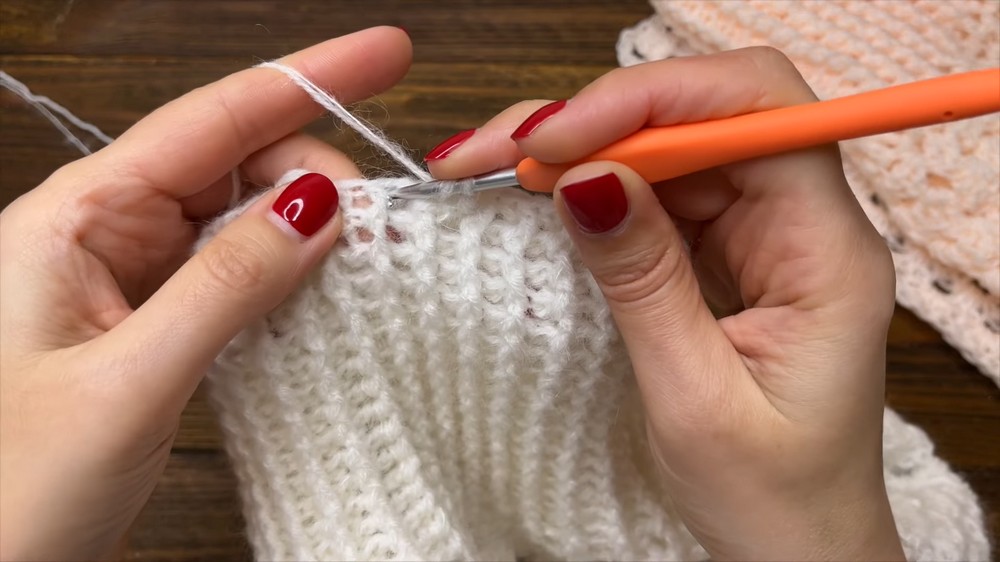
- Switch to the 4 mm hook for a tighter neck section.
- Chain one and work alternating front post double crochets and back post double crochets. This creates a stretchy ribbed effect.
- Repeat this row until you reach the desired neck height. The tutorial included 16 rounds for the neck.
Special Features
- Modular Customization: Use different yarn types and colors to create a unique look. The pattern works well in soft tones like white, pink, and gray.
- Simple Repetition: The repetitive granny square and ribbing techniques make it easy to follow for beginners.
- Stretchy Neck Section: The front post and back post stitches create elasticity for a snug and comfortable fit.
Level of Difficulty
This project is rated as easy to intermediate. It’s beginner-friendly, but some prior knowledge of granny squares, front post, and back post stitches is helpful.
Tutor’s Suggestions
- Don’t worry if your technique feels awkward at first; the tutor also shared this sentiment when using a larger hook size.
- Adjust stitch counts if the tension is too tight to ensure a smooth finish.
- Experiment with different yarns and colors for a variety of looks.
Uses
- Winter Accessory: Keeps the neck warm while adding a stylish touch to cold-weather outfits.
- Customizable Gift: Perfect for making personalized handmade gifts for loved ones.
Helpful Tip
When switching from the granny square body to the neck section, ensure your tension is consistent. Too loose or too tight stitches can distort the shape. Use the smaller hook size to tighten the ribbing for a polished, professional finish.
Conclusion
This pattern guides you through the process of making a versatile and beautiful granny square neck warmer. With its simple construction and cozy design, it’s a rewarding project for both beginners and experienced crocheters. The repeating pattern makes it meditative to work on, and the final product is both stylish and functional. Keep practicing, stay warm, and make crochet part of your creative routine!


Leave a Reply