
Slip tiny toes into cuteness and comfort with this Free Crochet Baby Socks Pattern, an easy and inviting project for thoughtful baby gifts.
Soft and stylish, a baby sock adds comfort and charm to any little one's wardrobe. Using gentle yarn and careful stitches, this tiny garment provides an ideal blend of warmth and breathability for delicate feet. With thoughtful details and customizable color choices, it becomes a special keepsake, perfect for baby showers or memorable milestones.
Dreamy Crochet Baby Socks Pattern with Playful Touch

The enchanting texture, elegant finish, and playful patterns make this more than just an accessory—it is practical, easy to put on, and keeps a baby's foot secure and cozy throughout the day. Whether adorned with a whimsical motif or classic stripes, the result is both delightful and functional, appreciated by parents and loved by babies.
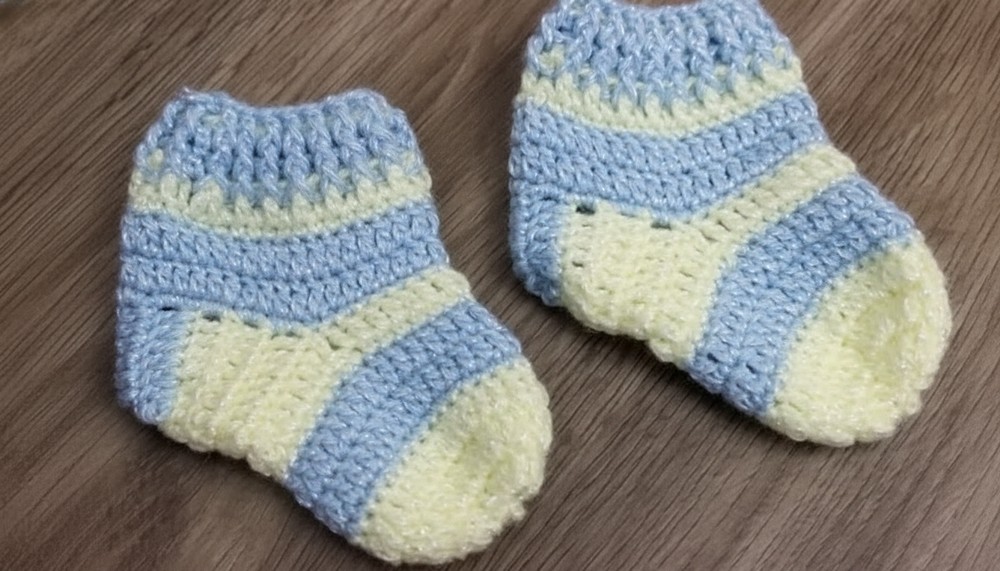
Following a crochet pattern for a baby sock offers a joyful, achievable project for both beginners and seasoned enthusiasts, turning a small amount of yarn into a cherished gift that celebrates tenderness, individuality, and timeless elegance in every tiny stitch.
Special Features
- Made for comfort with super soft, slightly shiny yarn
- Uses simple color changes for a charming striped look
- Adaptable sizing—simply adjust yarn or hook size
- Sturdy yet stretchy ribbed cuff for a secure fit
Difficulty Level
Beginner-friendly to Advanced Beginner
If you’re familiar with basic stitches—chains, single crochet, double crochet (US terms), and sewing seams—this project is perfect for you.
Tutor’s Suggestions
- Hide yarn tails as you work for a neat finish
- Work in a well-lit area to make color changes easier
- Don’t worry about using the whole skein; a little goes a long way
Uses
- Baby gifts & baby showers
- Everyday wear for little ones
- Practice for learning to crochet in the round and color changes
Materials
- Penguin Threads “Baby” yarn, colors 501 (blue) and 201 (yellow), 40g balls (only a bit needed; you’ll make multiple pairs from two balls of 130m each)
- 1.75mm crochet hook
- Tapestry needle (blunt)
- Small sewing needle for finer finishing
- Scissors
Step-by-step Pattern
1. Sole and Toe Formation
- With yellow yarn, make a slip knot.
- Chain 6.
- Yarn over, skip two chains. In the 4th chain from the hook, make a double crochet (dc). Double crochet in each of the next 3 chains. (Total: 4 dc)
- In the last chain, work 4 dc all into the same stitch (this turns the corner).
- Along the bottom of the foundation row, work 4 dc (opposite side of starting chain).
- In the remaining space, work 4 dc to round the turn (in the same stitch as previous 4 dc).
- Join with a slip stitch in the 3rd chain of starting chain. (Now you have 16 stitches in the round)

2. Increasing the Toe
- For the next round, chain 3 (counts as first dc). Work another dc in the same stitch.
- Work 2 dc in each stitch around (you now double the number: 32 dc).
- Slip stitch to the top of the starting chain.
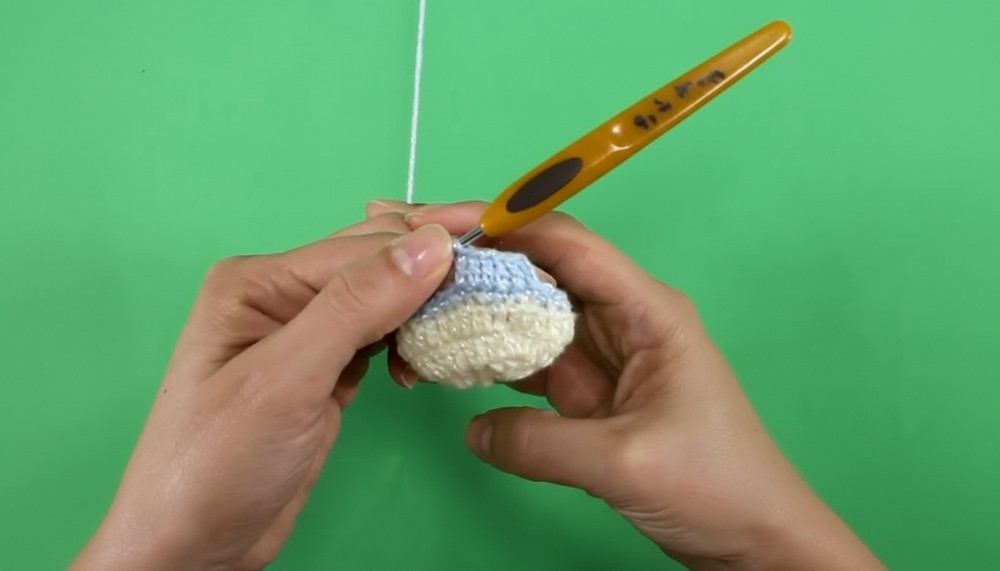
3. Shaping the Foot
- Chain 3, work 1 dc in each stitch around (32 dc); repeat for one more round.
- After two rounds, fasten off yellow.
4. First Color Change (Blue)
- Attach blue yarn at any place in the round.
- Chain 2 (counts as first single crochet - sc).
- Work 1 sc in each stitch around, covering tails as you go. Slip stitch to finish the round.
- Fasten off yellow and secure ends.

5. Continue with Blue
- Chain 3, work 1 dc in each stitch around (32 dc); repeat for a second round.
- Fasten off blue.
6. Second Color Change (Yellow)
- Attach yellow yarn. Chain 2.
- Work 1 sc in each stitch around (32 stitches).
- Slip stitch to close round.
- Chain 3, work 1 dc in each stitch around (32 dc).
7. Shaping the Instep (Top of Foot)
- Work with yellow yarn, now create three rows back and forth (not in the round), working 18 dc per row.
- At the end of each row, turn and chain 3 before starting the next row. Do this for three rows.

8. Heel Flap and Join
- After third row, leave a long tail and fasten off.
- Fold the piece so stitch markers line up heel-to-heel.
- Use a tapestry needle and leftover tail to sew the sides together, forming the heel cup.
- Use a simple whip stitch—always sewing chain to chain on each side, alternating blue and yellow as necessary.
9. Sock Shaft and Cuff
Tube:
- Attach blue yarn at the center of the newly formed heel.
- Chain 2, work 2 sc evenly along each side of the heel, one sc in each stitch along the foot, completing the round.
- Join, fasten off, and repeat process with yellow as you move upward—the sequence is:
- 1 round sc in blue
- 2 rounds dc in blue
- 1 round sc in yellow
- 1 round dc in yellow
Ribbed Cuff:
- With blue, attach at the back and then chain 3.
- Work 1 front post dc, then 1 back post dc alternately around (for ribbing).
- Join at end. Repeat for three rounds for a stretchy finish.
10. Finishing Touches
- Fasten off all threads, weave in ends securely.
- For the tie cord: With yellow, chain until you reach about 35cm (can adjust for preference). Finish off and weave through the cuff.
Conclusions
You’ve now completed a squishy, comfy baby sock with lovely color details and an adjustable tie for the perfect fit. Use your favorite colors to make sets for every occasion—these are sure to be cherished by parents and cozy for babies!
Pro Tip
To avoid visible seams, always join rounds in the top of the chain, not the base of the stitch. Weave in tails while switching colors to save time and keep your work super tidy.




Leave a Reply