Spruce up your space with cozy charm using this free crochet rug pattern that’s perfect for every skill level and bursting with creative fun.
Transforming ordinary yarn into stylish home décor, the artistry of a crocheted rug brings warmth and personality to any living space. This captivating design is growing in popularity, not only for its visual appeal but also for remarkable versatility. Presently, makers are crafting rugs that add a cozy touch underfoot, serve as an eye-catching welcome mat, or accentuate entryways and seating areas.
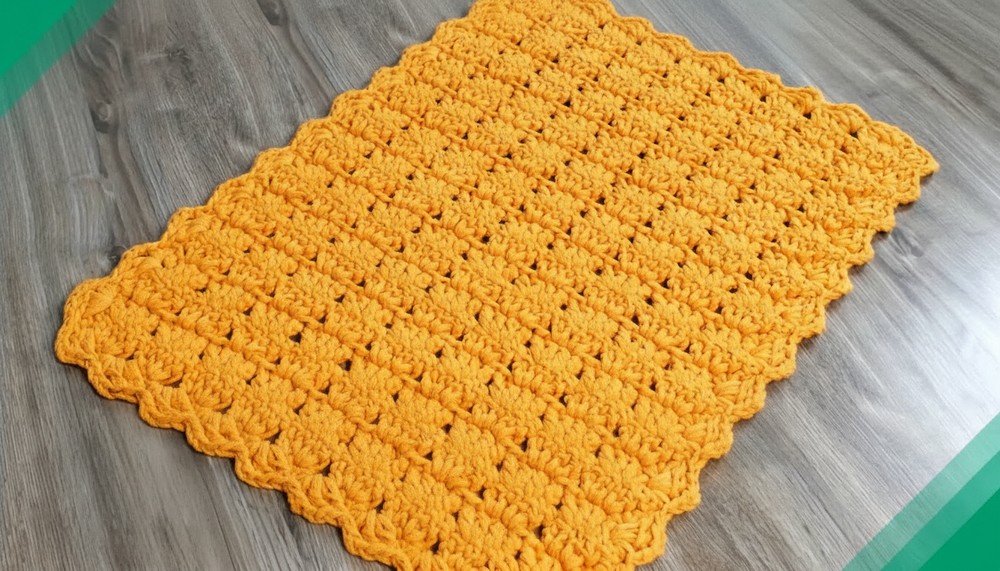
Cozy Crochet Rug Pattern Favorites for Ultimate Comfort

Beyond decorative beauty, such a pattern offers practical benefits, providing comfort, durability, and a customized look that store-bought options simply cannot match. The creative process invites crocheters to experiment with colors, textures, and shapes, resulting in a unique piece that reflects their personal style.
Whether it’s a modern geometric motif or a classic floral design, this rug complements a range of interiors and can be easily tailored to fit specific needs. The delight of crocheting a rug lies in its functionality, aesthetic charm, and the satisfaction of handmade artistry.
Special Features
- Maxi crochet technique with mesh yarn for strength and texture
- Quick one-row repeat for the main body
- Customizable size and adaptable to different yarn weights
- Easy, tidy finishing and sturdy edges
Difficulty Level
Beginner/Easy:
Ideal for crochet beginners and those looking for a straight-forward, satisfying project. Mastering the row and the border empowers you to replicate or adapt for blankets, mats, or runners.
Materials Needed
- Fial Mesh Yarn:
- 1 cone, 700g, color 17 pumpkin (or your choice)
- Note: This is a strip of mesh, not traditional yarn. Provides both thickness and durability.
- Crochet Hook: 7.0 mm (US size K or similar)
- Tapestry Needle: For weaving in and securing ends.
- Measuring Tape: For checking chain and rug dimensions.
- Scissors
Tutor’s Suggestions
- Adapting Yarn/Hook: You may substitute with other thick or thinner yarns. Match your hook size accordingly.
- Measuring Chains: Begin with a chain measuring the width you want (about 43 cm for the sample). Pattern multiples are in 4, so your foundation chain must be divisible by 4.
- Crochet Strip Handling: Hold the mesh strip as shown for easier tension and smoother crocheting.
Pattern Instructions
Step 1: Foundation Chain
- Make a Slip Knot: Leave a tail for sewing in at the end.
- Chain 40: (or another multiple of 4, adjusted for your desired width).
- Confirm Length: The chain should measure approximately 43 cm.

Step 2: Main Body Pattern (Row Repeat)
- Row 1:
- Skip the first 3 chains from the hook (counts as beginning turning chain + 1 space).
- Yarn over, work 1 double crochet (dc) in the 4th chain from hook.
- In the next chain, work another dc (two dc in two consecutive stitches).
- Skip 2 chains at the base.
- In next chain, work:
- 1 dc in each of the next 2 chains.
- Repeat: [Skip 2 chains, dc in each of the next 2 chains] across the row.
- At the end, skip 1 chain and dc into the last chain.

- Row 2 & Beyond:
- Ch 3 (counts as first dc and turning chain).
- Looking at each "group" of four dc from the previous row, skip the first and last dc of each group, and work 1 dc into the 2 center dc.
- Continue this process across the row.
- Finish with 1 dc on top of the turning chain at the end.
- Continue repeating this row until your rug is the desired length (about 60 cm is suggested in the video).
Step 3: Finishing Border
- Begin at One Side:
- Ch 1 and work a single crochet (sc) at the start of the side.
- Ch 3 (counts as turning/space), then dc in the same place.
- Skip one side “row;” in the next, sc, ch 3, dc in the same space.
- Repeat all along the side.
- Corners:
- At the rug's corners, you may need an extra group (sc, ch 3, dc) to keep the edge from pulling in.

- At the rug's corners, you may need an extra group (sc, ch 3, dc) to keep the edge from pulling in.
- Across Ends:
- For the short ends (rug’s length), work a group of (sc, ch 3, dc) into the spaces between the pairs of dc groups, matching your count across both ends.
- Final Join:
- When you reach your starting point, join with a slip stitch into the first chain at the border's start.
Step 4: Weaving in Ends
- Cut yarn, leaving a long enough tail.
- Thread the tail on the tapestry needle and weave through several stitches on the back, changing direction a few times to secure.
- Trim excess.

Uses
- Ideal for entryways, bathrooms, bedrooms, or as a cozy accent for any living space.
- Durable and washable due to strong mesh yarn.
- The technique is adaptable for table runners, placemats, or throw blankets.
Expert Tip
When working with a thick mesh or strip yarn, maintain even tension and always insert your hook under both loops for stability. Crochet more smoothly by holding the fabric as shown—this helps you pull the thick yarn through without excessive tugging.
Conclusion
You’ve created a robust and attractive crochet rug using a beginner-friendly method. With only a one-row main repeat and a simple, decorative edge, you can easily adapt this pattern for different spaces and occasions. Let your creativity flow by experimenting with colors or adjusting stitches for unique effects.


Leave a Reply