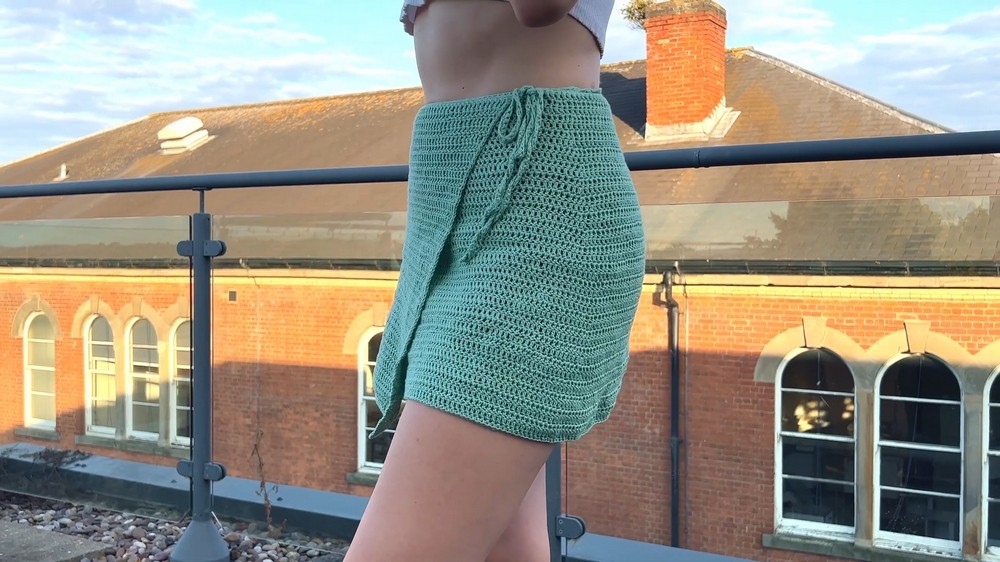
Step out in style and comfort with this Free Crochet Wrap Skirt Pattern that's perfect for adding fun and easy piece to your summer wardrobe.
You can create a stylish and comfortable garment with just yarn and a crochet hook, and the crochet wrap skirt pattern is a perfect example. This pattern is simple to follow and lets you adjust the skirt to fit perfectly by tying it as snug or loose as you like. The versatile wrap style makes it ideal for layering over swimwear, pairing with casual tops, or wearing for evenings out in the summer.
Statement Crochet Wrap Skirt Pattern for Bold and Unique Style

Beginners find it easy because the design uses basic stitches and straightforward steps. With the crochet wrap skirt pattern, you can pick any yarn color or type to suit your taste, making a skirt that is uniquely yours.
The finished skirt looks neat and elegant but remains practical and comfortable to wear. Thanks to its soft drape and adjustable fit, this handmade piece quickly becomes a favorite in any wardrobe, offering both beauty and everyday usefulness.
Materials Needed
- Yarn: Your choice (shown: Paintbox Cotton 4-ply, “Mint Green”, Medium uses 4 balls)
- Crochet hook: 3.5 mm
- Two stitch markers
- Tapestry needle
- Scissors
Special Features
- Fully adjustable wrap style
- Wide, sturdy waistband strap with tie closure
- Simple double crochet body with gentle shaping for hips
- Clean single crochet border for a professional finish
- Lightweight and customizable for any length or body type
Level of Difficulty
Beginner-Friendly
If you know how to make chains, single crochet, and double crochet, you can complete this project with ease!
Tutor’s Suggestions
- Try the waistband/strap length around your waist before starting the skirt body to ensure the perfect fit.
- Use stitch markers to accurately place hip increases and overlap points.
- Make sure to overlap the skirt front for secure coverage.
- Weave in ends neatly for the most comfortable and elegant finish.
Uses
Perfect as a poolside cover-up, summer skirt, or as a stylish handmade gift. The classic wrap style is flattering and versatile for many occasions.
Step-by-Step Pattern
1. Waistband Strap
- Start with a slip knot.
- Chain a long length to wrap around your waist and allow for a bow tie. For size M, chain about 346 (adjust as needed).
- Wrap the chain around your actual waist to check length. Add or remove chains if needed.
- Row 1: Work single crochet in each chain all the way across.
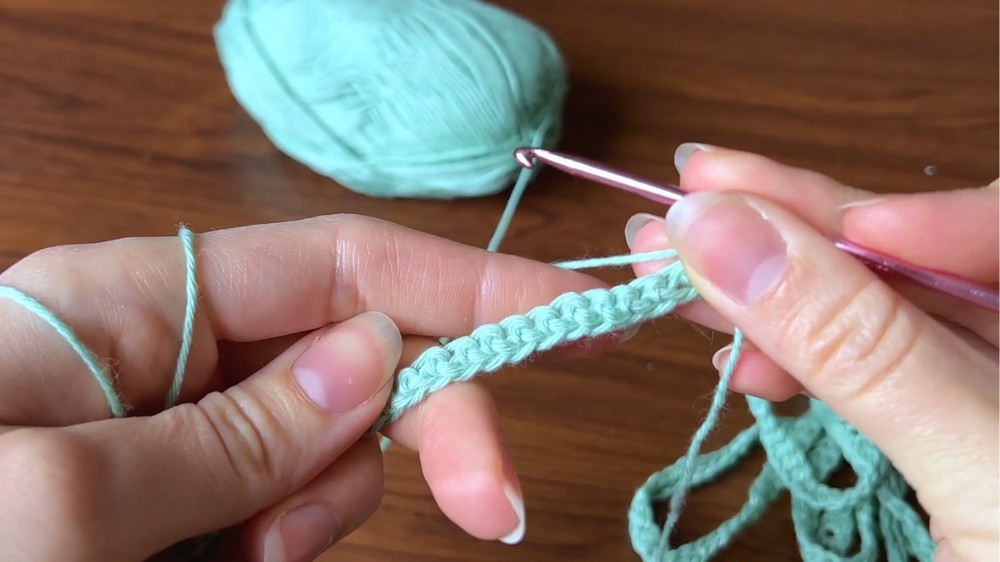
- Row 2: Chain 1, turn, and single crochet in each stitch again for a sturdier strap (optional if using thicker yarn).
- Fasten off and cut yarn. The waistband/strap is complete.
2. Mark Skirt Placement
- Wrap the strap around your waist.
- Use stitch markers to mark the section where your skirt will start and end. Remember to allow for overlap at the front so the skirt wraps nicely.
- The larger overlapping part will go around your waist and tie, while the shorter end forms the other side and the bow.

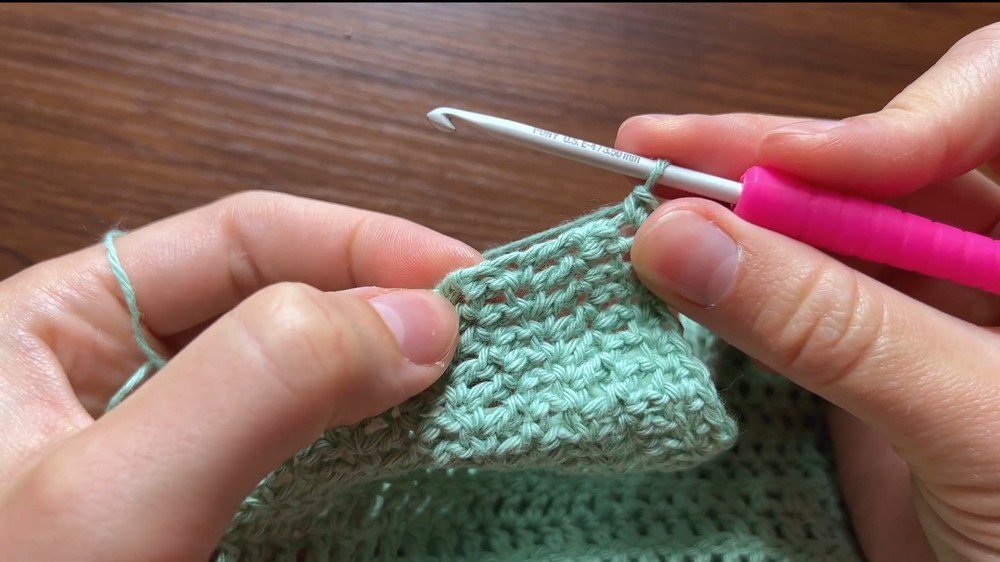
3. Main Skirt Panel
- Attach yarn at the first stitch marker.
- Chain 2 (acts as first double crochet), then double crochet in each stitch across to the second stitch marker.
- Next Rows: For the skirt’s shaping, you’ll increase at the hip points:
- Try on your skirt-in-progress.
- Place stitch markers where your hips are—these are your increase points.
- For every row, double crochet to the stitch marker, then work two double crochets in the marked stitch (increase), replace the marker in one of the new stitches, then continue across. Repeat for the second hip marker.
- Double crochet to the end of the row.
- Repeat: Work double crochet back and forth, always increasing at the hip points, until your skirt reaches the desired length. (Sample: 42 rows; you can make yours longer or shorter.)
- Fasten off.
4. Edging
- Attach yarn to the bottom edge or one of the corners.
- Work a single crochet edge:
- Along the bottom edge, work a single crochet into each stitch.
- At the corners, work 2 single crochets into the same stitch to turn smoothly.
- Along the sides, single crochet into the gaps (space between rows)—about one single crochet per gap.
- Continue edging along all sides of the skirt (except the waistband/strap).
- Fasten off and cut yarn.
5. Weaving in Ends
- Use a tapestry needle to weave in any yarn tails.
- For a neat finish, hide ends by threading them through the stitches of the waistband or skirt edge.

Conclusion
You’ve finished your breezy crochet wrap skirt! With its simple structure and sleek finish, it’s sure to become a summer staple. Enjoy customizing your creation with different yarns or adding length as you like.
Pro Tip
Always overlap your skirt generously when marking the start and end with stitch markers—this ensures coverage and a secure, comfortable wrap.


Leave a Reply