
Step into stylish comfort with this Crochet Blouse with Sleeves Pattern perfect for breezy days, effortless fashion, and playful layering.
Are you looking for a blouse that combines comfort, style, and a personal touch? This crocheted blouse with sleeves might be the perfect addition to your wardrobe. The design features a soft texture and simple stitched patterns, making it ideal for everyday wear or special occasions. You can customize the length of the sleeves or the body to fit your style and needs, ensuring a look that’s uniquely yours.
Flowy Crochet Blouse with Sleeves Pattern with Airy Comfort

The pattern is beginner-friendly yet still engaging for experienced crocheters, making the creative process enjoyable for everyone. Lightweight and comfortable, the blouse layers easily with other pieces, which means you can wear it in any season.
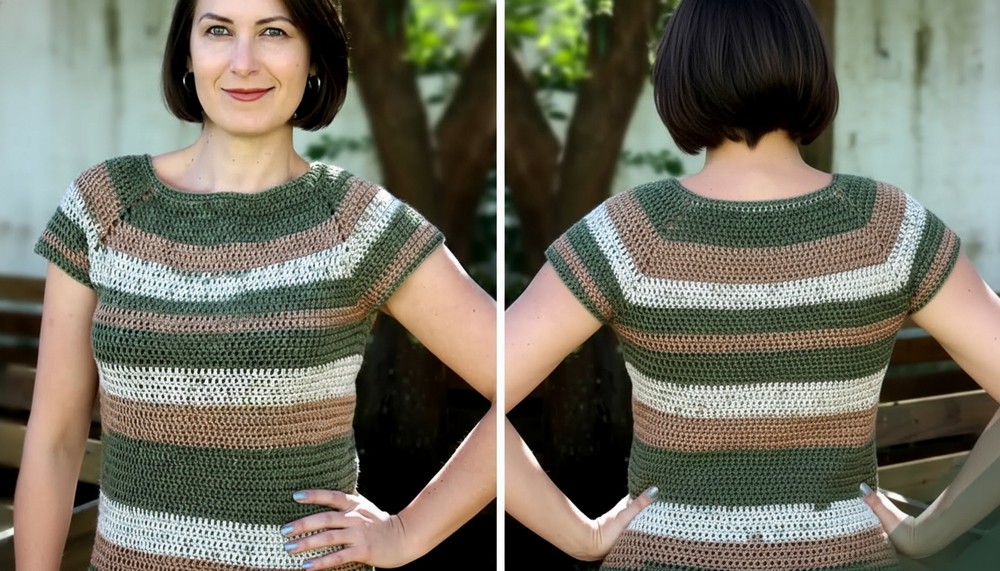
It also makes a thoughtful, heartfelt gift for friends or family members who appreciate handmade clothing. Whether you’re crocheting for yourself or a loved one, you’ll enjoy both making and wearing this versatile, attractive top that’s bound to receive compliments every time.\
Special Features
- Seamless top-down construction
- Adjustable sleeve length – easily turn into ¾ or long sleeves
- No visible seam line
- Soft, anti-pilling yarn for durability
- Beginner-friendly with step-by-step division for sleeve/body shaping
Difficulty Level
Beginner/Advanced Beginner
If you can crochet chains and double crochets (US terms), you can make this blouse!
Uses
- Perfect for casual wear, layering, or as a handmade gift
- Easily adaptable for tunics, dresses, or various sleeve lengths
Materials
- Yarn: 3 skeins of Coats Yarn Cake (100% anti-pilling acrylic, TEX 390, 250m/100g, Color 00022)
- Hook: 4 mm crochet hook
- Tapestry needle (No. 7) for finishing
- Scissors
- Measuring tape
- Stitch markers (optional)
Pattern Instructions
Step 1: Foundations
- Measure the Head Circumference:
Use your (or recipient’s) head circumference for a comfortable neck opening. - Chain Foundation:
Crochet a foundation chain that matches the measured circumference (for reference, 55 cm = 96 chains in the tutorial).- Tip: Make sure the total number of chains is divisible by 6.

- Tip: Make sure the total number of chains is divisible by 6.
- Join to Form a Circle:
Join with a slip stitch in the first chain, ensuring your foundation ring isn’t twisted.
Step 2: Yoke (Top/Shoulder Shaping)
- First Round:
- Start with 3 chains (counts as a dc), then 2 chains (for corner space).
- Work 32 double crochets for the front.
- Mark your corners!
After each major section, make 2 chains for the corners. - Next, work 16 double crochets (side).
- Repeat the corner and section division again: 32 for the back, 16 for the other side.
- At each “corner,” insert the 2 chain spaces between sections.
You should have a rectangular “yoke” divided as: 32 (front), 16 (side), 32 (back), 16 (side).
- Successive Rounds (Rounds 2-16):
- At each corner (where there are 2 chain spaces), always work (1 dc, 2 ch, 1 dc) into the space to create increases.
- Crochet a double crochet in each stitch between the corners.
- Continue until you have at least 16 total rounds or about 17 cm in depth.
- Try-on tip: Make sure yoke depth allows a comfy sleeve opening. Measure on arm or against desired fit.

Step 3: Dividing for Sleeves/Body
- Joining for Sleeves:
- At the start of a new round, crochet up to the first corner. Fold the yoke, bring corresponding front and back corners together, and join with a slip stitch (or sc) to create the sleeve opening.
- Repeat on the other side.
- Now, you will work only around the “body loops,” separating sleeves from the main body.
Step 4: Body
- Continue in Rounds:
- Work 1 double crochet in each stitch for the body.
- To keep the join invisible, use Ju’s method:
- At the end of every round, close with a slip stitch into the first dc (not the chain).
- Begin each round with 2 chains, then 1 dc in the same place—this helps hide the seam.
- Work until you reach your desired length (the demo blouse is 30 cm after armhole division).
- Final Row (Optional):
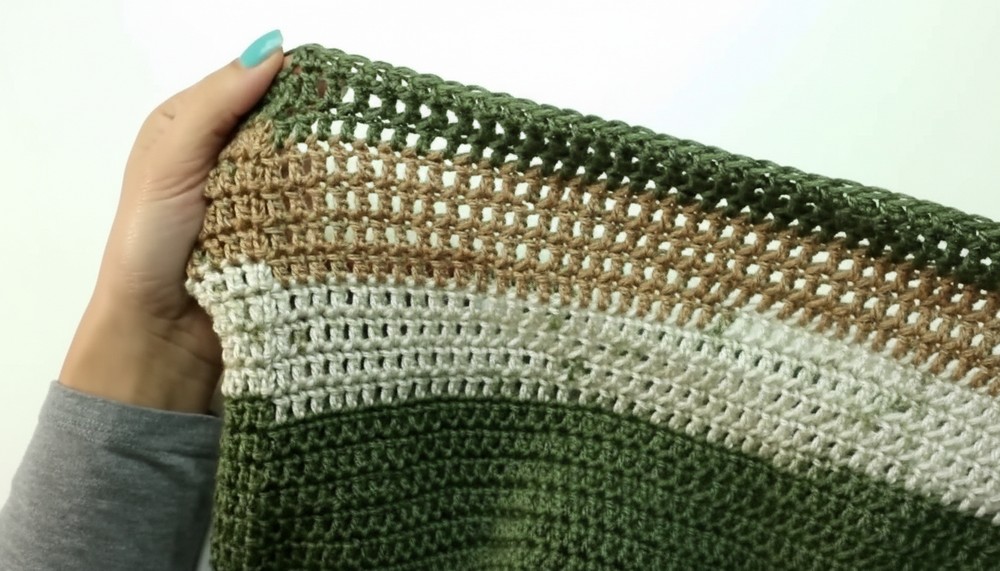
- For a neat edge, finish with one round of half-double crochet (US hdc).
- Fasten off, and weave in ends with the tapestry needle.
Step 5: Neckline & Sleeves Finishing
- Neckline (optional):
- Work around the neckline with one round of hdc for a polished edge.
- Use your tapestry needle for a flawless finish.
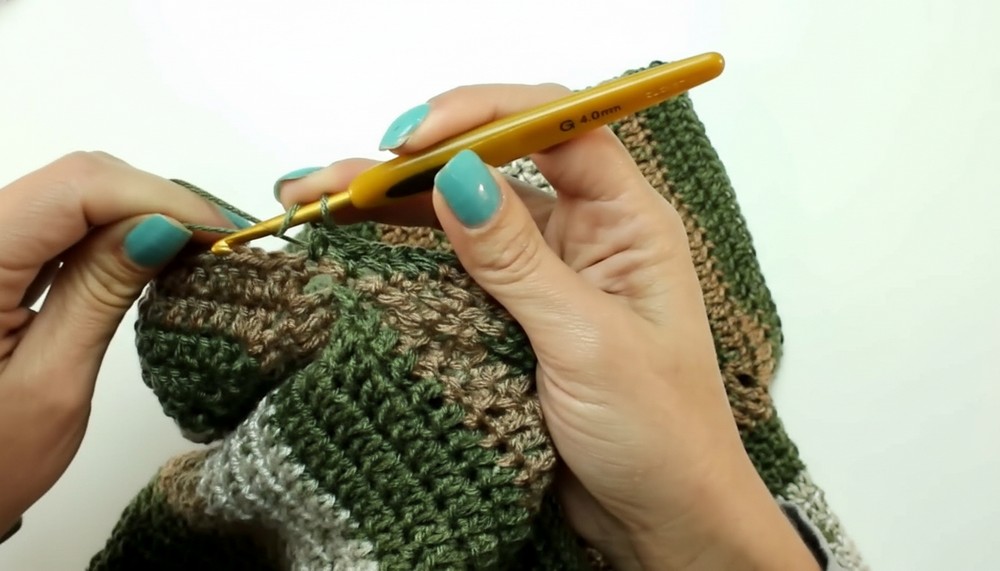
- Sleeve Edging:
- For each sleeve opening, start at the underarm.
- Crochet a round of hdc, tightening any gaps, then fasten off and weave in ends.
Tutor’s Suggestions
- Adjustments:
Add more body or sleeve rounds for tunic/dress length or long sleeves. - Fit Check:
Try on your yoke and measure at key steps for a custom fit. - Decorative Options:
Add lace or a different edging for a unique touch.
Pro Tip
To make your seams nearly invisible, always close your round with a slip stitch to the first stitch (not the chains) and begin the next round with 2 ch + dc in the same spot. This hack keeps the seam flat and professional!
Conclusion
This easy crochet blouse is a must-try for anyone wanting to expand their garment-making skills without fuss. Its seamless yoke, neat finishes, and beginner-friendly instructions make it a wardrobe winner.




Leave a Reply