
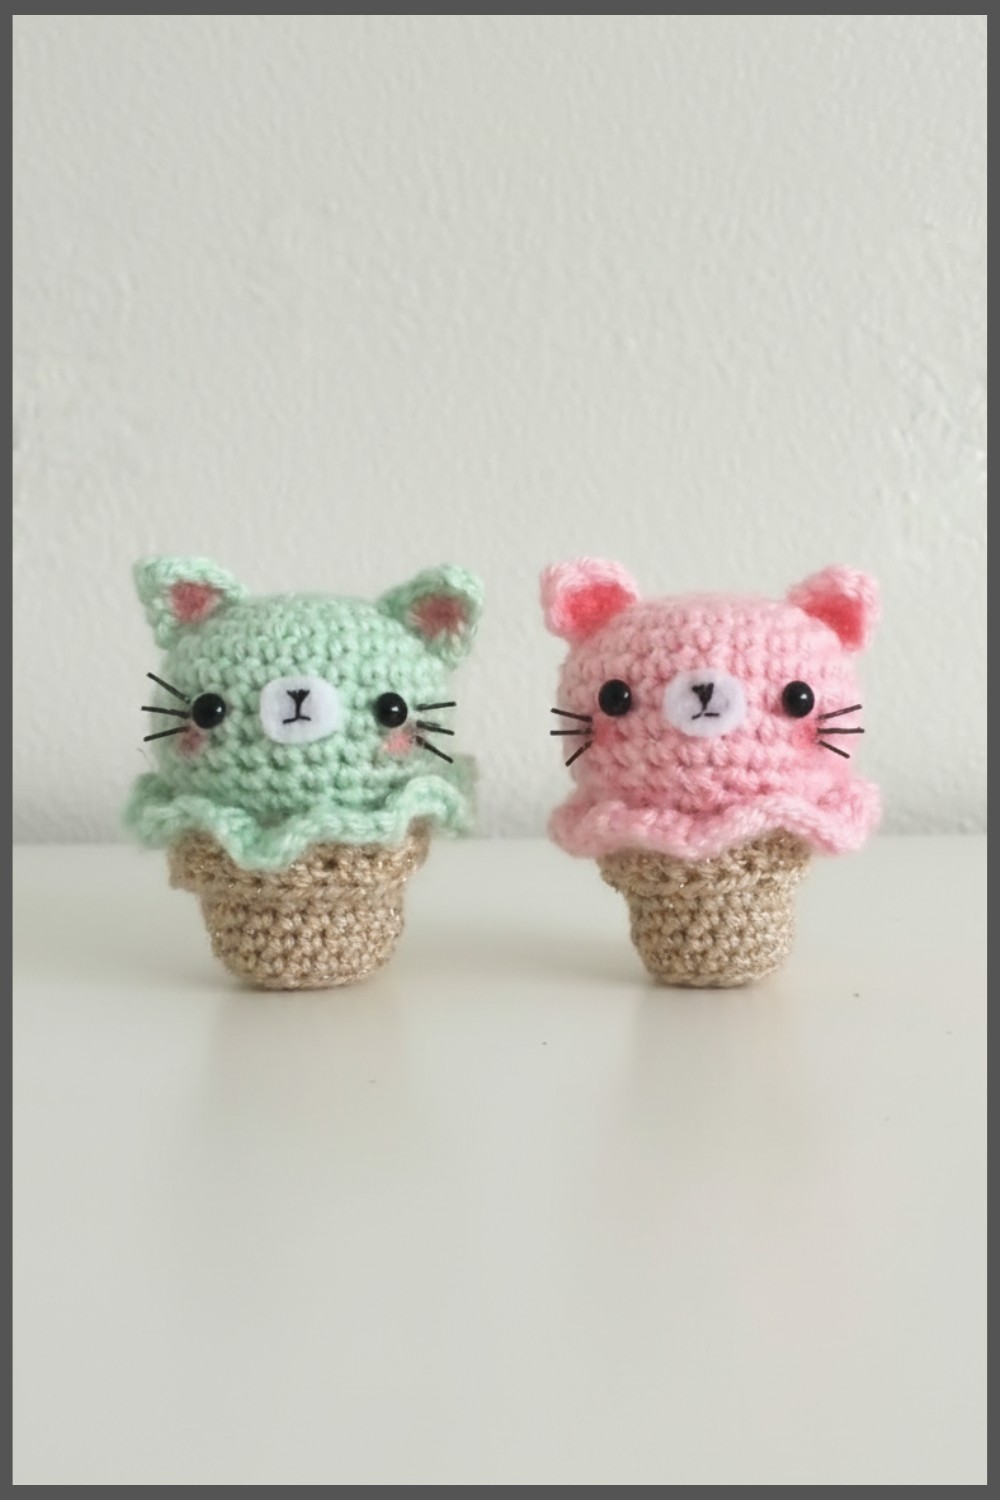
Fresh Crochet Kitty Ice Cream Pattern Perfect for Room Corners
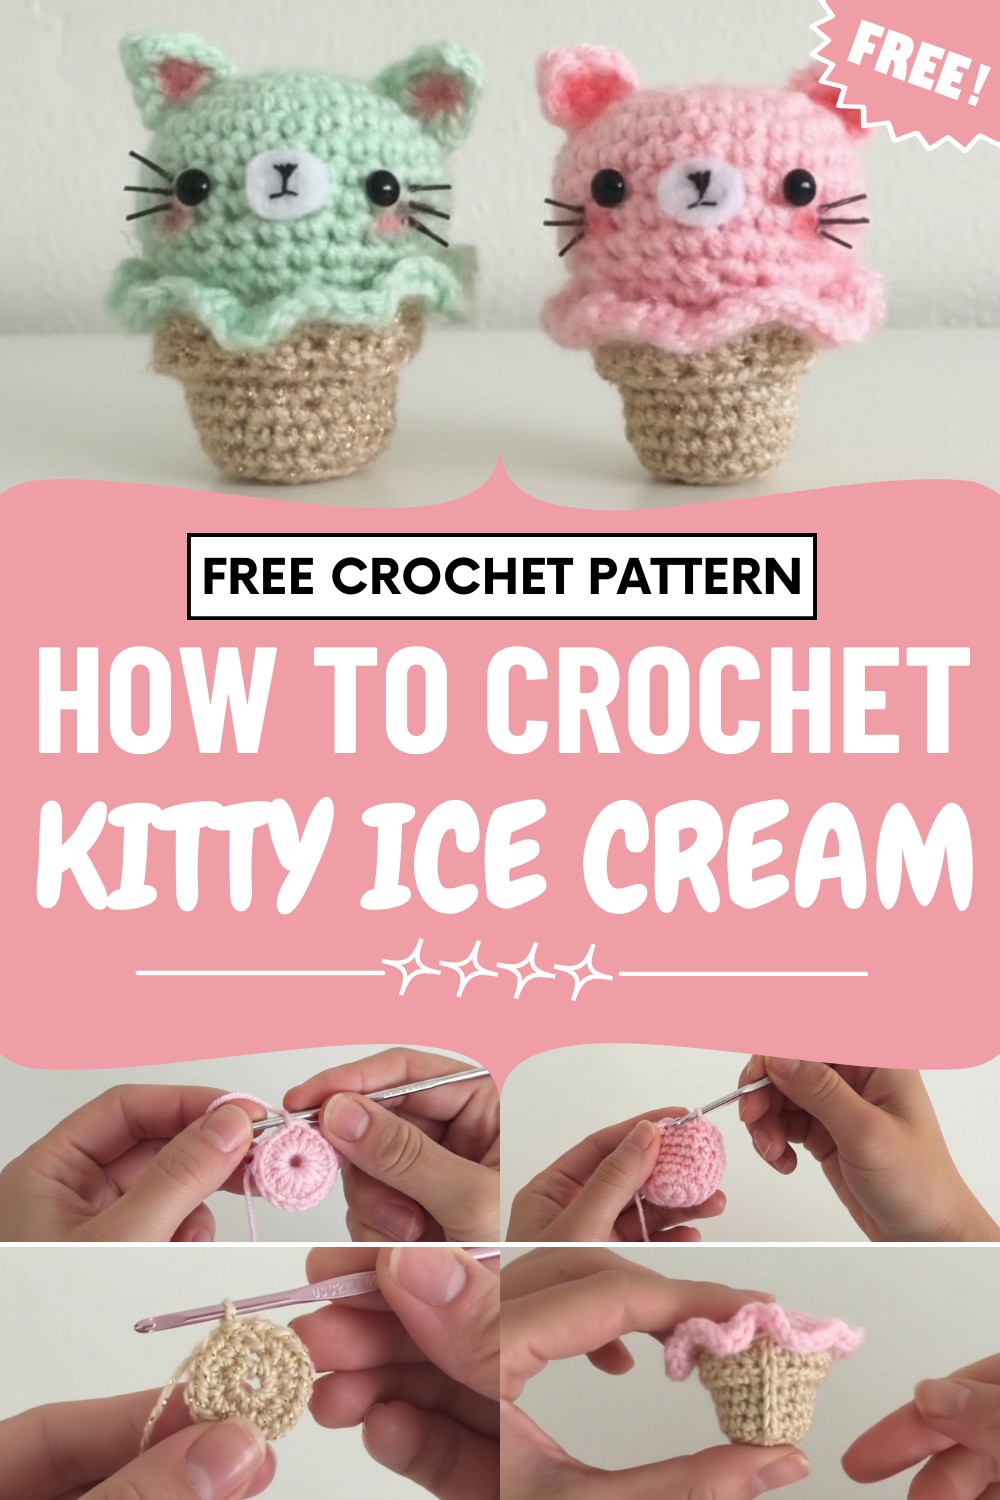
Children love to play with this soft friend; adults can display it as a cheerful reminder of fun and creativity. The easy steps and basic stitches make it possible for anyone, even beginners, to create this joyful project.
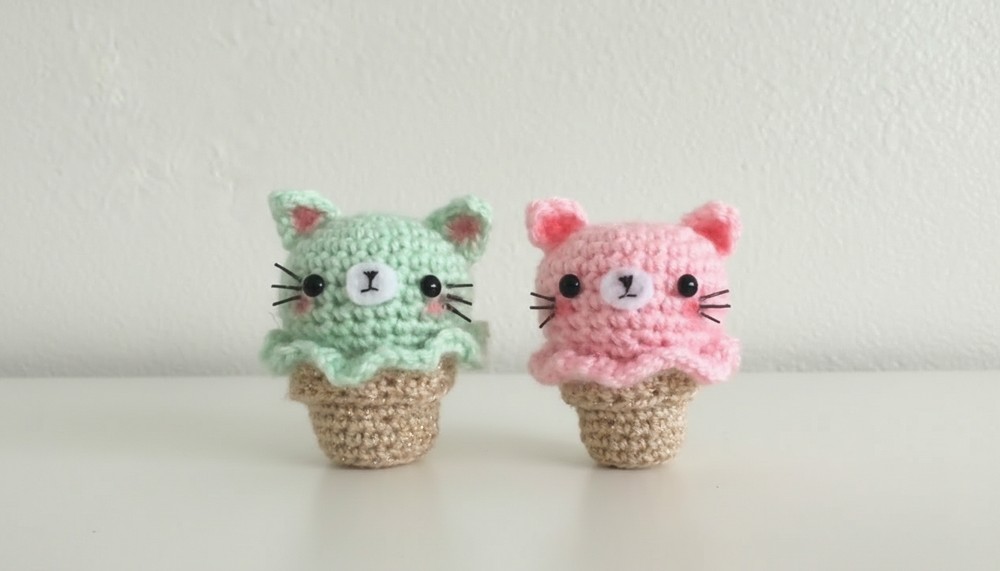
Its best feature is the way it combines two things people love—kittens and ice cream—into one unique, eye-catching design that never fails to make people happy.
Crochet Kitty Ice Cream Cone Pattern
Materials Needed
- Yarn: Worsted weight acrylic yarn or cotton yarn in desired “ice cream” color (e.g., pink) and “cone” color (e.g., tan)
- Hook: 2.75 mm crochet hook (or similar size of your preference)
- Stuffing: Polyester fiberfill or similar
- Felt: Small scrap of white (for face)
- Sewing Thread: Black (for nose and mouth)
- Plastic Safety Eyes: Small size, or use embroidery/yarn if preferred
- Blush: Pink or red eyeshadow/makeup
- Hot Glue Gun: For quick, secure assembly (optional—can sew pieces instead)
- Scissors
- Optional: Fabric paint for details, black plastic sticks or polymer clay for whiskers
Key Abbreviations
| Abbreviation | Meaning |
|---|---|
| MR | Magic Ring |
| ch | chain |
| sc | single crochet |
| inc | increase (2 sc in 1 st) |
| dec | decrease (sc2tog) |
| sl st | slip stitch |
| st(s) | stitch(es) |
| BLO | back loop only |
| FLO | front loop only |
| FO | fasten off |
| rep | repeat |
Step-by-Step Pattern
1. Ice Cream Top (Kitty’s Head)
With “ice cream” color yarn:
- Form a Magic Ring (MR).
Ch 2 if MR is difficult for you. - Round 1: 6 sc in MR. (6 sts)
- Round 2: inc in each st around. (12 sts)
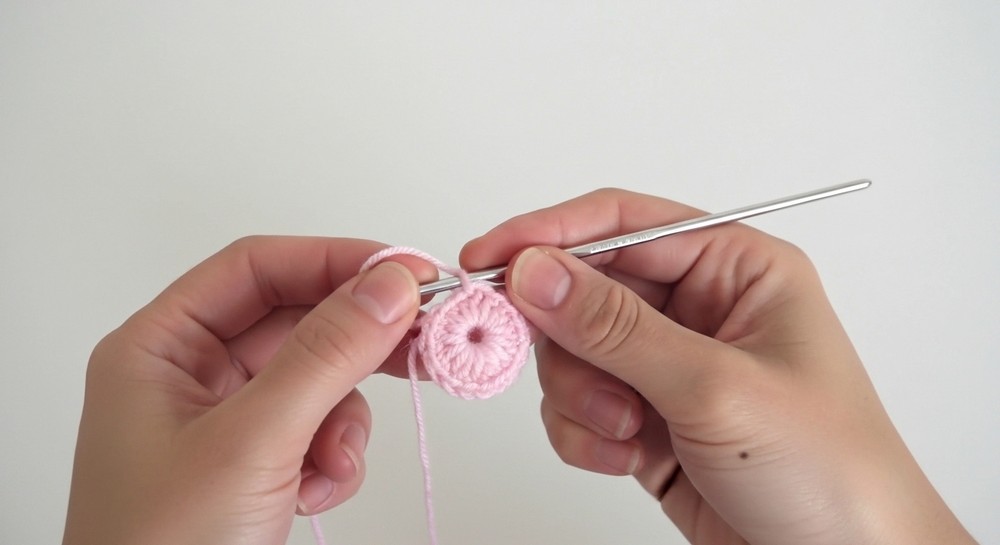
- Round 3: (sc, inc) rep around. (18 sts)
- Round 4: (2 sc, inc) rep around. (24 sts)
- Round 5: (3 sc, inc) rep around. (30 sts)
- Rounds 6-9: sc in each st around. (30 sts)
- Round 10: (3 sc, dec) rep around. (24 sts)
- Round 11: (2 sc, dec) rep around. (18 sts)
- Round 12: (sc, dec) rep around. (12 sts)
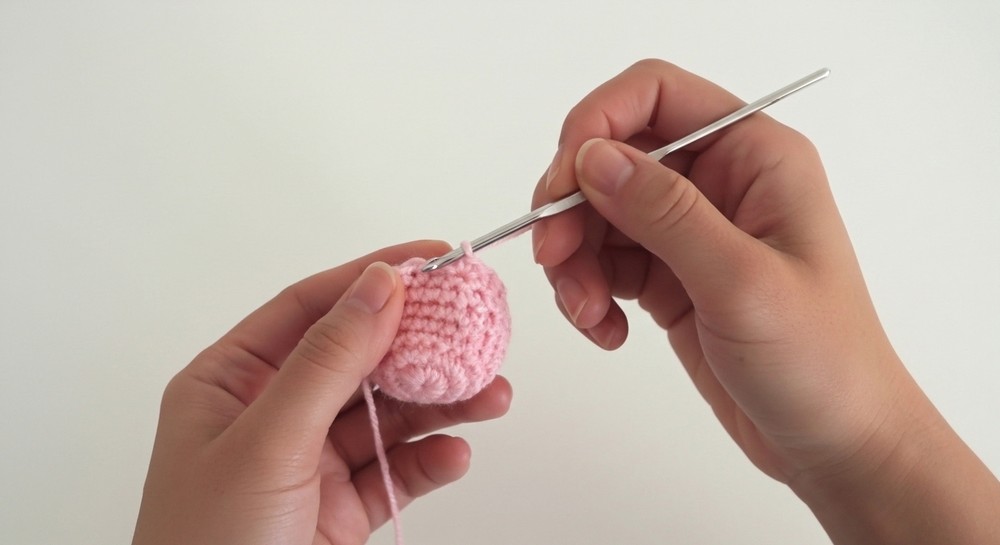
- Stuff firmly with fiberfill.
Tip: If making a double scoop, repeat this part!
- (Optional: Don’t close off the bottom if attaching to cone as per video. If finishing the head, continue...)
- Round 13: dec around. (6 sts)
FO, weave tail through final stitches and pull tight.
Leave a large opening for attaching the cone.
2. Ice Cream Cone
With “cone” color yarn:
- Make a Magic Ring, ch 2 or create a small circle as in video.
- Round 1: 6 sc in MR (or circle). (6 sts)
- Round 2: inc in each st around. (12 sts)
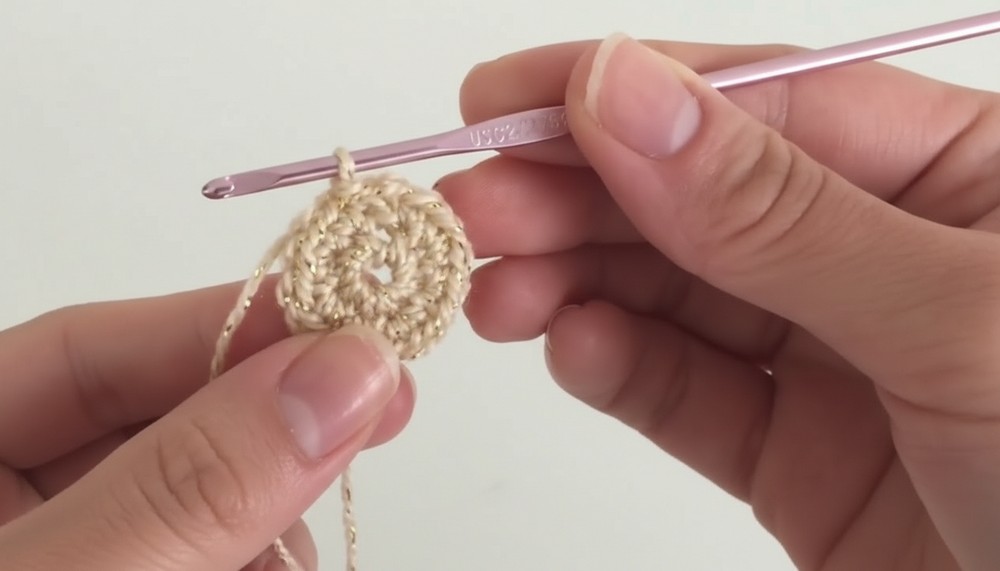
- Round 3: BLO, sc in each st around to create a 90° angle for the cone rim. (12 sts)
- Rounds 4–7: sc in each st around to build cone sides (suggest 4 rounds for a short, stubby cone). (12 sts)
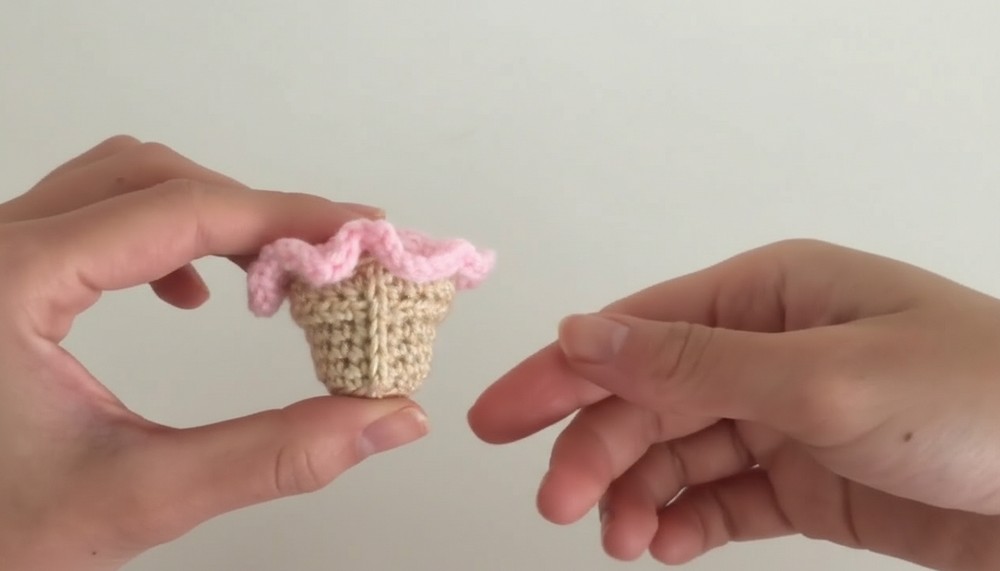
- Round 8 (the rim): FLO, (sc, inc) in each st around to create a frilled cone edge.
For a wavier edge, increase the number of increases per stitch. - Round 9: BLO, sc in each st around. (12 sts)
FO, leave a long tail for sewing.
3. Ice Cream Drip and Assembly
- With “ice cream” color yarn: Attach at cone rim.
- (Optional)
- Round 1: Work around cone rim, placing 2–3 sc in each stitch for wavy drip effect.
- FO, weave in end. - Stuff the cone and stitch or hot glue the ice cream head to the cone.
- Add stuffing where needed before full closure.
4. Kitty Ears (make 2)
With “ice cream” color yarn:
- Make a MR, ch 1.
- 2 sc in MR, ch 1, turn.
- 2 sc in next st, FO, leave a tail for sewing.
- Shape slightly into triangles and attach to top of head with glue or stitches.
5. Face Details
- Cut a small oval of white felt.
- Embroider: Use black sewing thread to stitch nose and mouth onto felt.
- Eyes: Attach small safety eyes or sew/paint them on.
- Blush: Dab pink/red eyeshadow or real blush under eyes.
- Whiskers: Attach black plastic sticks or use black yarn/thread; glue or stitch in place.
Customization Ideas
- Vary yarn colors for different flavors (mint, vanilla, chocolate).
- Use cotton yarn for a matte look, or acrylic for extra fluff.
- Experiment with face styles: sleepy, smiling, winking.
- Make “toppings”—crochet tiny cherries or sprinkles.
- Vary cone shape: experiment with pointy or rounded bases.
Special Notes
- Maintain consistent tension for a neat shape.
- Use a slightly smaller hook than recommended for tight stitches (prevents stuffing from showing).
- Hot glue is fast for attaching parts but sewing gives a more secure finish.
Conclusion
This adorable crochet kitty ice cream cone is perfect for gifts, desk decor, or as a cute toy. The easy pattern invites creative embellishments and is suitable for confident beginners and experienced crocheters alike.
Pattern Correction & Tips
- Correction: The video sometimes refers to “chains” instead of “single crochet.” Be sure you’re making sc for body rounds.
- Tip: If you find the “magic ring” difficult, begin with 2 ch and work into the first ch instead.
- Tip: To make your cone more stable, you can insert a small piece of cardboard at the bottom (optional).



Leave a Reply