
Show off your style with this Crochet Granny Square Bag Pattern and enjoy a colorful, versatile, and charming accessory for every occasion.
Lightweight Crochet Granny Square Bag Pattern for Daily Adventures
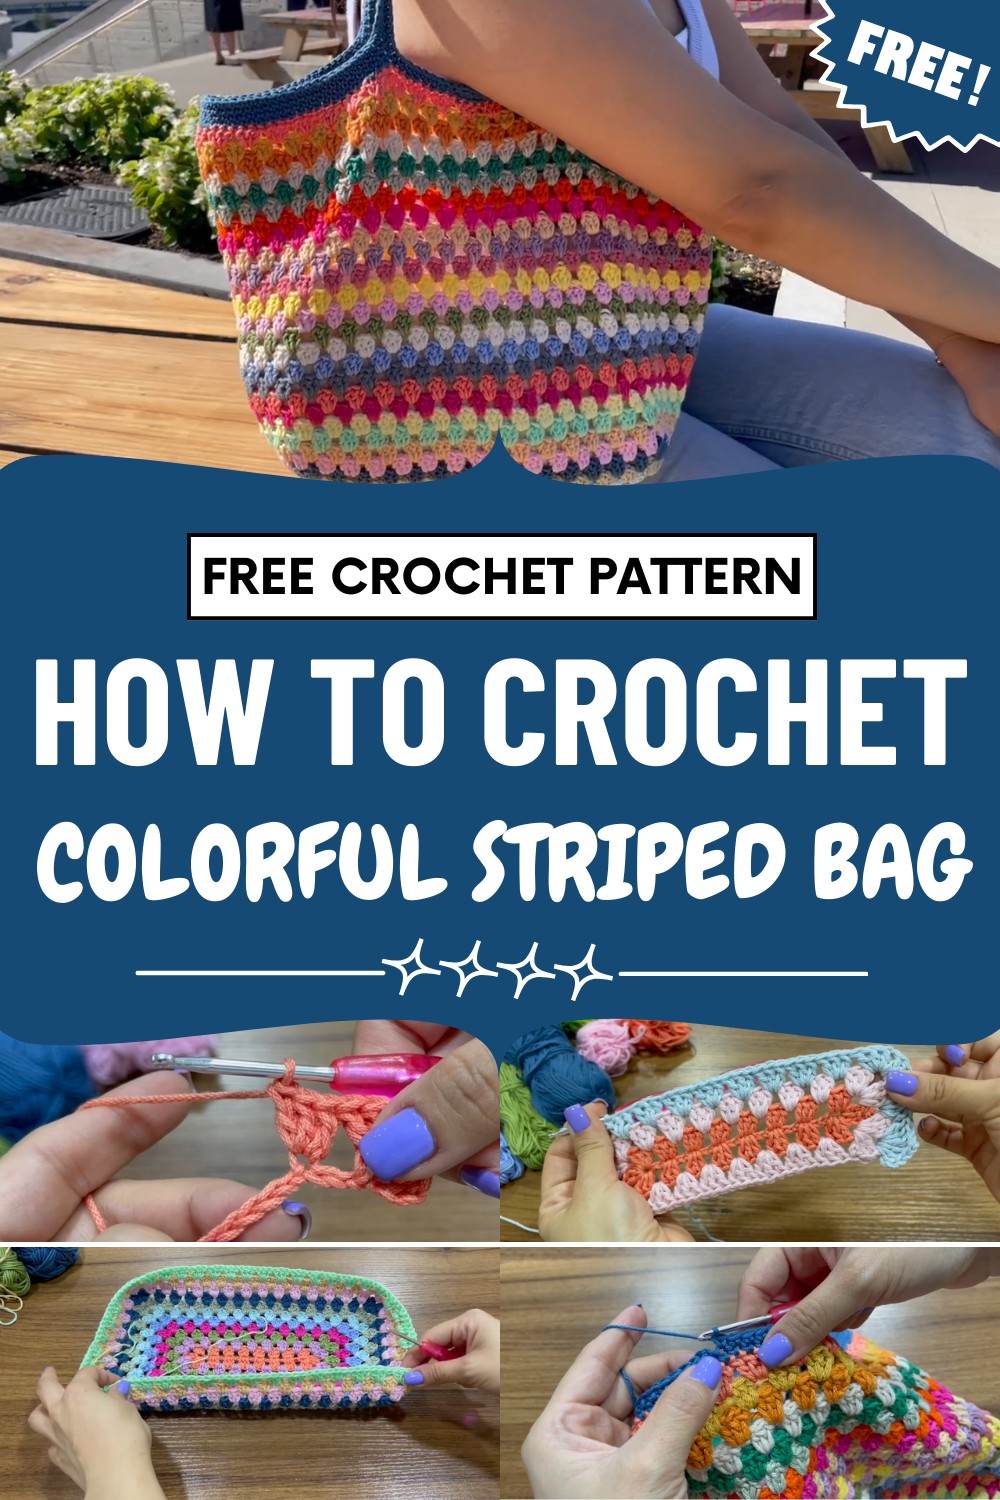
The finished bag is long-lasting, easy to care for, and can be used again and again, giving a simple and eco-friendly alternative to store-bought bags. Stylish and handy, it goes well with many outfits and occasions.
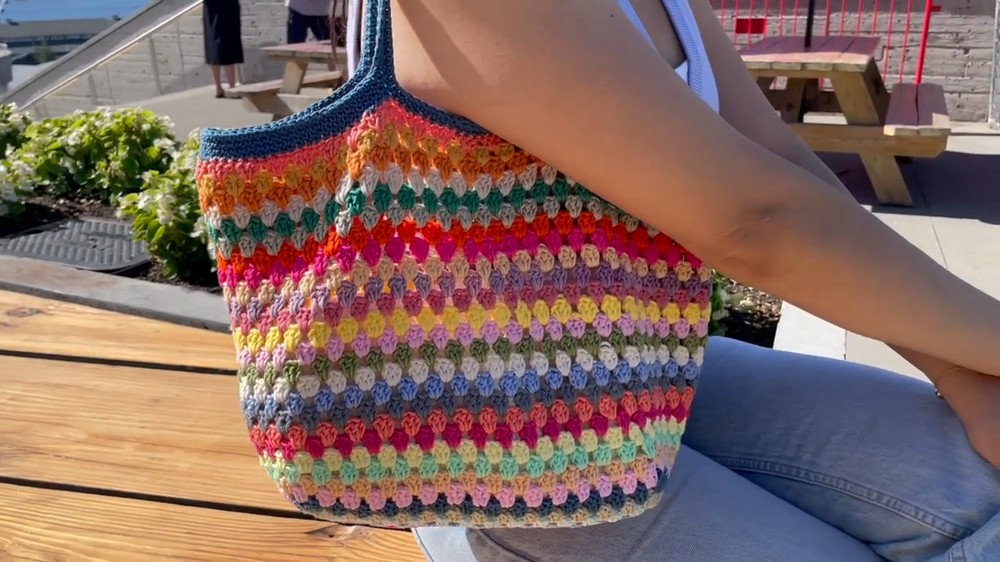
With its mix of beauty and usefulness, this bag turns simple yarn into a piece that brightens everyday looks and adds a touch of lasting charm to your wardrobe.
Special Features
- Rectangular base using Granny Stitch
- Colorful, customizable stripes
- Sturdy handles integrated into the bag
- Fully seamless, worked in the round from base upward
- Ideal project for leftover yarns
Level of Difficulty
This pattern is suitable for confident beginners with basic knowledge of chaining, single crochet, double crochet, and working in the round.
Tutor's Suggestions
- Size adjustments are easy: simply add more rounds to the base for a larger bag, or fewer for a smaller one.
- Use up your leftover yarns for a colorful effect.
- Change colors at the start of each round for vibrant stripes.
Uses
Perfect for:
- Daily errands
- Beach trips
- Craft tote
- Gifting to friends and family
Materials
- Yarn: 200g 100% cotton (approx. 2 mm thick; leftovers are great!)
- Hook: 3 mm
- Stitch markers (optional, for handles)
- Scissors
- Yarn needle (for weaving in ends)
Step-by-Step Pattern
1. Make the Base
A. Foundation Row
- Make a slip knot.
- Chain 24.
B. First Row (Granny Stitch starts)
- Chain 3 (counts as first double crochet).
- In the 4th chain from hook, work 2 double crochets (dc). This forms your first "group of 3 dcs".
- Mark this as the first corner.
C. Make First Corner
- Chain 2 (corner space).
- In the same chain: work 3 dcs.

D. Form Rectangle Sides
- Skip 2 chains, in the next one: 3 dcs in the same chain.
- Repeat the above step across until you have 3 chains remaining at end.
E. Second Corner
- Skip 2 chains, in the last chain:
- Work 3 dc, ch 2, 3 dc (second corner formed).
F. Round the Corner
- Chain 2 (for next corner).
- In the same space: 3 dc.
G. Work Along Opposite Side
- Repeat: skip 2 chains, in the next chain: 3 dc.
- Continue until 3 chains remain.
- In the last chain: 3 dc, ch 2, join with a slip stitch to top of first ch-3.
- Cut yarn, pull to close.

2. Building the Base (Rounds 2–8)
- Insert hook in any corner (2-ch space).
- Join new color.
- Corner: ch 3 (counts as a dc), 2 dc, ch 2, 3 dc all in corner.
- Next corner: In 2-ch space, work 3 dc, ch 2, 3 dc.
- In spaces between groups: 3 dc each.
Continue as follows:
- In each corner, work 3 dc, ch 2, 3 dc.
- In each side space, work 3 dc.
- At end of round, join with slip stitch to top of beginning ch-3.
- Change colors every round (optional).
- Continue until you have about 8 rounds (or your chosen base size). Example measurements: 27x15 cm.
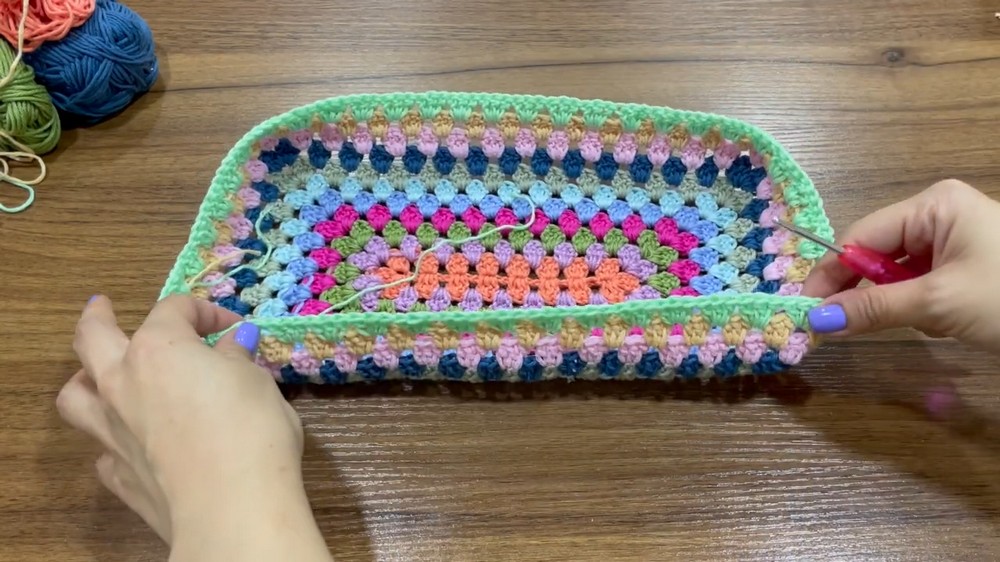
3. Building the Body (No More Increases)
- Start in any ch-2 space. Join a new color if desired.
- Ch 3, 2 dc in same space (only 1 group of 3 dc, not forming corners).
- In every space between groups: 3 dc.
- Continue in this manner, joining with a slip stitch at the end of each round.
- Work 23 rounds total for approx. 23 cm height (folded bag: 23x40 cm).
4. Forming the Handles
A. Single Crochet Edge
- Fold bag in half to locate sides.
- Join yarn at the side.
- Ch 1, work 1 single crochet (sc) in each stitch around the top.
- Join with slip stitch to first sc.
B. Mark Handle Placement
- Place markers:
- Measure 13 cm from each side to place the handle beginnings.
- Mark points on front and back of bag (4 markers total).
C. Creating Handles
- Start at first marker: single crochet to the marker.
- At marker: work 1 sc, then chain sufficient chains for desired handle length (e.g., 50 ch = 32 cm).
- Skip to next marker, sc into that marked stitch.
- Continue sc to next pair of markers, repeat for second handle.
- Finish round with single crochet.
D. Reinforce Handles
- Next round: sc in every stitch and every chain (including handle chains).
- Repeat for a total of 2 rounds to reinforce.

5. Finishing
- To reinforce handles further, join yarn at bottom of each handle and sc along the inside of the chain (optional).
- Finish by joining with a slip stitch, cut yarn, and weave in ends.
Conclusion
Enjoy your new colorful crochet bag! Its compact yet spacious design and durable cotton construction make it suitable for everyday use. Customize it with your favorite leftovers and color combinations to suit your style.
Tip
To keep your bag sturdy and neat, tighten your single crochet stitches when working around the handles–this helps prevent stretching and adds durability.




Leave a Reply