
Top off your sunny looks with this Free Crochet Daisy Bucket Hat Pattern that's perfect for cheerful and stylish summer outfits for beach.
Fresh Crochet Daisy Bucket Hat Pattern Bringing Joy to Every Stitch

The design allows choice in colors, daisy sizes, and brim style, so every hat feels unique and personal. Working on this project is relaxing and rewarding, enhancing focus, patience, and crochet skills while producing a chic wearable piece.

The finished hat is durable, easy to care for, and versatile enough to elevate dresses, casual wear, or summer ensembles. The Crochet Daisy Bucket Hat Pattern transforms simple yarn into a sophisticated accessory that blends beauty, practicality, and handmade elegance, adding a timeless touch to any wardrobe.
Special Features
- Unique Construction: Made with five daisy granny squares and a daisy pentagon for a playful, modular look.
- Customizable Colors: Choose your favorite color palette for the centers, petals, and borders.
- Structured Fit: The grannies provide a comfortable yet stylish shape, while the shaped brim helps shield from the sun.
Level of Difficulty
Adventurous Beginner to Intermediate:
Familiarity with basic stitches, magic rings, working in rounds, and joining motifs will be helpful, though clear instructions support newer crocheters too.
Tutor's Suggestions & Uses
- Experiment with Colors: Pick contrasting or pastel shades for vibrancy or a vintage vibe.
- Great Gift: Makes a fun gift or a playful addition to festival, vacation, or everyday outfits.
- Adaptable Size: Adjust motif size for kids or adults (see notes in the pattern).
Materials Needed
- Worsted weight (category 4) yarn in three colors (e.g., yellow for centers, white for petals, blue for backgrounds)
- 3.0 mm crochet hook
- Yarn needle
- Scissors
Pattern Instructions
1. Making Daisy Granny Squares (Make Five)
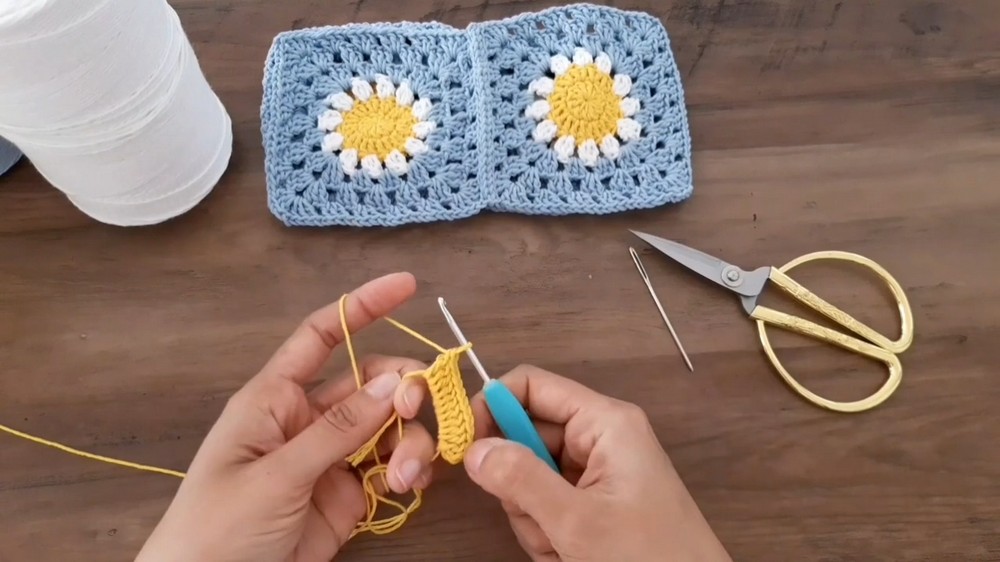
A. Daisy Centers
- With yellow yarn, make a magic ring.
- Chain 3 (counts as 1 double crochet).
- Work 11 double crochets into the ring. (Total: 12 stitches with chain 3).
- Close the ring by pulling tight.
- Slip stitch into the 3rd chain to close the round.
B. Creating Petals
6. Attach white yarn into any stitch.
- Chain 3.
- Into the same stitch: [Yarn over, insert hook, yarn over, pull through, yarn over, pull through two loops (leave remaining loops on hook)] twice (for 3 partial double crochets in total).
- Yarn over, pull through all loops on hook to close the petal.
- Chain 2, skip one stitch, repeat petal in the next stitch.
- Continue around for 12 petals. Join with slip stitch.
C. Granny Square Rounds
12. Attach background color (e.g., blue) in any chain space.
- Chain 3, work 2 more double crochets in same space (first 3-dc group).
- Chain 2, work 3 double crochets in same space (corner made).
- Chain 1, in next chain space work 3 half double crochets. Repeat for next two sides.
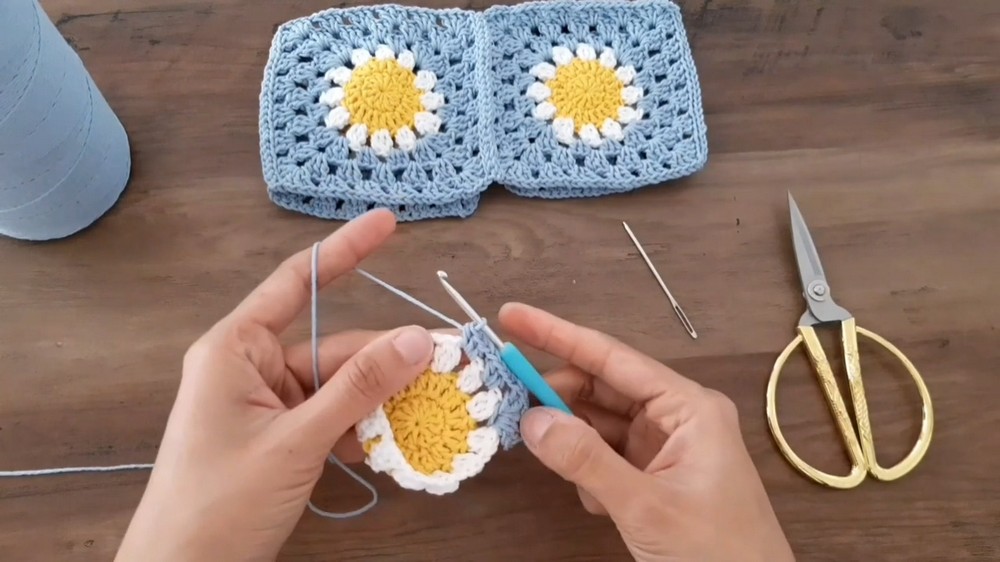
- In next chain space (corner) work [3 double crochets, chain 2, 3 double crochets].
- Repeat sequence to finish square (four sides) and close round with slip stitch.
- For each new round, slip stitch to corner, then repeat corners and sides as previously, adding an extra round for adult size.

Tip: For adult hats, work 3 rounds for squares; for kids, 2 rounds per square.
2. Joining Granny Squares
- Join squares together along the sides using slip stitches and a yarn needle, aligning stitches edge to edge.
- Form a continuous band by joining the first and last granny squares.
3. Making the Daisy Pentagon (Top of Hat)
A. Daisy Center & Petals
- Follow steps as for square centers, but after the yellow circle (12 double crochets), switch to single crochets for the next round: 2 single crochets in each stitch (24 total).
- Next round, 3 single crochets, then an increase (2 in same stitch); repeat around (30 total).
- Attach white, create petals as before, making 15 petals this time (skipping a stitch between petals).
B. Pentagon Motif
4. Attach blue yarn in any chain space.
- Work corners as [3 double crochet, chain 2, 3 double crochet].
- Sides are [chain 1, 3 half double crochet]. Repeat for 5 sides.
- Continue with additional rounds as needed for adult size.
4. Joining the Top Pentagon to the Body
- Join each side of pentagon to an edge of a granny square band (5 sides, 5 squares) with slip stitches.
5. Brim Construction
- In any chain space along the lower rim, attach yarn and chain 3.

- Work 3 double crochets into each chain space around without chains between groups. Close with slip stitch.
- Next round: 1 double crochet in each stitch. Join with slip stitch.
- Third round: 2 double crochets in first stitch, 1 double crochet in next (repeat around for a gentle flare).
- Final round: Double crochet in each stitch. Fasten off.
- Weave in all ends with the yarn needle.
Conclusion
This delightful daisy granny bucket hat lets you infuse your wardrobe with handmade charm and retro flair. Its modular design makes customization easy, and the adjustable fit ensures comfort for all ages. Follow the steps above for a beautiful, functional hat that stands out in any season.
Pro Tip
For a crisp, structured brim, single crochet around the edge after finishing, or add a thin wire for extra shape—just make sure to weave it in securely.




Leave a Reply