The "Crochet Labrador Amigurumi Pattern" offers a delightful way to make your own adorable, lovable Labrador, perfect for crochet enthusiasts of all levels.
The "Crochet Labrador Amigurumi Pattern" offers a unique blend of simplicity and charm, making it ideal for both beginners and seasoned crochet enthusiasts. This delightful pattern marries detailed instructions with lovable design, resulting in an adorable Labrador that captures hearts. Crafted with care, each stitch brings the project closer to life, making it a joy to work on. Perfect for dog lovers, this pattern provides a rewarding experience and a wonderful way to make a special keepsake or gift. Step into a world where creativity meets affection and produce an exquisite amigurumi Labrador.
Let's bring a cuddly Labrador puppy to life with just a hook and some yarn! With the Crochet Labrador Amigurumi Pattern, it's as simple as following a magical map that guides you through each loop and knot.
Cutest Crochet Labrador Amigurumi Pattern

Overview
The post highlights the enchanting experience of crocheting a Labrador amigurumi, emphasizing the joy and creativity involved in the process.
Appearance and Look
- Adorable Labrador Puppy: The pattern guides you in forming a soft and lovable Labrador puppy, cute enough to melt hearts.
- Ready for Hugs and Adventures: Your finished amigurumi will look playful and cuddly, symbolizing endless companionship and joy.
Crocheting Process
- Piece by Piece Formation: As you work with the yarn, each piece of your Labrador emerges, building the full figure step by step.
- Magical Transformation: Your hands dancing with the yarn bring a magical transformation from simple materials to an adorable plush friend.
Experience and Outcome
- Sprinkle of Joy: The process itself is joyful, adding a cheerful and creative touch to your daily routine.
- Fluffy Friend: The finished Labrador amigurumi adds a special, never-leaving companion to your collection, perfect for hugs and play.
Ideal Audience
- Dog Lovers: Those with affection for dogs will find this pattern particularly delightful.
- Crochet Enthusiasts: Anyone who enjoys crochet will appreciate the detailed yet engaging nature of this project.
Materials Needed:
- Medium weight yarn (color of your choice for the Labrador)
- Crochet hook suitable for your yarn (usually 3.5 mm to 4.5 mm)
- Fiberfill for stuffing
- Safety eyes (around 9 mm)
- Black yarn for the nose and mouth
- Yarn needle
- Scissors
Making
Body and Head:
Starting at the nose and working towards the body: Start with a magic ring.
- Round 1: 6 sc in magic ring (6 stitches).
- Round 2: 2 sc in each stitch around (12 stitches).
- Rounds 3-4: Sc in each stitch around (12 stitches).
- Round 5: [Sc in next stitch, 2 sc in next stitch] repeat around (18 stitches).
- Rounds 6-15: Sc in each stitch around (18 stitches).
Round 16: [Sc in the next stitch, decrease 1] repeat around (12 stitches).
- Insert safety eyes between rounds 10 and 11, about 5 stitches apart.
- Begin stuffing the head, continue to stuff as you work.
Round 17: Decrease around (6 stitches). Fasten off, leaving a long tail for sewing.
Ears (make 2):
Start with a magic ring.
- Round 1: 4 sc in magic ring (4 stitches).
- Round 2: 2 sc in each stitch around (8 stitches).
- Rounds 3-6: Sc in each stitch around (8 stitches).
- Flatten the ear, no need to stuff. Fasten off, leaving a long tail for sewing onto the head.
Legs (make 4):

Start with a magic ring.
- Round 1: 6 sc in magic ring (6 stitches).
- Round 2: 2 sc in each stitch around (12 stitches).
- Rounds 3-8: Sc in each stitch around (12 stitches).
- Fasten off the first two legs, leaving a long tail for sewing. Do not fasten off the third and fourth legs; continue to join to the body.
Tail:

Start with a magic ring.
- Round 1: 4 sc in magic ring (4 stitches).
- Round 2: Sc in each stitch around (4 stitches).
- Round 3-6: Sc in each stitch around (4 stitches).
- Fasten off, leaving a long tail for sewing.
Assembly:
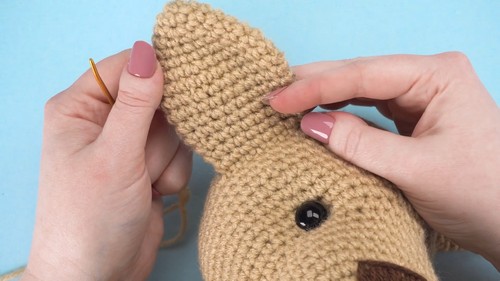
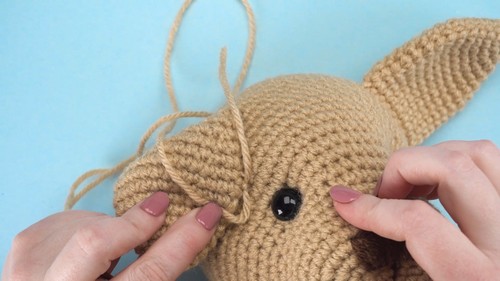
- Attach the ears to each side of the head.
- Sew the legs to the body. The front two legs are joined directly without fastening off, as per previous steps.
- Attach the tail at the back.
- Embroider the nose and mouth using black yarn.
Final Touch:
- Give your amigurumi Labrador a final check for any loose ends or adjustments needed in stuffing and shaping.
- Add more stuffing if the shape requires before closing up seams fully.


Leave a Reply