
Find inspiration with this Free Crochet Flower Headband Pattern, stylish project that adds a playful and colorful twist to your accessories.
A touch of handmade beauty and whimsy is always in style, especially in a crochet flower headband pattern that brings vibrant blossoms together on a soft, adjustable band. Presenting a graceful balance between elegance and bohemian flair, this charming accessory effortlessly transforms both everyday outfits and special looks, making it perfect for festivals, bridesmaids, or playful kids’ attire.
Adorable Crochet Flower Headband Pattern Perfect for Spring

The lightweight construction ensures comfortable, all-day wear, while the customizable nature lets crocheters experiment with endless color combinations and flower variations. Not only does a crochet flower headband pattern keep hair neatly in place, but it also adds an eye-catching, artisanal element that garners compliments wherever it’s worn.
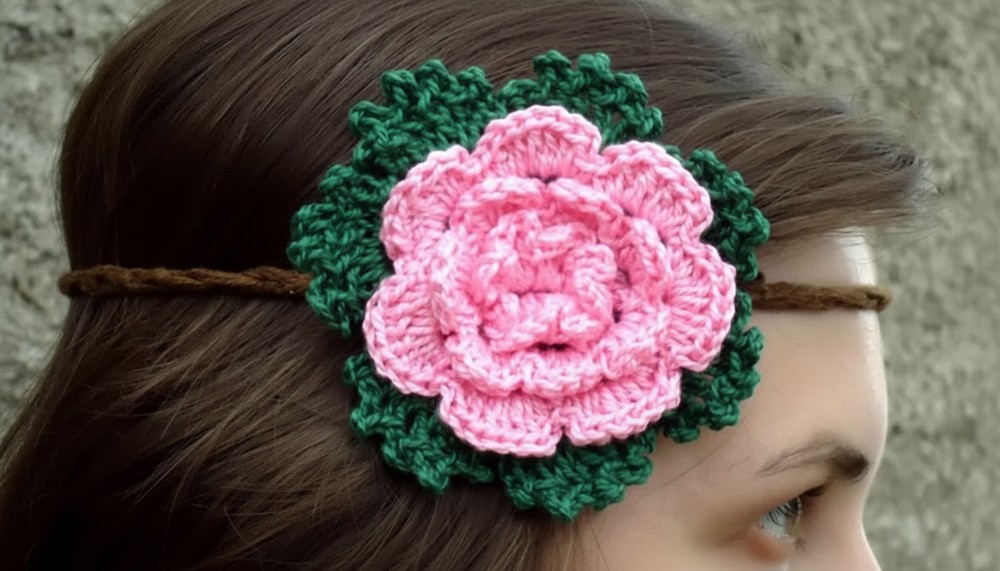
Versatile enough to double as a sweet bracelet or even an impromptu belt, this accessory highlights your crochet skills and creative flair. With each stitch, present-day fashion meets timeless handmade artistry, making it a must-have addition to any accessory collection.
Special Features
- Three-dimensional floral design
- Uses colorful leftover 100% cotton yarn
- Versatile — can be used for napkin holding, as a headband, or even as a decorative tie or necklace
- Picot and petal texture for a delightful finish
Level: Suitable for advanced beginners/intermediate crocheters
Materials
- 3.5mm crochet hook (for braids)
- 2mm or TR 7 crochet hook (for flower)
- 100% cotton yarn (scraps in brown, green, baby pink, and light pink)
- Scissors
- Yarn needle for weaving ends
Step-By-Step Pattern
1. Make the Flower Center (First Layer, Baby Pink)
- Using baby pink yarn, chain 6.
- Join with a slip stitch to form a circle.
- Chain 1 to begin the round.

- [First Petal] Chain 2 (counts as first part of tall stitch), make 3 double crochet into the ring. Chain 2, slip stitch into ring to finish first petal.
- Continue making petals: chain 2, 3 double crochet, chain 2, slip stitch into the ring.
- As you go, gently pull petals close together to fit all 8 petals comfortably.
- After 8 petals, slip stitch into the initial chain to close the round.
2. Create the Base for Second Petal Layer
- Chain 1, then working behind each petal, single crochet into the central stitch behind each petal (use visible loops).
- Chain 3 between each base point.
- Repeat to make 8 chain-3 bases.
- Slip stitch to the first chain to close the round.
3. Crochet the Second Petal Layer (Light Pink)
- Move into the first chain-3 space with a slip stitch.
- Chain 1, make 5 double crochet into the space; secure petal with a single crochet into the same space.
- Move to the next chain space and repeat (single crochet, 5 double crochet).
- Continue this process for all 8 petals.
- After finishing, slip stitch to the first chain to close the round.
4. Create the Base for the Third Petal Layer
- Chain 1, secure single crochet behind the middle of each petal as before.
- This time, chain 4 between each base point.
- Repeat for 8 bases.
- Slip stitch to starting chain to close the round.
5. Crochet the Third Petal Layer
- In each chain-4 space, single crochet, then make 7 double crochet, secure with a single crochet.
- Repeat for all 8 petals.
- Arrange petals for a neat, layered look.
- Slip stitch to starting chain to complete the round.
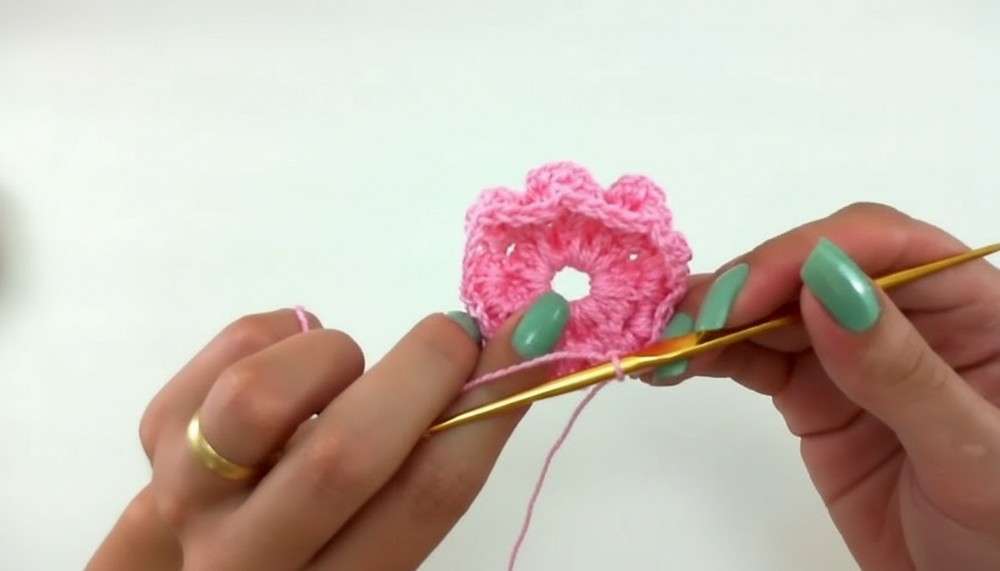
6. Create the Final Petal Layer Base
- Chain 2, single crochet into the center back of the next petal.
- [Increase chains:] Chain 5 between each base.
- Repeat process for all 8 spaces (bases).
- At the end, when joining, introduce green yarn by pulling through both strands and finish with a slip stitch.
7. Crochet the Final Petal Layer (Green)
- Chain 1 with green.
- In each chain-5 space: [Picot Petal]
- Single crochet into base
- Double crochet, chain 3, slip stitch into first chain (picot), double crochet, repeat for 4 total picots
- One last double crochet without a picot
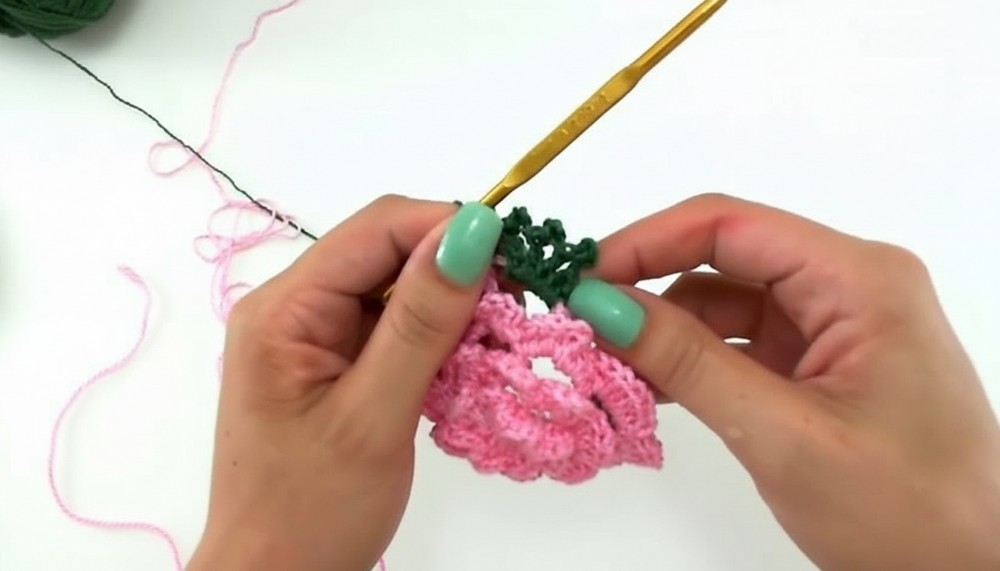
- Secure with single crochet in the same space
- Move on to next chain space, repeat process for all 8 petals.
- Slip stitch to starting chain, fasten off, and weave in green end behind petals.
Making the Braided Tie (Brown)
- Cut 4 strands of brown yarn, each 1.5 meters long.
- Hold all strands together; insert into the back of the first round of petals, securing them through 4 back loops.
- Smooth out, knot securely close to flower.
- Using all 4 strands at once, make chain stitches (for a thick braid) until only 8-10cm remain.
- Knot at end to secure chains, leaving some ends as fringe.
- Repeat on the opposite side of the flower.
- Trim fringe evenly.

Uses & Tutor’s Suggestions
- Use as a charming napkin holder for table settings.
- Transform into a headband, necklace, or belt with longer cords.
- Experiment with wider strip bases using single crochet for a thicker accessory.
- Color-coordinate with occasions, seasons, or room decor for personalized gifting.
Tip
Weave in all ends carefully for durability and a neat finish. Lightly block the flower after completion to help shape the petals beautifully.
Conclusion
This Crochet Granny Napkin Holder Pattern combines simplicity and beauty—creating a functional yet decorative piece for your table or as a multi-use accessory. Experiment with color combinations and cord lengths for unique results.




Leave a Reply