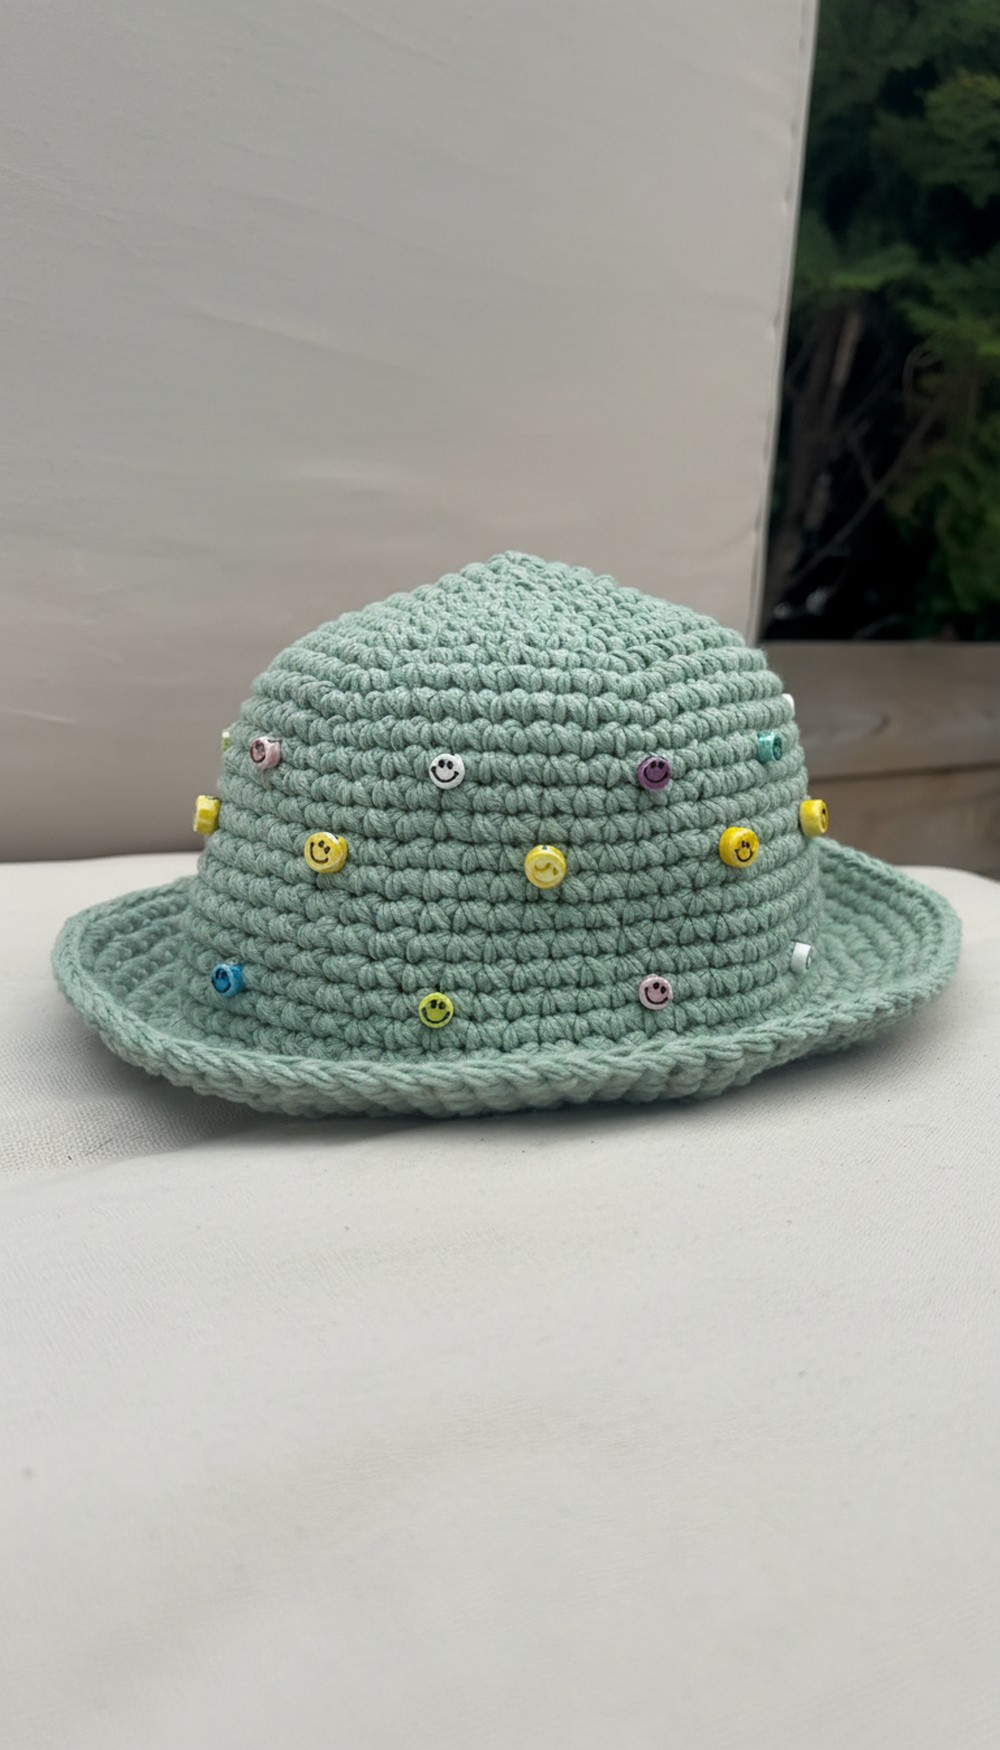
Show off your playful side with this free crochet bucket hat pattern that’s easy, fun, and sure to become your new favorite summer accessory.
Looking for a project that merges creativity, practicality, and on-trend style? A crochet bucket hat pattern offers just that—a blend of classic fashion and modern flair, perfect for crocheters of all skill levels. Present-day enthusiasts love how easily this accessory transitions from sunny outdoor adventures to city strolls, offering both sun protection and a stylish statement.
Retro Crochet Bucket Hat Pattern for Instant Style Upgrade

Its adaptable form means you can easily customize with different yarn colors, playful stripes, or eye-catching embellishments, making each hat truly one-of-a-kind. The lightweight, breathable construction ensures all-day comfort while the softly structured shape flatters a variety of face shapes.

Additionally, its approachable pattern structure provides a satisfying, rhythmic crocheting experience and quick results—ideal for personal use, thoughtful handmade gifts, or trendy market pieces. Beyond function and comfort, this hat pattern elevates any wardrobe, making it a must-crochet staple that showcases both personality and skill.
Special Features
- Double-Stranded for Structure: Two strands of yarn are held together throughout, giving the hat extra firmness and a modern "chunky" feel.
- Worked in the Round Without Joining: The hat is constructed seamlessly by working continuously in the round, avoiding visible join seams.
- Adjustable Size: The increase rows allow easy adaptation to fit any head size.
- Optional Embellishment: Add beads for a custom, decorative touch.
Level of Difficulty
Beginner to Advanced Beginner
If you can single crochet and increase, you can make this hat! The repetitive row structure and helpful tips make this an excellent first hat or a fun, quick project for more experienced crocheters.
Materials
- Yarn: Two strands of "Made with Love" yarn by Tom Daly/Lion Brand Yarns (2 x 100g balls, or any worsted-weight yarn held double)
- Crochet hook: 4mm (G/6)
- Stitch marker
- Scissors
- Yarn needle for weaving in ends
- For beading (optional):
- Small sewing thread
- Small-eye sewing needle
- Beads with holes large enough for thread
Tutor's Suggestions and Hat Uses
- Sizing: Ensure your circle fits snugly on the crown of your head—it will stretch with wear. Avoid starting too large.
- Edge Definition: For a subtle edge, single crochet through the back loops only in the first body row or brim.
- Customization: Be creative with bead placement; mark where you want them using stitch markers before attaching.
Pattern Instructions
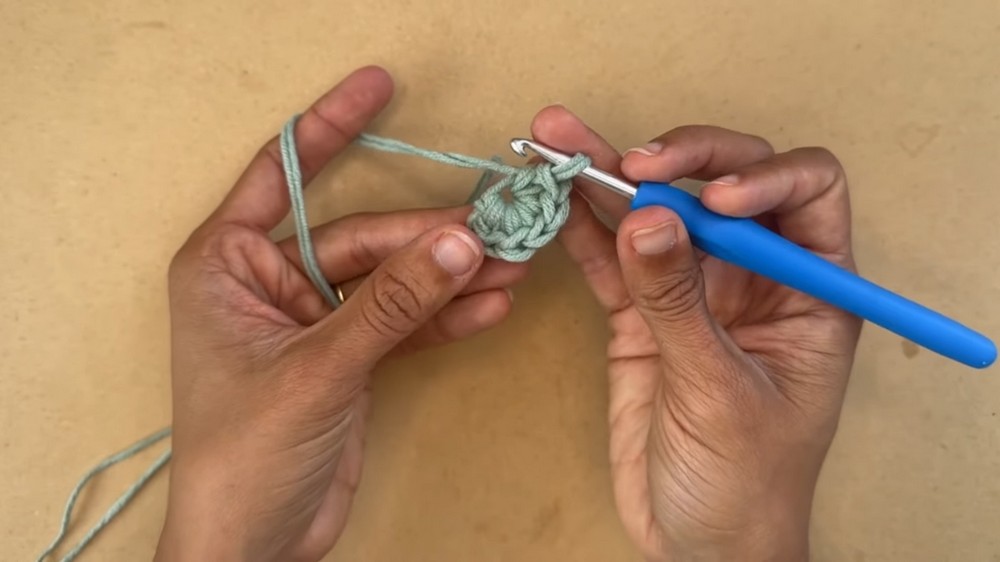
1. Start with a Magic Ring
- Hold both yarn strands together.
- Create a magic circle and chain 1.
2. Row 1
- Chain 1.
- Make 6 single crochets (sc) into the ring.
- Pull the tail to close the circle.
- Do not slip stitch to join; continue working in a spiral.
3. Row 2 (Increase Round)
- Place a stitch marker on the first st.
- 2 sc in each stitch around. (Total: 12 sc.)
4. Row 3
- [1 sc in next stitch, 2 sc in following stitch]—repeat all the way around. Move the stitch marker up each row. (18 sc)
5. Row 4
- [1 sc in each of next 2 stitches, 2 sc in next stitch]—repeat around. (24 sc)

6. Row 5
- [1 sc in each of next 3 stitches, 2 sc in next stitch]—repeat around. (30 sc)
7. Continue Increase Rounds
- Each new round, increase the singles between increases by 1:
- Row 6: 1 sc in each of next 4, 2 sc in next, repeat.
- Row 7: 1 sc in each of next 5, 2 sc in next, repeat.
- Continue in this way until you have completed 10 increase rounds OR until the circle covers the crown of your head snugly.
Example for average adult size: 10 increase rounds, ending with 1 sc in each of next 8 stitches, 2 sc in next.
8. Body of the Hat
- Work 1 sc in each stitch around (no increases) for as many rows as needed for the hat to reach your eyebrows. Usually 13 rows for adult size.
- Option: For a defined edge, work first body row in back loops only.

9. Begin the Brim
Row 1 of Brim (Row 24):
- Work in front loop only: [1 sc in each of next 4 stitches, 2 sc in next stitch]—repeat all the way around.
Row 2 of Brim:
- Work 1 sc in each stitch around, both loops.
Row 3 of Brim:
- [1 sc in each of next 3 stitches, 2 sc in next stitch]—repeat around.
Rows 4-5 of Brim:
- 1 sc in each stitch around for 2 rounds.
Row 6 (Last Row):
- [1 sc in each of next 10 stitches, 2 sc in next stitch]—repeat around.

10. Finishing
- Slip stitch to the first stitch of the last row to join.
- Cut yarn, leaving a long tail.
- Thread the tail with a yarn needle and weave in ends securely on the inside of the hat.
11. (Optional) Add Beads
- Use sewing thread and a small needle to attach beads where desired according to your pattern.
- Tie off securely on the inside and trim excess.
Conclusion
This quick and easy bucket hat lends itself to endless customizations—from fun color combinations to beadwork embellishments. Its beginner-friendly, double-stranded construction gives it structure and warmth, making it both practical and fashionable.
Pro Tip
To avoid visible “steps” in spiraled rounds, always move your stitch marker up as you complete the first stitch of each new row. This ensures neat edge rows and helps keep track of increases!.


Leave a Reply