
Cozy up your mugs with this Free Crochet Mug Cover Pattern that warms drinks and adds a cute, cheerful touch to every coffee or tea moment.

Soft yarn and thoughtful textures make it comfortable to hold, while details like buttons or floral accents give it a polished, inviting look. Lightweight and practical, it can be slipped on or removed quickly and washed when needed.
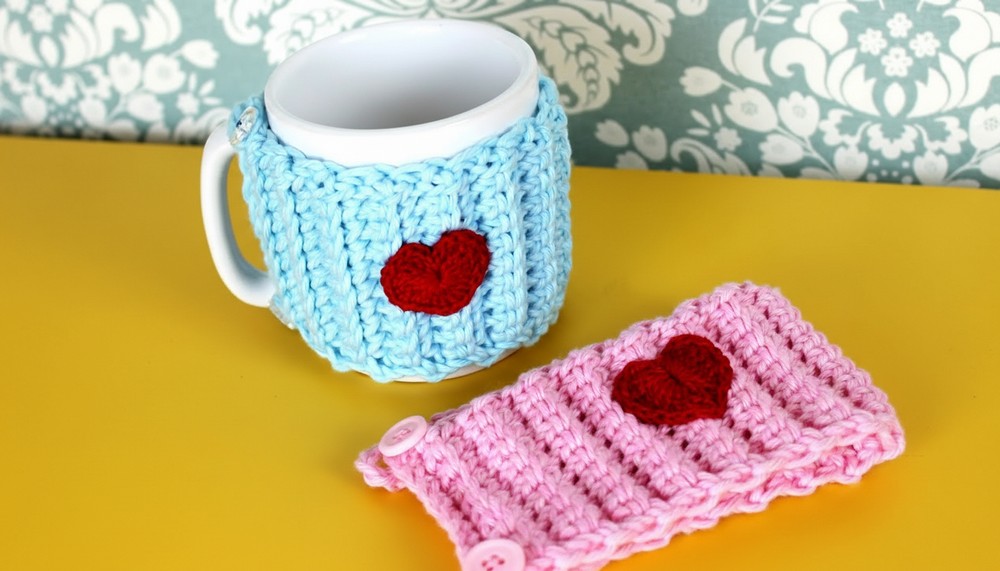
This pattern turns simple yarn into a charming accessory that combines warmth, protection, and visual appeal, bringing a cozy and stylish touch to every sip while making ordinary mugs feel special.
Special Features
- Heart motif appliqué
- Button closure for easy removal
- Simple textured stitch for a cozy look
- Fully customizable colors and appliqué themes
Level of Difficulty
Beginner
This pattern uses basic stitches and is great for new crocheters. Follow step-by-step instructions to master the process!
Materials Needed
- Baroque Maxcolor yarn (Candy color, blue: color 20, pink: color 3526)
- Small amounts of Anne thread for the heart appliqué (color 3528)
- 4.5 mm crochet hook for the cover
- 1.75 mm crochet hook for the heart appliqué
- 2 buttons (matching the cover color)
- Needle and matching sewing thread for attaching buttons
- Tapestry needle for weaving ends
Step-by-Step Pattern
1. Crocheted Mug Cover
- Begin with a Slip Knot
Start by making a slip knot. - Chain Foundation
Chain 12. - First Row (Single Crochet)
Skip two chains from the hook, then single crochet into the next chain. Continue single crocheting across the row (you’ll have 11 single crochets).
- Textured Rows
Chain two to turn. From now on, work all stitches in the back loops only to create a ribbed, textured effect. Crochet 11 single crochets in each row, making sure to always crochet in the back loop. - Continue Rows
Repeat textured rows until the cover measures about 24 cm (or fits the circumference of your mug).
- Straps for Button Closure
To make the straps, chain 8 at the end of your row, turn, and continue single crocheting in the back loops across to the second-to-last stitch. At that point, chain 8 again and single crochet into the end stitch. - Finish and Weave Ends
Secure and hide loose ends on the inside using a tapestry needle.
2. Attach Buttons
- Decide which side will be the closure.
- Sew 2 buttons on that side using matching sewing thread and a hand-sewing needle.
- Fasten securely by stitching in an “X” pattern multiple times.

3. Heart Appliqué
- Magic Ring
Make a magic ring, leaving a tail for sewing. - Crochet Heart Shape
Inside the ring, work:- 3 chains to start
- 6 double treble crochets
- 3 double crochets
- 1 double treble crochets (for the heart tip)
- 3 double crochets
- 6 double treble crochets
- 3 chains, then slip stitch to close
- Close and Shape
Tighten the magic ring well to form the heart shape. Leave enough tail to sew the heart onto the cover.
4. Sew Heart onto Mug Cover
- Position the mug cover on your mug.
- Decide where to place the heart (e.g., at the center front).
- Use a tapestry needle and leftover Anne thread to sew the heart onto the cover, stitching through the chains around the heart to secure it firmly.
- Hide and trim excess thread.

5. Final Assembly
- Put the finished cover around your mug.
- Use the straps and buttons to close and secure.
- Admire your heart-themed crochet mug cover!
Tutor’s Suggestions
- Try different motifs like flowers, balloons, or even heat-sealable patches instead of a heart.
- Use up yarn scraps for a colorful striped effect.
- Match button and yarn colors for a seamless look.
Uses
- Protect your hands from hot mugs
- Add decorative flair to your mug
- Makes an excellent and quick gift
Tip
When working the heart appliqué, pull the magic ring tightly before fastening off – this keeps your heart shape neat and closed in the center.
Conclusion
Now you have a beautiful, handmade crochet mug cover that’s both functional and stylish! Share your finished creations on social media or send them to friends for a delightful personal touch.




Leave a Reply