Whimsical sparks blend with Crochet Wild Robot Glitter pattern, perfect for unique crochet lovers chasing a playful twist in every stitch.
Among the most captivating crochet creations, the Wild Robot Glitter figure stands out for its charm and versatility. This delightful project brings together shimmering threads and unique shapes, resulting in a character that radiates personality and intricate beauty. From its expressive eyes to finely detailed features like wings and antennae, every element feels thoughtfully constructed. The finished piece serves as more than just a decoration—it’s a heartwarming expression of creativity and individuality. It’s small enough to function as a keychain or ornament while remaining bold enough to make a striking statement.
Crochet Wild Robot Glitter – Pattern How-To for Modern Makers

This design offers more than its appearance; it provides an opportunity to refine skills with techniques like shaping stitches and working with metallic yarns. Its compact size makes it approachable, yet its details offer a satisfying challenge for makers at all levels. The glowing accents and seamless form draw admiration, making it an ideal gift or personal keepsake that stands apart. Crocheted with attention to detail, it invites crocheters to explore the blend of textures and colors that truly bring it to life.
Every stitch in bringing this robot to life sparks joy and fosters connection, whether it’s shared through gifting or displayed proudly. Its combination of playfulness, elegance, and versatility ensures it will bring a bit of wonder wherever it finds itself, leaving a lasting impression on anyone who encounters it. Whether as a conversation starter or a personal touch in any space, this crochet figure embodies the timeless beauty of handmade art and creativity.
Materials Used
- Thread: Cotton thread (specific composition shared in the video).
- Hook: 2 mm crochet hook.
- Eyes: 10 mm safety eyes.
- Additional Supplies: Yarn needle, green thread for details, pins, blush for finishing touches.

Step-by-Step Details
Special Features
- Magic Ring Start: The project begins with the magic ring technique, ideal for tight, neat starts.
- Color Changes: Instructions focus on a seamless method for switching between white and hazelnut colors, ensuring a polished finish.
- Shaping Details: Various increases, decreases, and folds are used to sculpt the body, tail, wings, and other intricate features.
- Textured Finish: Both front and back post stitches are employed creatively to enrich the design.
- Customizable: Add a key ring or keep it as a stand-alone craft for gifting or decoration.
Tutor's Suggestions and Level of Difficulty
- Level of Difficulty: Intermediate. While those new to crochet may find the techniques a challenge, a patient approach makes it achievable.
- Tips from the Tutor:
- Use stitch markers to identify key points (round beginnings, stitch counts, etc.) to avoid errors.
- Avoid cutting the threads unnecessarily during color changes unless specifically directed.
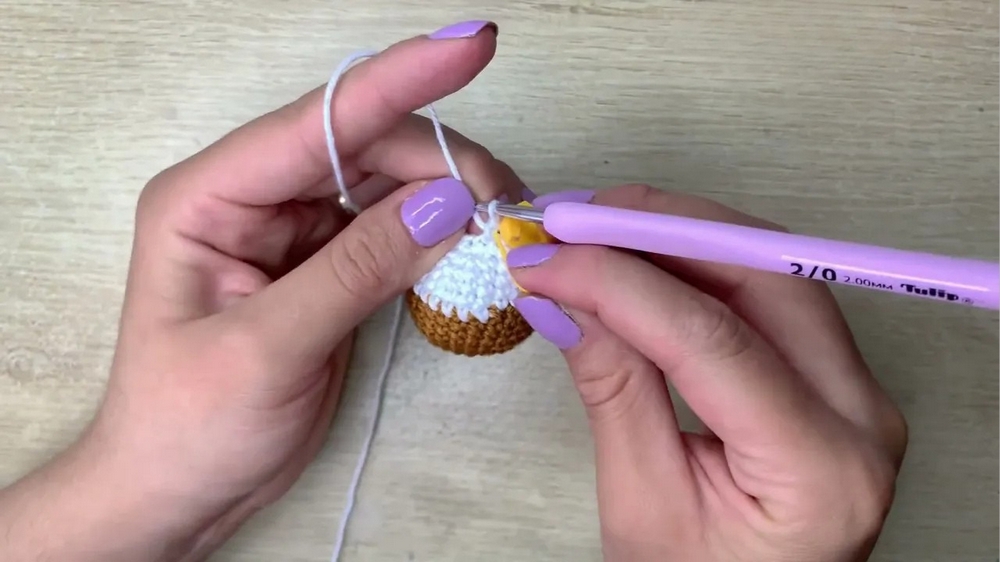
- For adding the eyes, place them between rounds 9 and 10, and ensure they are evenly spaced with six single crochets’ distance between them.
Crochet Instructions
1. Base Body
- Start with a magic ring using white thread.
- Work single crochets and gradual increases across rounds to shape the body (Round 1: 8 sc -> Round 2: 16 sc).
- Change to hazelnut thread for the remainder of the body.

- Incorporate sequences of single crochets and increases for shaping rows, ensuring accuracy with stitch counts:
- Round 9 to 12: 30 stitches (maintaining the shape).
- Round 9 to 12: 30 stitches (maintaining the shape).
- Add safety eyes (10 mm size) between rounds 9 and 10. Use green thread to add subtle detailing around the eyes.

2. Forming the Tail
- Using the strands remaining from Round 21, attach white thread to build the tail.
- Incorporate single crochet, half-double crochet, and double-crochet stitches to achieve the distinctive shape.
3. Making Antennas (Wees)
- Create a starting chain of four with yellow thread.
- Work single crochets and meticulous increases to shape the tiny antennas.
- Add detailing by chaining five and working backwards with additional single crochets. Finish and sew onto the body.
4. Designing the Wings
- Use white thread and start with a magic ring.
- Gradually increase the stitches across rounds to widen the wings, ending with 18 stitches.
- Fold and close the fabric to complete the wing structure. Make two identical wings and sew them onto the body using pins for proper alignment.

Uses
- Gifts: Makes a thoughtful handmade gift for fans of The Wild Robot.
- Keychains: Attach a ring to create a personalized accessory.
- Decor: A whimsical and playful decoration for shelves, desks, or nurseries.
Tip for Success
When making color changes, avoid cutting the threads unless absolutely necessary. Instead, carry the unused thread along the work to achieve a neater, professional finish.
Conclusion
This step-by-step pattern empowers crocheters to create the delightful AB Glitter character from The Wild Robot Movie. Featuring techniques like magic rings, color changes, increases, decreases, and shaping, the project offers a fun challenge for intermediate crocheters. Whether gifted, sold, or kept for yourself, this handmade treasure is bound to bring joy and appreciation. With patience and practice, anyone can recreate this charming design—don’t forget to add your personal flair.


Leave a Reply