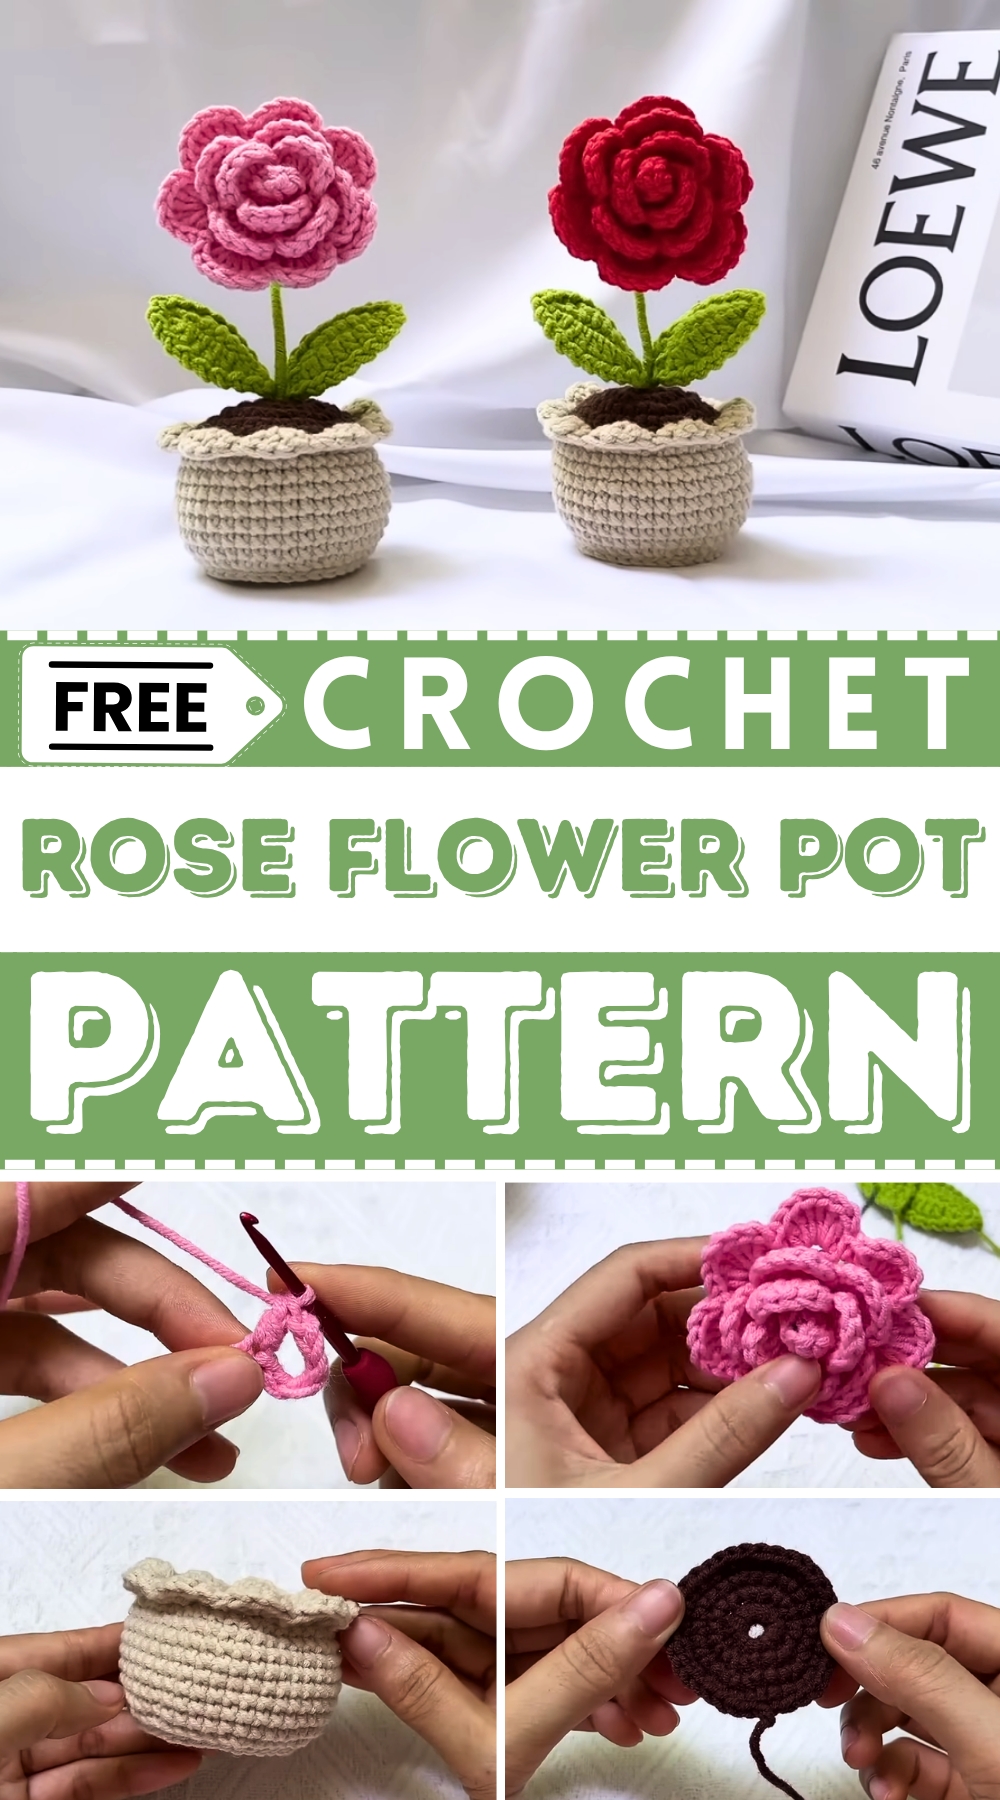
learn the Art of Crochet Rose flower Pots for Delightful Accents
Perfect for any crocheter, this pattern is designed to be accessible, whether you’re a beginner or already experienced with yarn and hooks. Its versatility allows for limitless customization—choose vibrant or pastel colors to complement your aesthetic or experiment with textures for a unique touch. Beyond its visual appeal, the rose flower pot carries sentimental value, making it a thoughtful gift for loved ones on special occasions.
This cozy masterpiece not only enhances your surroundings but offers a practical benefit too. Use it to infuse personality into small nooks, spruce up a workspace, or adorn a coffee table. Plus, its creation provides a mindful experience, helping to ease stress while producing lasting results. Whether for yourself or someone special, the crochet rose flower pot delivers both charm and meaning in every delicate detail.
Materials Needed
- 5-ply cotton yarn in various colors (for petals, leaves, and the pot)
- 2.5mm crochet hook
- Wire (approximately 18 cm) for shaping leaves
- A branch (18–20 cm) for the rose stem
- Darning needle
- Stuffing material (for the pot)
- Glue (optional, for assembling the parts)

Special Features
- Realistic Structure: Includes petals, a sepal, leaves, and a pot for a complete, lifelike rose design.
- Beginner-Friendly: Simple double crochet, single crochet, and slip stitch techniques are used, making this suitable for crochet beginners.
- Compact Size: Perfect for small spaces and easy portability.
- Personalizable: The pattern works well with different yarn colors, allowing for customization according to preference.
Level of Difficulty
This pattern is best suited for beginners and intermediate crocheters. The pattern clearly explains each step, making it easy to follow despite its intricate design.
Step-by-Step Instructions
1: Crochet the Rose Petals
- Begin with a slip knot and chain 52.
- Work a row of V-stitches by skipping two chains and making (double crochet, chain 2, double crochet) in the third chain. Repeat to create 15 V-stitches.

- For the second row, turn the piece, make chain one, and crochet six double crochets in each V-stitch gap. Separate each petal with a single crochet.

- After completing all petals, fasten off the yarn, leaving a long tail.
2: Create the Sepal
- Form a magic ring and create 10 double crochets into the ring. Join with a slip stitch.
- For each "leaf" of the sepal, chain six, and then work slip stitches, single crochet, half double crochet, and double crochet in sequence to shape the point. Repeat five times for five leaves.
- Fasten off and leave a long tail for assembly.
3: Make the Leaves
- Start with a slip knot, chain 9, and prepare a wire (18 cm) bent in half.
- Crochet over the wire, working single crochet, half double crochet, and double crochet along one side. Add three single crochets in the last chain before turning to the opposite side.
- Repeat the stitch sequence along the other side, finishing with slip stitches and wrapping the wire with yarn to keep it secure.
4: Crochet the Pot
- Start with a magic ring and work seven single crochets.
- Gradually increase the stitches for each round to form the base.
- For the sides, only crochet in the back loops for a round before continuing with regular single crochet rounds to create the pot shape. Crochet until the desired height is reached.

- Add decorative final touches using front loops for folded edges.
5: Create the Soil
- Begin with a magic ring and work 14 single crochets, leaving a small hole in the center.
- Build up the soil by increasing and tapering rounds to fit securely inside the pot.

6: Assemble the Rose Pot
- Attach the rose petals to the stem using glue and wrap the petals around themselves.

- Insert the branch into the sepal and secure the sepal around the base of the rose with glue.
- Use the leaves to embellish the rose stem, wrapping yarn to cover any exposed wires.
- Stuff the pot tightly, position the soil at the top, and sew them together. Insert the branch through the soil hole and adjust.
Uses of the Crochet Rose Pot
- Home Decor: A decorative piece for shelves, desks, or living room corners.
- Gifting: Makes a handmade present for loved ones.
- Keepsake: Serve as a long-lasting and maintenance-free alternative to real plants.
Tutor’s Suggestions
- Be consistent with your tension to maintain the symmetry of petals and leaves.
- Use high-quality cotton yarn for better texture and finish.
- Add small stones or gravel to the pot to make it sturdier and stable.
Tip for Success
Block each section (petals, leaves, and a sepal) before assembly. This ensures the shapes are neat and hold their structure well.
Conclusion
Crocheting a rose flower pot doesn’t just satisfy your creativity—it also produces a cherished piece of art you can showcase or gift. With its simple, beginner-friendly instructions and delightful results, this project is a must-try for any crochet enthusiast. Follow these steps to bring your own stunning rose to life and brighten your surroundings with its charm.


Leave a Reply