
Spruce up your space with this Crochet Chicken Rug Pattern that's cheerful, easy project that invites personality and warmth into your home.
Nothing transforms a space quite like a handmade touch, and this crochet chicken rug pattern stands out as a true masterpiece in home décor. Its delightful chicken motif, crafted with plush, textured stitches, offers a blend of warmth, style, and irresistible charm that's perfect for any kitchen, entryway, or cozy nook. Function meets artistry as this rug provides gentle comfort underfoot while protecting floors from everyday wear.
Must-Try Crochet Chicken Rug Pattern for Cheery Home Decor

With endless opportunities for color customization, the design adapts beautifully to rustic, modern, or farmhouse interiors. Thoughtful construction ensures durability and easy maintenance, making it an enduring favorite that stays fresh through frequent use. Whether you’re a seasoned crocheter or just beginning, clear instructions guide you through a satisfying creative process.
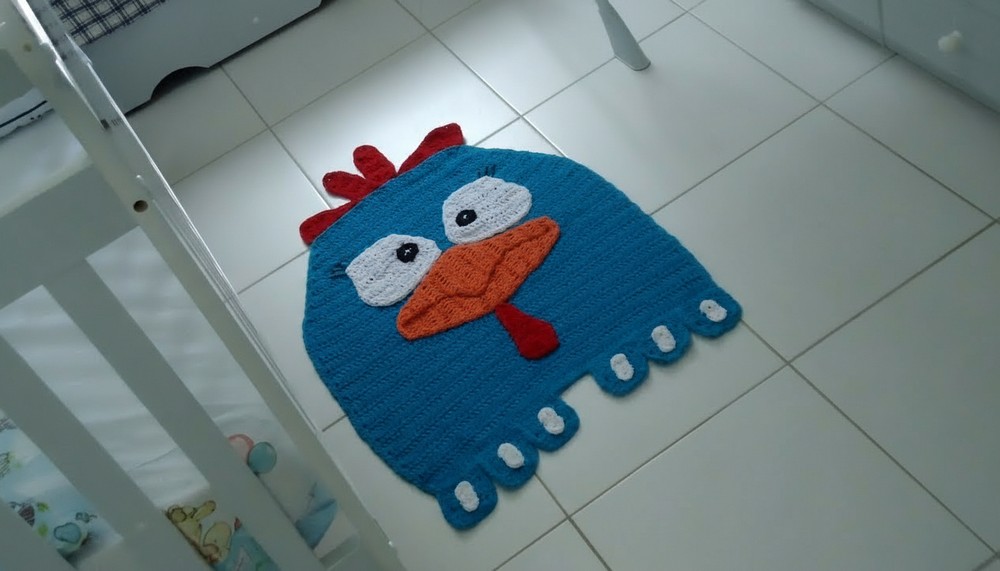
The finished rug is more than just practical—it’s a cheerful conversation starter and a delightful expression of personality, elevating the atmosphere and making your home truly one of a kind.
Special Features
- Three-Dimensional Details: The rug features layered, sewn-on crest, beak, ruffles, and eyes for a realistic, textured effect.
- Appliqué Construction: Individual crochet pieces are sewn onto the base, ensuring durability and a polished finish.
- Customizable Colors: Use any shade for the main body and details—great for using up scraps.
- Beginner-Intermediate Friendly: Straightforward stitches, basic shaping, color work, and simple sewing skills required.
Level of Difficulty
Confident Beginner to Intermediate
You should be comfortable with chain, single crochet, double crochet, slip stitch, increasing, decreasing, and sewing pieces together.
Materials
- Yarn: Size 8 cotton string (cone) in blue (main color), with scraps of orange, red, black, white, and terracotta or dark orange.
- Hook: 5 mm crochet hook
- Notions: Tapestry needle, scissors
Step-by-Step Pattern
Main Body (Blue)
- Foundation:
- With blue, chain 65.
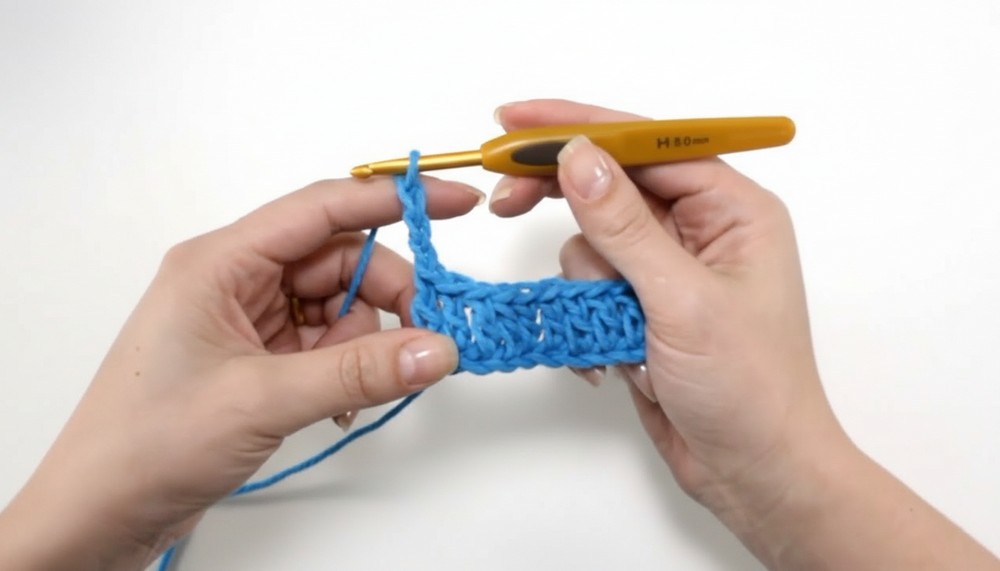
- Starting in 4th ch from hook, double crochet (dc) across (62 dc in total).
- Rows:
- Ch 3, turn, dc in each stitch. Repeat this row until the piece measures 42 cm high.
- Shaping the Top:
- Begin decreases: Ch 3, dc2tog over first two stitches, dc across to last 2, dc2tog (decrease at each row start and end).
- Repeat decreases until only 35 stitches remain.
Bottom Ruffles (Blue)
- Mark the starting edge into 7 sections; each section has 9 stitches.
- You will make three ruffles on the left, leave the middle section empty, and three more on the right.
- For each ruffle:
- Join blue at first stitch of section.
- Row 1: Ch 3, dc in next 8 (9 dc).
- Row 2: Ch 3, turn, dc in each (9 dc).
- Row 3: Ch 3, turn, dc in next 7, dc2tog over last 2 (8 dc).
- Row 4: Ch 3, turn, dc in next 6, dc2tog (7 dc).
- Fasten off, weave in ends.
- Repeat for each ruffle section.
Bottom and Side Edging
- With blue, join at the center of the starting edge.
- Work single crochet (sc) evenly all along the base and ruffle edges, hiding ends as you go.
- At corners or turns, work 2 sc in same stitch to keep the work flat.
- End behind work, fasten off, and weave in all ends.

Crest (Red)
You will create four separate crest pieces:
1st Crest Piece:
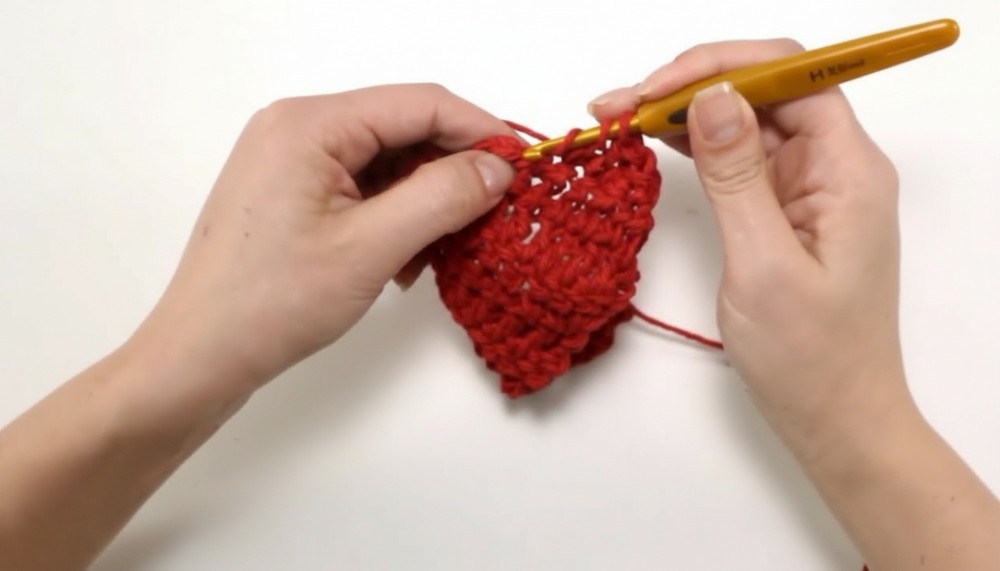
- Ch 7, start in 4th ch from hook, 5 dc.
- Work 5 rows of 5 dc, then decrease at start and end (dc2tog at start and end) to shape the tip.
2nd Crest Piece:
- Same as above, but make 6 rows of 5 dc before the decreases.
3rd Crest Piece:
- Ch 5, in 4th ch from hook, work 3 dc.
- Add a row of 3 dc, then a row with increases at start/end to reach 5 dc.
- Make two rows of 7 dc (increasing 1 at start and end), then one row decreasing to 5 dc.
4th Crest Piece:
- Same as 3rd but with more increases: after reaching 5 dc, make two rows with 7 dc, then a row with 9 dc (increasing at start and end), then decrease back to 7 dc, 5 dc, then to 3 dc.
For all:
- Edge each with single crochet in red, fasten off, and leave a long end for sewing.
Assembly:
- Sew all crest pieces closely together at the top blue edge to form a soft curve.
Red Wattle (Under the Beak)
- Ch 5, dc in 4th ch from hook (3 dc).
- Row 2: Ch 3, turn, 3 dc.
- Rows 3–4: Increase at start and end to 5 dc.
- Rows 5–6: Increase at start and end to 7 dc.
- Rows 7–8: Work 7 dc, decrease to 5 dc in next row, then edge all around with single crochet.
- Sew centered below the ruffles, using remaining yarn tail.
Ruffle "Dewlap" White Circles
- For each ruffle, make:
- Ch 6, sc in 3rd ch from hook and in next 3 ch (5 sc).
- Work 3 sc in last st to turn. Continue working on the other side of foundation ch, sc in next 4, 3 sc in last st.
- Join with slip stitch, fasten off with long end.
- Sew a white circle into the center of each ruffle.
Beak (Orange)
- Ch 9, dc in 4th ch from hook, dc across (7 dc).
- Increase 1 at beginning and end of next row (9 dc), repeat to reach 11 dc.
- Work several rows increasing alternately at start or end to form a triangle up to 19 dc.
- Work rows with decreases at start and end to form a beak tip.
- Edge with sc, leave a long tail, and sew beak centered on the face over the orange division.
Beak Divider (Terracotta/Dark Orange)
- Ch 35.
- Mark position running from tip up the beak and over the head—sew in place following the beak contour before sewing the beak.
Eyes (White)
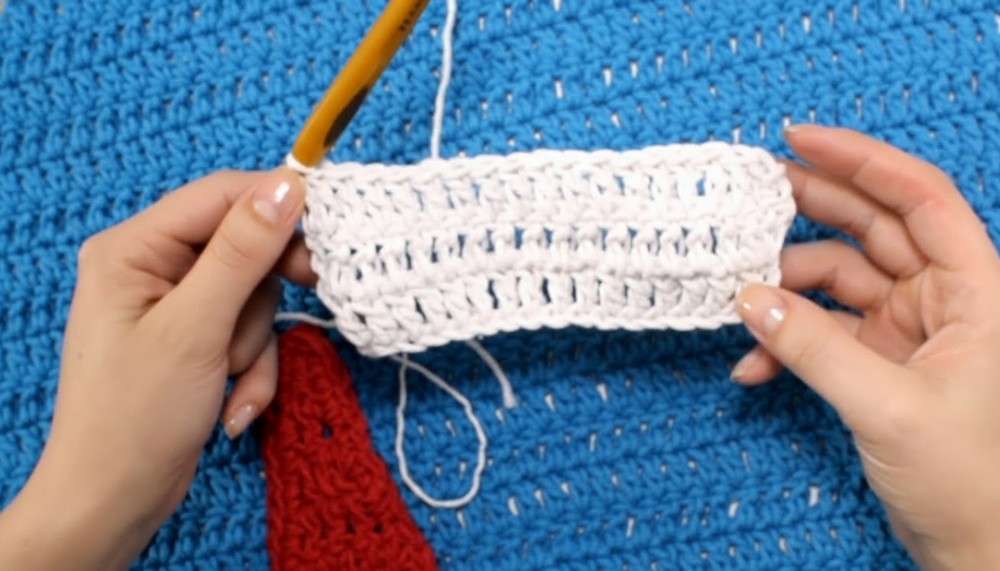
- Ch 19, dc in 4th ch from hook and across (17 dc).
- Next row: increase at start and end (19 dc).
- Next: decrease at start and end (17 dc).
- Continue decreasing and shaping as per transcript for a rounded eye.
- Edge with sc, fasten off with long tail.
- Make 2 eyes, one mirrored in edge direction so they face opposite sides.
Pupils (Black)
- With black, make a magic ring, 8 sc inside ring, pull tight.
- Next round: 2 sc in each st (16 sc).
- Fasten off, leave end for sewing.
Eye Highlights (White)
- Use a separated ply of white yarn, use a tapestry needle to make a small stitched cross on pupil.
Assemble
- Sew black pupils onto each white eye, stitch a cross in white for highlight. Sew eyes onto face, leaving tip of beak visible between.
Eyelashes
With black yarn, use tapestry needle to stitch three short lines outward from upper outer edge of each eye.
Tutor’s Suggestions
- Pin First: Pin all pieces in place before sewing for perfect alignment.
- Match Tension: Adjust stitch count or tension for uniform, flat pieces.
- All Parts Sewn: Sew all pieces rather than gluing for washability and durability.
- Invisible Sewing: Use yarn tails from each piece for sewing to minimize ends.
- Shaping: Block the finished rug for best results.
Uses
- Kitchen or bathroom decorative rug
- Nursery mat
- Wall hanging (with stiffener)
- Creative gift
Tip
For perfectly even pieces and to prevent curling, block each part before assembly by laying flat and gently steaming.
Conclusion
You’ve completed a delightful and bold chicken-shaped rug, paying attention to every whimsical and practical detail. This project highlights creative colorwork, beginner-friendly construction, and thoughtful applique assembly.




Leave a Reply