
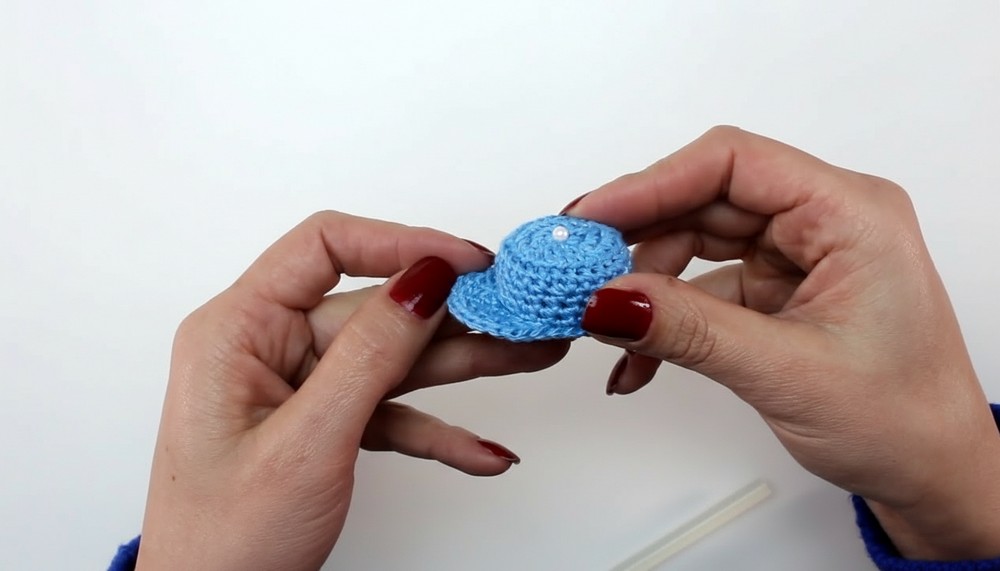
Carry charm everywhere with this Free Crochet Hat Keychain Pattern that's featuring cute designs, vibrant stitches, and playful tiny details.

Repetitive, structured stitches make the process relaxing and approachable, providing an enjoyable experience for all skill levels while allowing creative experimentation with yarn types and hues. Beyond aesthetics, these tiny hats serve as functional identifiers for keys or bag charms, reducing mix-ups and adding convenience to daily routines.
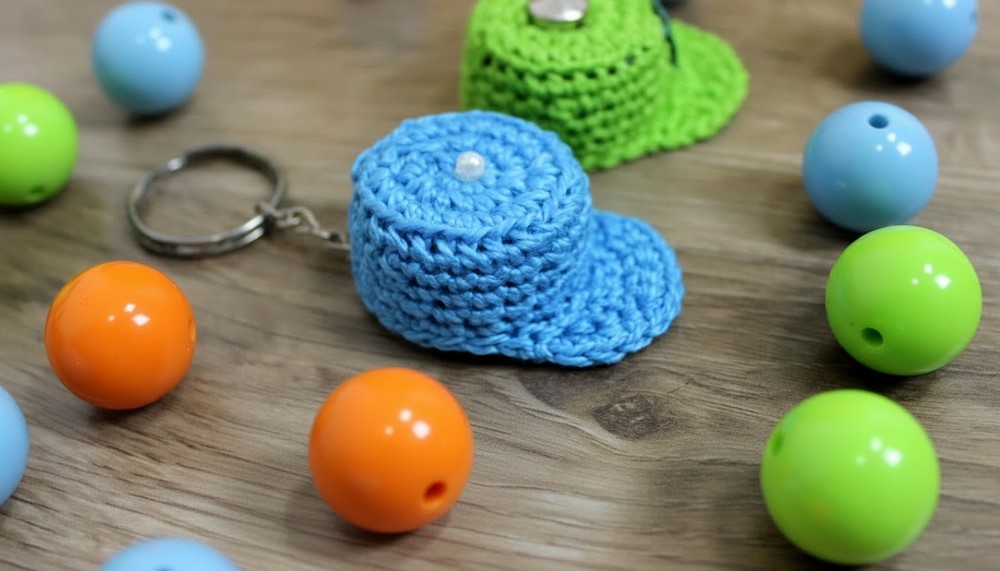
The finished keychain maintains shape and durability while retaining a soft, tactile appeal. Blending utility, whimsy, and visual charm, this pattern transforms simple yarn into a miniature accessory that is both practical and stylish, offering a handcrafted touch to everyday life.
Special Features
- Uses a recycled bottle cap for structure
- Perfect as a keychain, magnet, or party souvenir
- Quick and economical project
- The cap can be personalized with colors or embellishments
Level of Difficulty
Beginner to Easy Intermediate
This pattern is suitable for those familiar with basic crochet stitches: chains, single crochet, slip stitch, and working in the round. It features simple increases and decreases, with embossed (relief) stitches for added texture.
Materials
- Fil Amigurumi Yarn in color 2500 (blue), or color of choice (very little required)
- Crochet Hook: 1.75 mm
- Plastic bottle cap (from soda or water)
- Pearl/embossed button: optional, for the top “button” detail
- Jump ring and keychain clasp
- Sewing needle, scissors, and pliers (for attaching keychain)
- Optional: Ribbon, paper label for personalization
Step-by-Step Pattern
1. Cap Top
- Foundation: Chain 4, join with a slip stitch to form a ring.
- Round 1: Chain 2 (counts as first single crochet). Work 8 single crochets in the ring (total 9).
- Join with a slip stitch in the first stitch.
- Round 2: Chain 2 (acts as first sc), work 1 more single crochet in the same stitch (inc).
- 2 single crochets in each stitch around (total 18 sc).
- Close with a slip stitch.
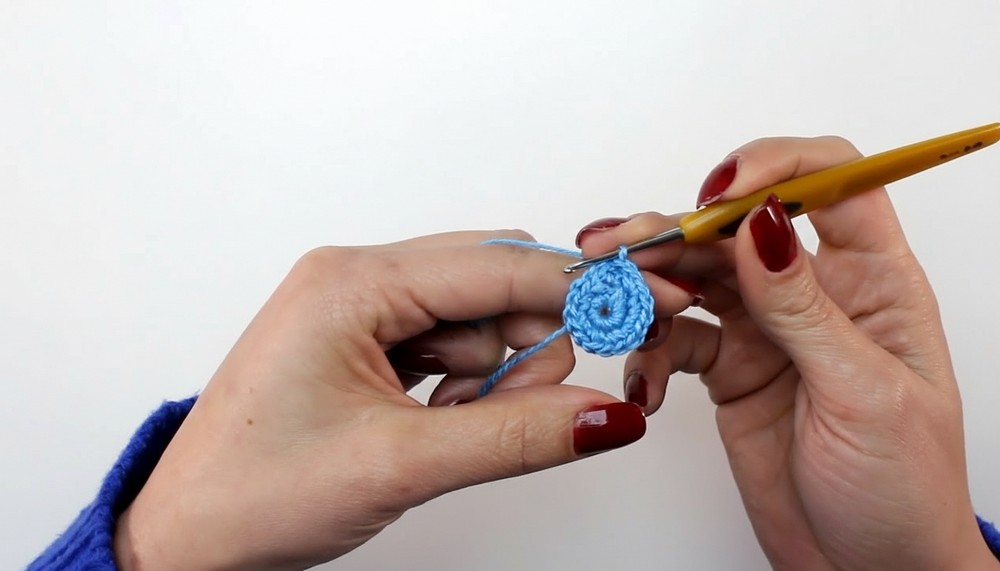
- Round 3: Chain 2, 1 single crochet in first stitch, 2 single crochet in next stitch (repeat around).
- Join with slip stitch.
2. Cap Body (Raised/Relief Stitches)
- Round 4: Chain 2, work 1 relief (front post) single crochet in each stitch around (crochet under the stitch).
- Close with slip stitch.
- Round 5: Chain 2, single crochet in next 3 sts, decrease over next 2 (sc4, dec). Repeat around.
- Join with slip stitch.
- Rounds 6–8: Work 3 rounds of single crochet in each stitch (no increases or decreases). Always chain 2 at start.
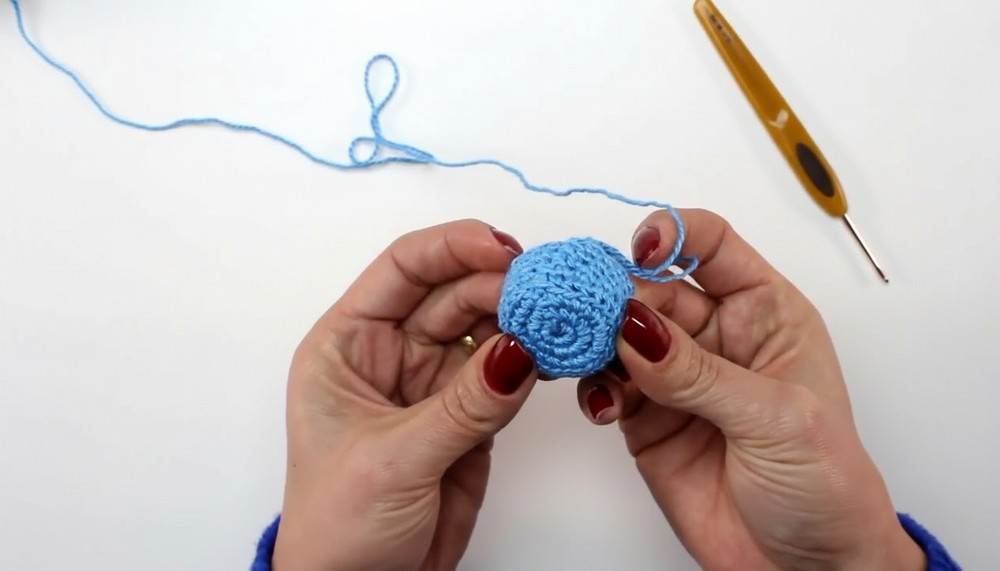
3. Add the Cap for Structure
- Insert the plastic bottle cap securely inside the crochet work.
- Tip: If not using a cap, you can stiffen the piece with commercial stiffener or DIY solutions.
4. Cap Base Decreases
- Round 9: Chain 2, work relief sc in next 5 sts, decrease over next 2 (repeat around).
- Join with slip stitch.
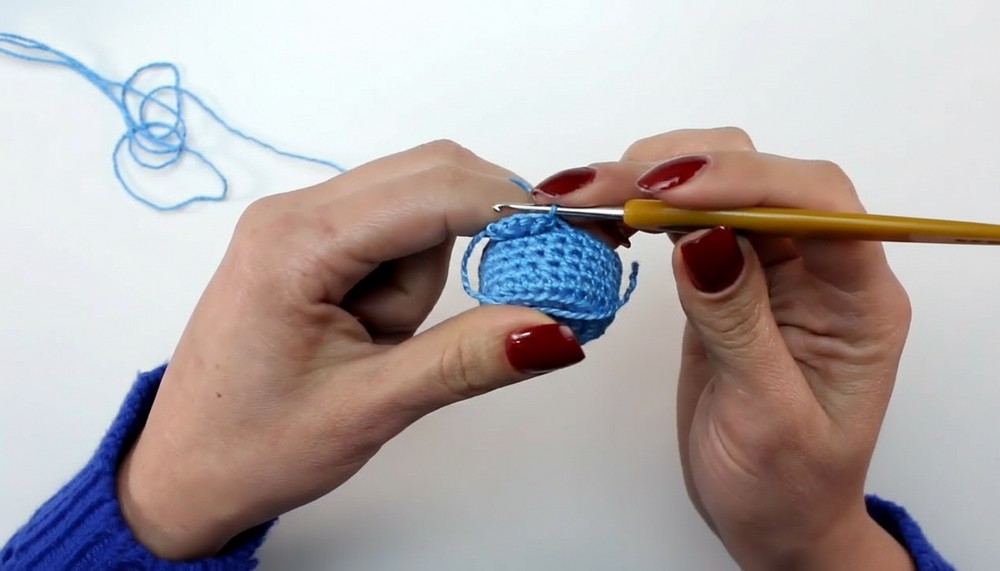
- Join with slip stitch.
- Round 10: Chain 2, work sc in next 4 sts, then decrease over next 2 (repeat).
- Join and fasten off. Weave in ends.
5. Cap Brim
- Identify brim position, opposite the closing seam.
- Attach yarn, chain 2, and work 3 single crochets across the brim stitches.
- Secure with a slip stitch.
- Brim Expansion:
- Turn work.
- Row 2: Sc in first, 2 sc in next, sc in last. Slip stitch to base.
- Row 3: Turn. Sc in first, 2 sc in next, sc in next, 2 sc in last. Slip stitch.
- Repeat: Continue rows, always increasing for shaped brim (about 4–5 rows), alternating sc and increases.
- Final Edging: Slip stitch around the entire cap edge for a neat finish.
6. Embellishment and Assembly
- Attach a decorative button or pearl to the cap top.
- Insert jump ring through cap stitches at back center, attach keychain clasp (use pliers or scissors to open and close).
- Personalize: Tie on a ribbon, add a paper label, or attach as a magnet or party favor.
Tutor's Suggestions
- Use sturdy yarn and secure the bottle cap tightly for durability.
- Explore different color combinations to match your event theme.
- Add small embellishments like embroidery, beads, or tiny bows for extra charm.
- For a softer cap, skip inserting the plastic cap and stiffen with starch if desired.
Uses
- Keychain or bag charm
- Party or baby shower favor (with personalized tags)
- Magnetic fridge decoration
- Decorative accessory for gifts
Conclusion
Making a mini crochet cap is a fun, eco-friendly project ideal for gifts, keepsakes, or personal use. The structured yet cute design allows you to experiment with colors and finishing touches, making each one unique. Share your creations, add special details, and enjoy the delight these mini caps bring to any celebration!
Tip
For a crisp, professional finish, gently press your cap with a warm iron through a cloth, and always weave in ends securely for lasting use.




Leave a Reply