
Glide through warm weather with this Crochet Tank Top Pattern offering featherlight comfort and a relaxed feel for sunny moments everywhere.
Handmade fashion pieces bring a distinctive charm to any wardrobe, and the timeless appeal of a crochet tank top pattern lies in its blend of style, comfort, and versatility. Perfect for layering or wearing solo during warmer months, this top feature breathable textures and intricate stitch work that elevate even the simplest outfit.
Carefree Crochet Tank Top Pattern for Everyday Comfort

The beauty of crochet allows crocheters to experiment with a palette of colors and patterns, resulting in personalized creations that suit any occasion—from casual beach days to chic urban evenings. The lightweight fabric ensures lasting comfort, while the structure flatters a range of body types for a universally appealing silhouette.
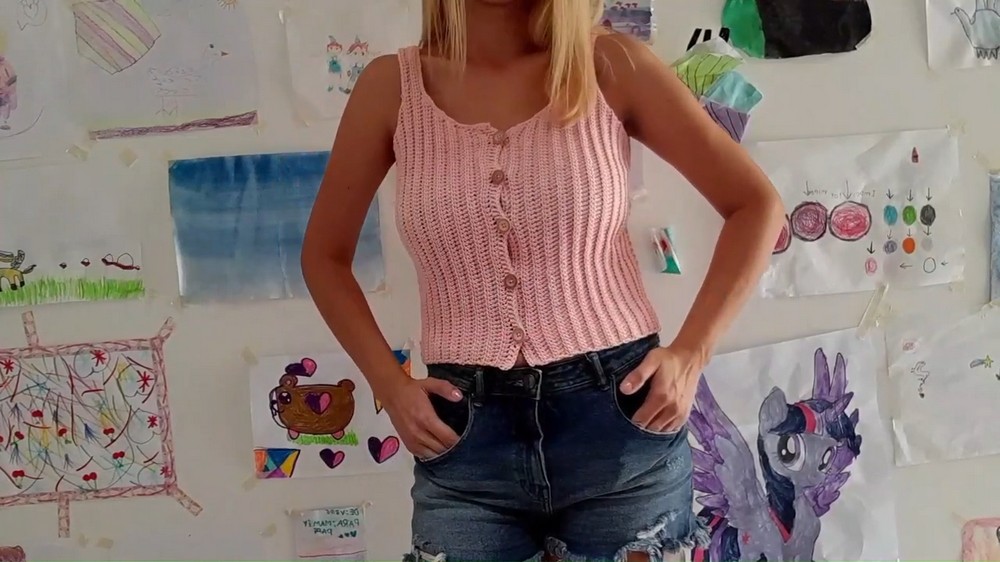
Beyond aesthetics, creating this top offers a satisfying and creative process for makers of all skill levels. The finished result showcases the warmth of handmade artistry and seamlessly complements contemporary or classic looks throughout the fashion seasons.
Special Features
- Customizable body length and shoulder straps
- Buttoned front for easy wear
- Neat rounded edges at neckline and armholes (no staggered corners!)
- Worked with half double crochet and slip stitch for texture and structure
- Suitable for various sizes
Difficulty Level
Beginner to Advanced Beginner
Basic knowledge of chains, half double crochet, slip stitch, and simple shaping is required. Stitch markers and row counting help ensure accuracy.
Materials
- 100% cotton yarn (“Natural Swan 6 Capes” recommended)
- 4mm crochet hook
- Scissors
- Stitch markers
- Yarn needle
- Buttons (as desired)
Step-by-Step Pattern
1. Foundation Chains
- Size S: Chain 60
- Size M: Chain 64
- Size L: Chain 68
- Size XL: Chain 72
Chain length is measured just under the armpit, from one side of the top to the desired length.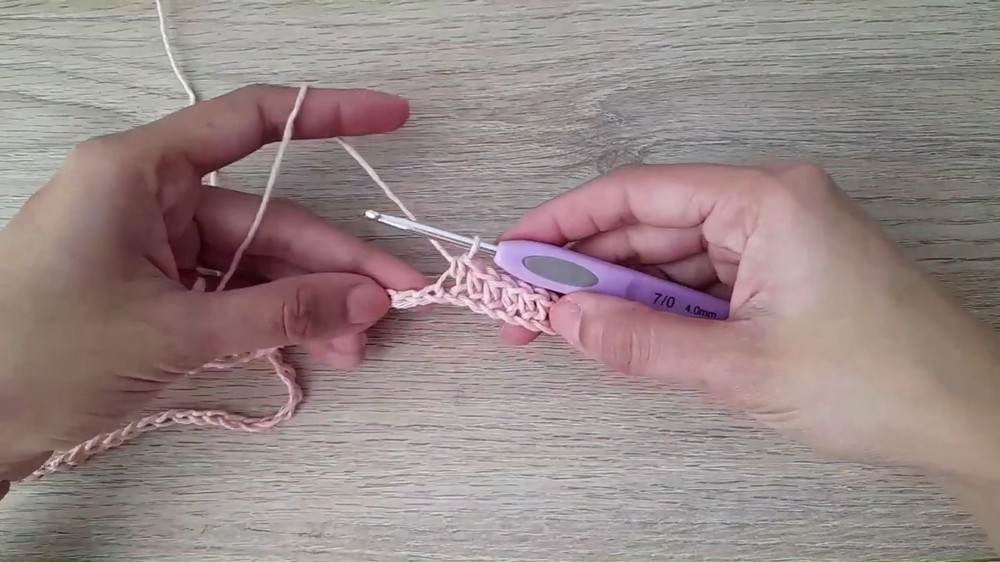
2. Work Initial Rows
- Row 1: Work half double crochet (hdc) in each chain, starting in the second chain from hook. (Total stitches will match your chain count.)
- If you’re new to half double crochet: Yarn over, insert hook, yarn over and pull up a loop (3 loops on hook), yarn over, pull through all 3 loops.
- Row 2: Chain 1, turn. Work hdc in back loop only of each stitch across.
- Size S: 2 rows;
Size M: 3 rows;
Size L: 4 rows;
Size XL: 5 rows.
3. Begin Side Increases (Shaping for Armhole)
- Remove stitch marker.
- Chain 3, turn.
- In the second chain from hook, work 1 hdc; in the next chain, work 1 hdc.
- Continue in established pattern (hdc in back loop only) to end of row. Mark the first stitch for reference.
- Your stitch count now increases by 2.

4. Continue Increases
- Work additional rows of hdc in back loop only.
- Repeat the increase rows as needed for your size:
- Each increase row starts with chain 3, then two hdc in chains before returning to the body.
- Continue for designated number of rows for size.
5. Make Shoulder Strap
- Chain 5 (for size S; adjust for other sizes as per desired strap width).
- Turn, make hdc in second chain from hook (4 hdc for increased width).
- Work up the row in pattern (hdc in back loop only), marking the first stitch.
- Complete the current and next row for strap.
- For other sizes, use more chains (see video for M: 21 chains, L: 25 chains, XL: 27 chains).
6. Work Across Top Section
- Chain 1, turn, hdc across back loop only for desired length.
- Work additional rows for depth as required.
- Use stitch markers to note row start/end.
7. Shaping Opposite Armhole
- In rows following the shoulder strap, work decreases as follows:
- At row start, work hdc up to the marked fifth stitch, place marker.
- Turn and work only to the marked stitch for the next row.
- Repeat process for three stitches and subsequent rows to decrease shoulder edge.
8. Finish Front Panel
- Chain 1, work one row of regular hdc through both loops to neaten the edge for button placement.
9. Make Second Front Panel
- Repeat steps 1-8, but omit the last two finishing rows (for buttonhole front).
10. Create Buttonholes
- With the buttonhole panel, resume at the initial chain edge.
- Chain 2 for height, work double crochet (dc) along this edge.
- For each buttonhole: chain 1, skip 1 stitch, continue dc.
- Ensure spacing between buttonholes matches the markers on the buttoned panel.
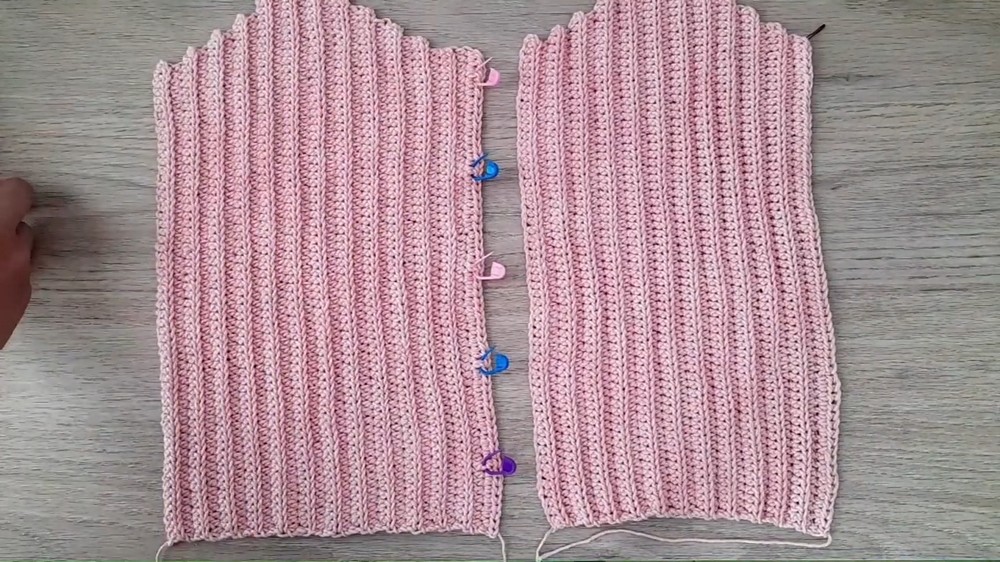
11. Work Back Panel
- The back is constructed as two front panels joined together (mirroring the increases, straps, and decreases as above).
- Skip the last two extra rows as in the buttonhole panel.
12. Join Pieces
- Lay the buttoned front, buttonhole front, and back pieces side by side.
- First, sew shoulders (straps) together using yarn needle and mattress or whip stitch.
- Align the buttoned/buttonhole fronts with the back and sew side seams, ensuring rows and edges match.
- Use markers to keep all seams even.
13. Neaten Edges (Neckline and Armholes)
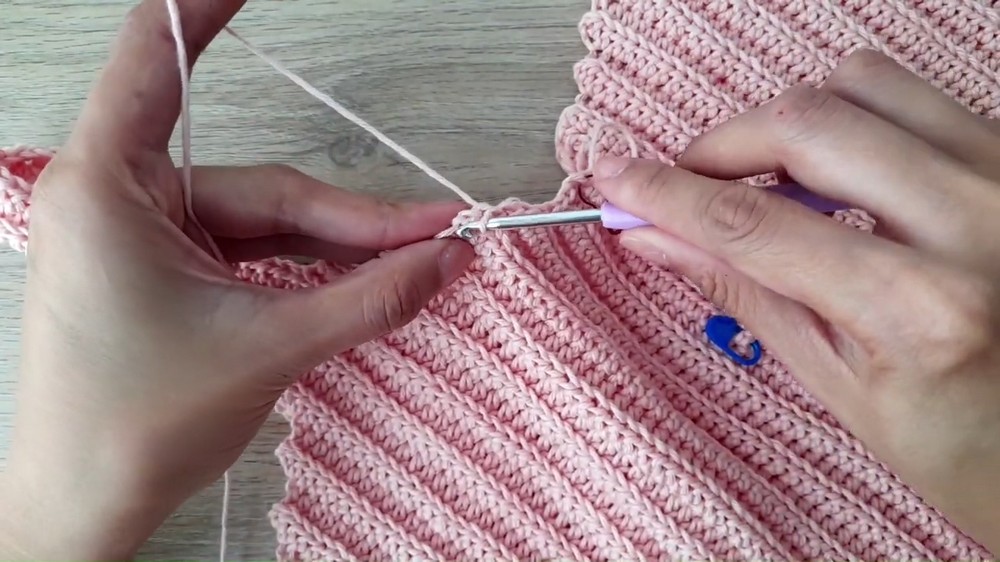
- With yarn and hook, work slip stitch edging along neckline, armholes, and straps:
- First row: slip stitch, sometimes working directly into chain spaces or stitch centers to round corners.
- Second row: slip stitch in back loop only for extra definition.
14. Sew on Buttons
- Evenly space buttons using your stitch markers as a guide.
- Sew securely with thread and needle, matching to buttonholes.
Tutor's Suggestions & Uses
- Best with cotton yarn for comfort and breathability.
- Use plenty of stitch markers—they make tracking stitches easier and keep shaping precise.
- Take time to ensure button and buttonhole alignment before sewing.
- This top is a great choice for everyday wear, layering, or gifting.
Tip
For smoother edges and easier sewing, always work slip stitch edging carefully into chain spaces or stitch centers at corners (not just regular edges). This removes any stair-stepping or jagged effect and creates a professional, rounded finish.
Conclusion
This pattern allows you to crochet a stylish tank top with clean details and customized fit. You’ll love the versatility—wear it alone in summer or layered through the seasons. The clear instructions and helpful tips make it rewarding for beginners and a breeze for more practiced hands.




Leave a Reply