
Step into summer style with this Crochet Summer Vest Top Pattern that's easy to follow, and perfect for adding a breezy touch to any outfit.
Everyone will love adding this beautiful and practical piece to their summer collection. Designed as a crochet summer vest top pattern, it is light, airy, and perfect for hot days, giving you an easy way to stay cool while looking stylish. You can wear it over a tank top with shorts for a relaxed afternoon or layer it over your favorite dress for a special evening.
Lacy Crochet Summer Vest Top Pattern Insta-Ready Looks

The lovely stitches give it a handmade and unique look, making it stand out wherever you go. With its open design, it covers you just enough without feeling heavy or tight. This piece is great for the beach, festivals, or simply running errands around town.
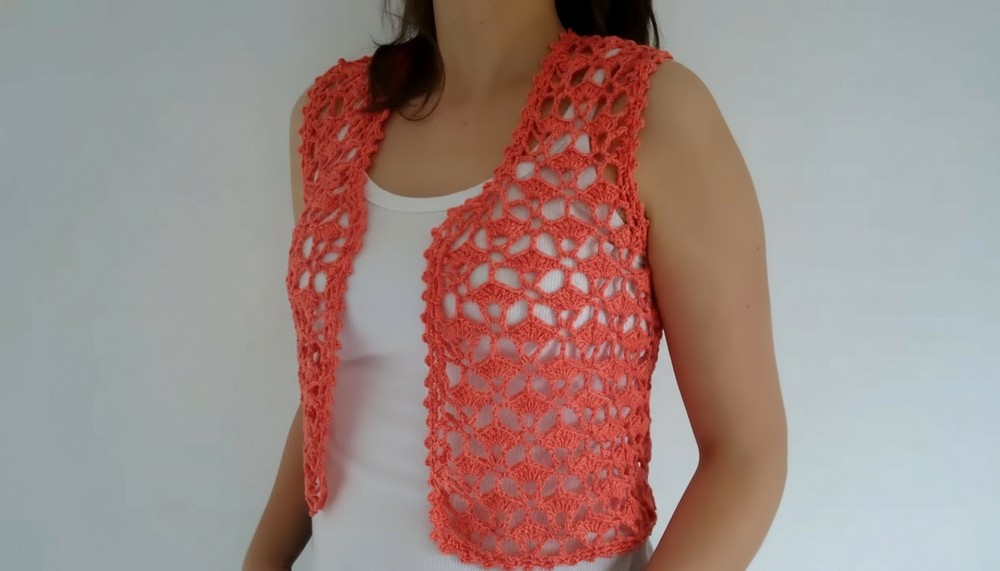
You can choose any color you like to make it fit your own style. Comfortable, beautiful, and easy to wear, this pattern will quickly become a favorite in your summer wardrobe.
Special Features
- Open, Lacy Design: Uses V stitches and chained spaces for a breezy look.
- Seamless Back-to-Front Construction: Minimal seaming for a smooth fit.
- Elegant Picot Edging: Adds a decorative, finished look to all openings.
- Adjustable Width: Easily adapt foundation for custom sizing.
- Beginner-Friendly Repeats: Only two main pattern rows repeated throughout.
Difficulty Level
Confident Beginner to Intermediate
- If you know chain, double crochet, and single crochet, you can do this!
Materials
- Yarn: 150g skein of 100% cotton (about 405 meters; medium to thick weight), orange used in sample.
- Hook: 2.5 mm
- Notions: Tapestry needle for finishing, scissors, two scrap yarns/stitch markers for marking
Step-by-Step Pattern
1. Foundation Chain
- Chain 167 (measures approx. 82 cm).
- Tip: Your chain length may vary by tension; the key is getting 82 cm. For a wider vest, increase by multiples of 10 chains.
- Add 10 extra chains for every 10 cm you wish to increase width.
- If your repeat ends oddly, always finish with a double crochet (not a V stitch).
2. Row 1: Setup Row
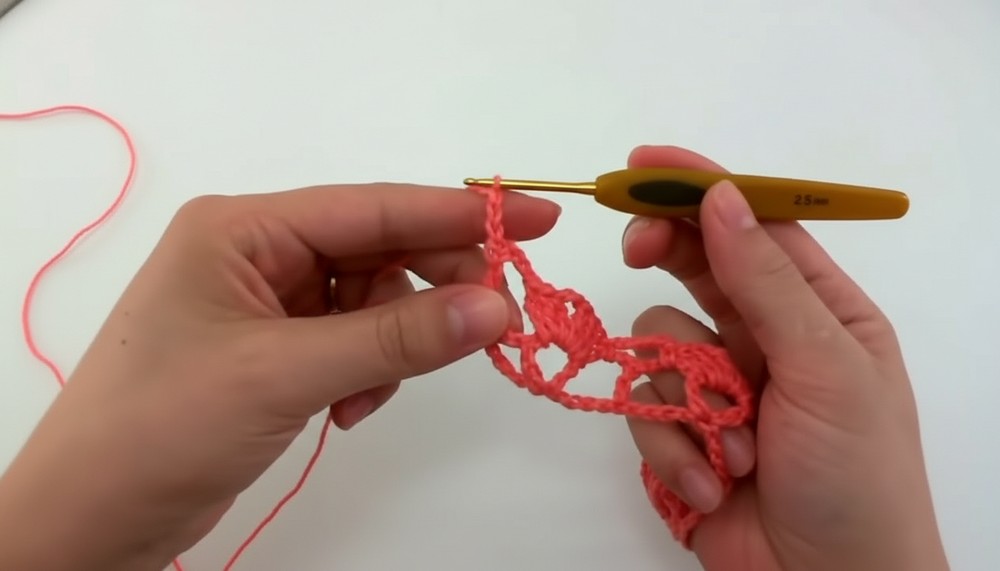
- Skip 11 chains (counts for edge, spacing, and turning), in the 12th ch, make a simple V stitch (dc, ch 4, dc) in same chain.
- Ch 4, skip 4 chains, dc in next chain.
- Ch 4, skip 4 chains, V stitch in next chain.
- Repeat across, alternating dc and V stitch, always separating by ch-4 and skipping 4 chains.
- Finish with a dc in the last chain.
3. Row 2: Triple V Row
- Ch 3 (counts as dc), ch 4 (space), turn.
- In center of each V stitch of previous row, make a triple V: (3 dc, ch 2, 3 dc) in the chain-4 space of the V.
- In the chain-4 spaces on either side of the double crochets: sc, ch 4, sc in next space.
- Alternate across: Triple V over V stitch, (sc, ch 4, sc) in spaces next to dc.
- End: ch 4, dc in 5th chain from previous edge.
4. Row 3: Repeating V Row
- Ch 3 (dc), ch 4, turn.
- In center of each triple V, work a simple V (dc, ch 4, dc).
- Ch 4, dc in the (ch-2) center of Triple V from previous row.
- Continue: V in center of triple V, ch 4, dc in center of next triple V, across.
- Finish with dc as established.
5. Continue Repeating Rows 2 & 3
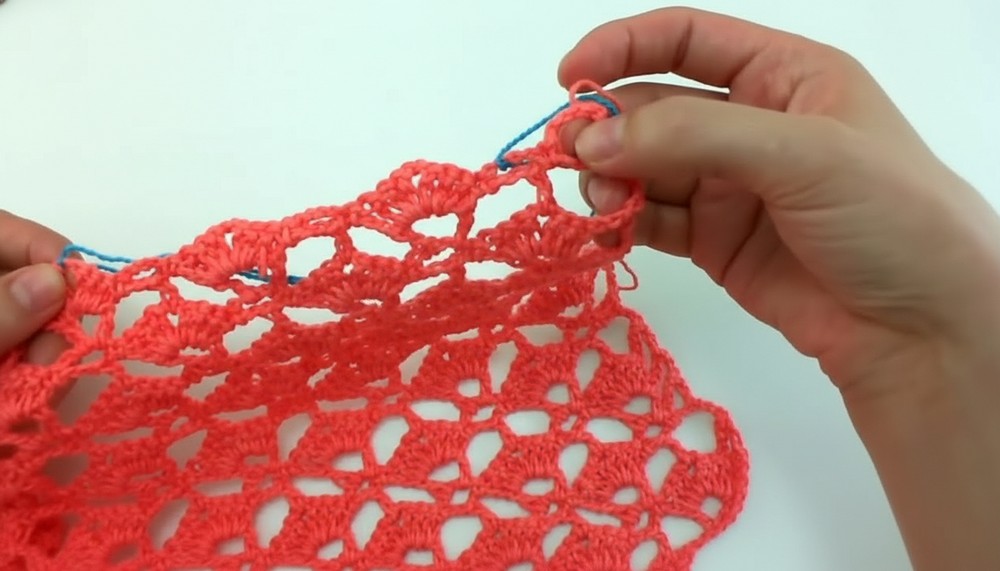
- Alternate Row 2 (Triple V) and Row 3 (Simple V).
- Work until piece measures 23 cm in height.
6. Divide for Back and Fronts
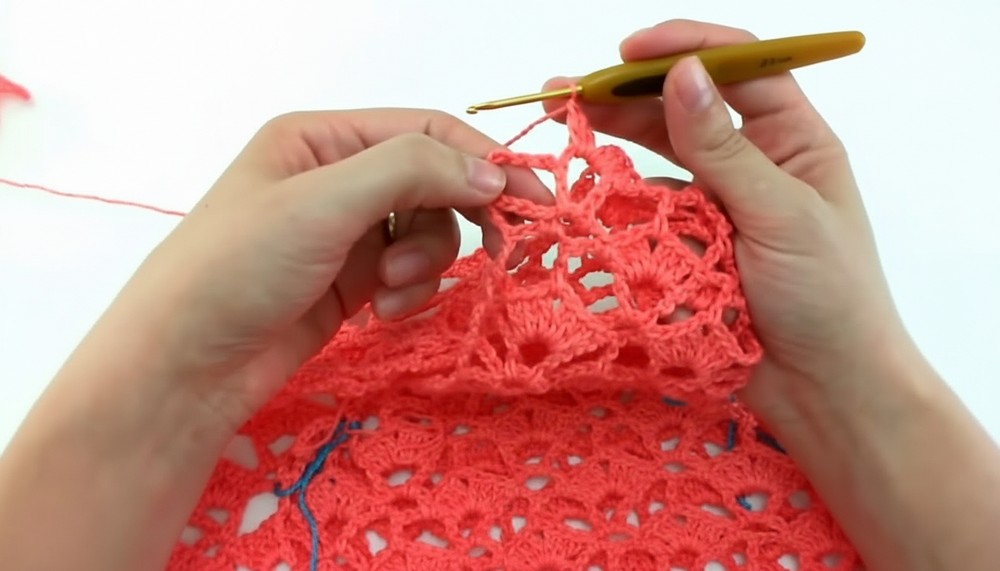
- After 23 cm, measure across. Mark the center 35 cm for the back with a scrap yarn/stitch marker.
- The two remaining sections, about 27 cm each, become the two fronts.
7. Back Section
- Attach yarn at left front marker. Work across the designated back stitches for 18 cm more.
- For first 9 cm, work Rows 2 & 3 as described.
- For final 9 cm, decrease as follows:
- Begin row with ch 3 only (skip the ch 4 at beginning/end); this tapers armholes.
- Work only over 5 V/bases, decreasing as needed by skipping V placements or chain spaces as described for a gentle slope.
8. Front Sections (Work Each Side Separately)
- Attach yarn at marked front edge, leaving the chain-4 armhole space empty.
- Work foundation (Row 3) so that Vs are on the right side.
- Shape front as for back, but start at armhole edge and work toward center.
- Taper armhole edges as you did for the back when working the final rows.
- Work same number of rows as for back (should be about 14 after armhole shaping).
9. Join Shoulders
- For a seamless look, on the last row of each front, join to back as you go (use single crochet, slip stitch, or join as you crochet). See transcript for “join as you work” method.
- Make sure Vs and dcs match across the seam for a smooth result.

10. Finishing: Edging and Picots
First Row:
- Starting at lower edge, ch 4, sc in next space, repeat around entire vest edge, neck, and both armholes.
- Always ch 4, sc in next open space (center of V or ch-4 space).
Second Row:
- Ch 4, return to 1st ch, sc (picot made), sc in next ch-4 space.
- Repeat: ch 4, picot, sc in next space all around edge.
- Fasten off and weave in ends on the inside of the work using a tapestry needle.
Tutor's Suggestions
- Use stitch markers or different color yarn for easy piece division and symmetry.
- Keep measurements consistent for a neat fit, and adjust chain multiples as needed for your size or gauge.
- Always block your finished piece for the best drape and to open up the lacework.
Tip
If joining as you go (instead of sewing), always check that your stitches from front and back sections align for a seamless look.
Conclusion
You've completed a breezy, stylish summer vest with a beautiful lace and picot finish. It's light, airy, and perfect for summer layering—wear over a tank top at the beach, or pair with a summer dress.




Leave a Reply