
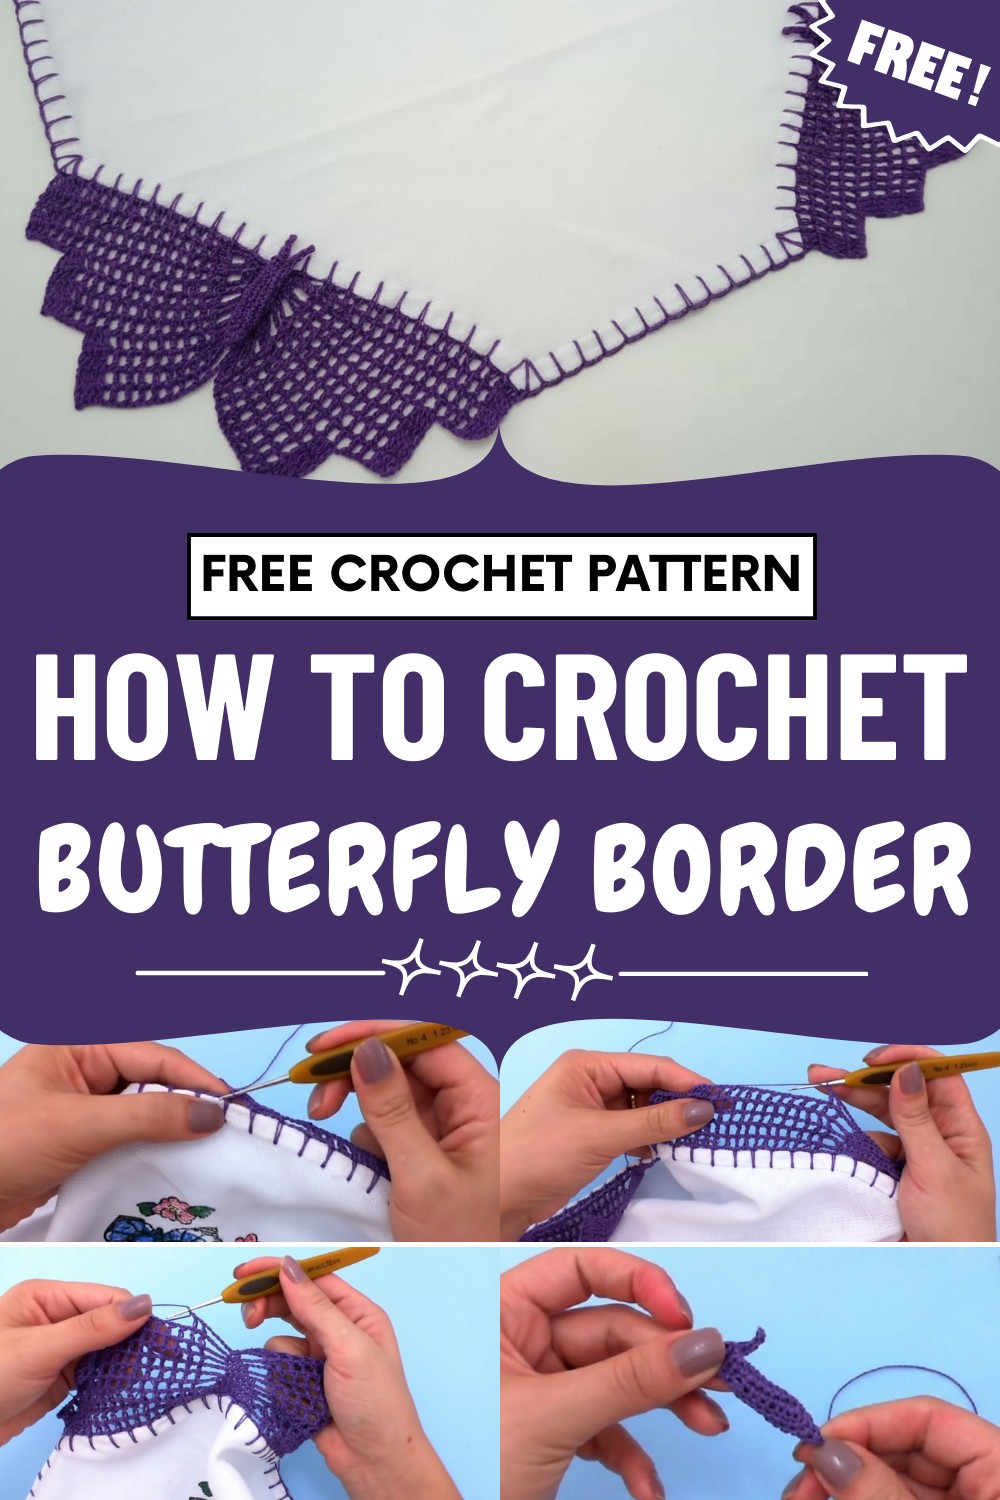
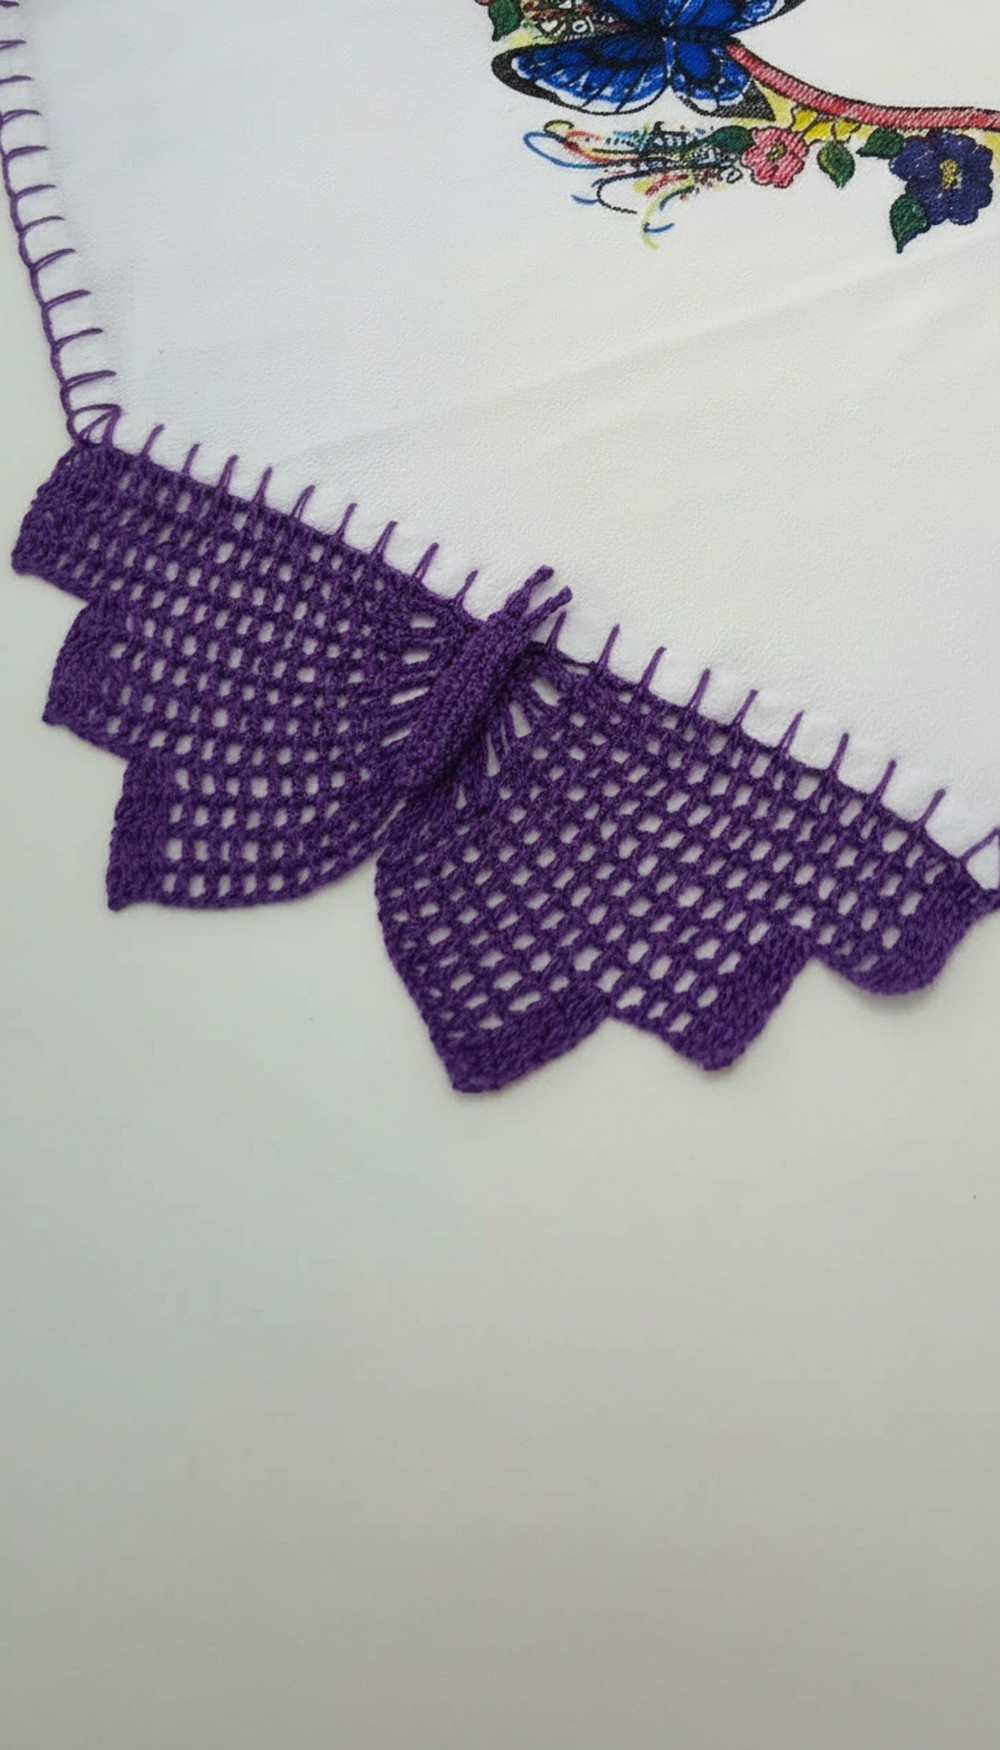
Inspire your next project with this Crochet Butterfly Border Pattern, offering a playful touch that beautifully accents any blanket or scarf.
Adding a gentle touch of beauty to any project, a delicate border with a tiny butterfly can truly make your crochet work stand out. The Crochet Butterfly Border Pattern lets you bring whimsy and charm to the edge of a blanket, scarf, tablecloth, or even a garment. With a single butterfly resting along the edge, your creation gains a lovely decorative detail that feels both fresh and lively.
Fluttering Beauty Crochet Butterfly Border Pattern With Step-By-Step Guide
This pattern is a wonderful choice if you want to personalize a gift or simply make your finished piece more cheerful and special. It is simple enough for beginners to try, yet offers enjoyment for more experienced crocheters who want to explore color or stitch variations.
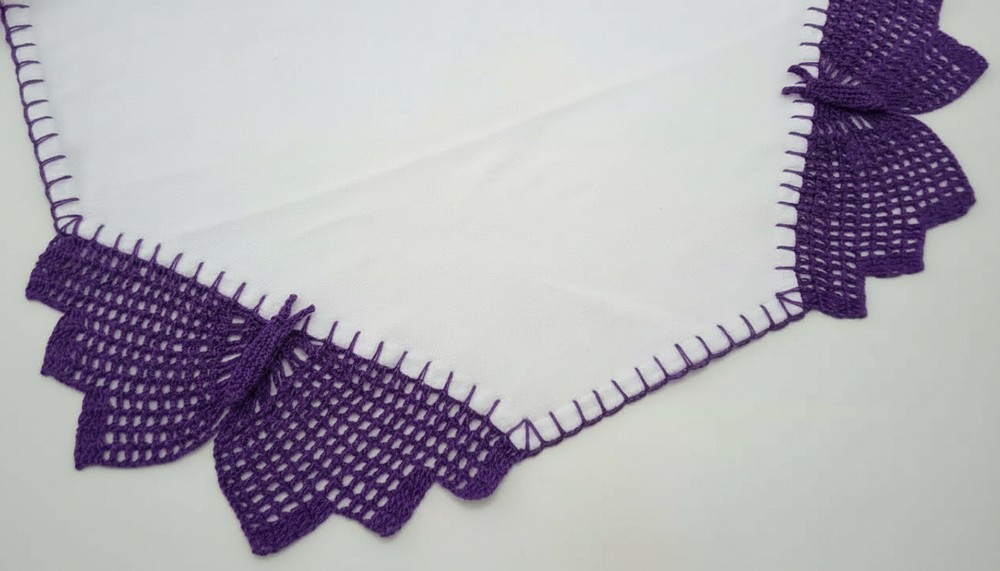
Not only does this border add texture and a pretty finish, but it’s also a great way to use up small bits of your favorite yarn. Whether you prefer a subtle edge or a bold accent, this pattern gives your project a joyful, handmade look.
Special Features
- Versatile and Customizable: Works for various towel sizes, adjustable to your measurements.
- Mixed Technique: Simple hand-sewn hem plus a crochet butterfly motif joined to the fabric.
- Durable and Decorative: Secure finishes, classic buttonhole edging, and dimensional butterflies for a lasting accent.
- Perfect for Leftover Yarn: Ideal way to use small amounts of cotton yarn in your favorite colors.
Level of Difficulty
Beginner to Advanced Beginner.
Requires basic hand sewing, crochet foundation, and simple shaping skills.
Materials
- Small towel or dishcloth (e.g., 46 cm wide, but 42–48 cm works also)
- Measuring tape, marking pen or pencil
- Scissors, sewing needle (hand sewing), white sewing thread
- Iron (optional for folding hems)
- Crochet hook, 1.25 mm (or size 4)
- 100% cotton yarn leftovers (e.g., purple, but any color matches)
- Tapestry needle (for weaving ends and sewing butterfly)
Step-by-Step Pattern
1. Prepare the Towel Corners
- Mark and Cut:
- From each lower corner, use a measuring tape to mark a line at 21 cm (for a finished diagonal cut of about 22 cm after hemming).
- Cut along your marks to form a triangle on each lower corner.
- Fold and Iron:
- Fold the cut edge in by about 0.5–1 cm, tucking in the triangle tip.
- Mark the fold with an iron for crispness.
2. Hem the Cut Edges
- Thread needle with white sewing thread. Knot the end.
- Sew a hem:
- Insert needle into fold, bring out through right side, tiny stitches along the folded edge, grabbing both layers.
- Stitch along the full cut edge. When done, anchor thread and weave in securely.
- Repeat for second corner.
3. Crochet the Buttonhole Base
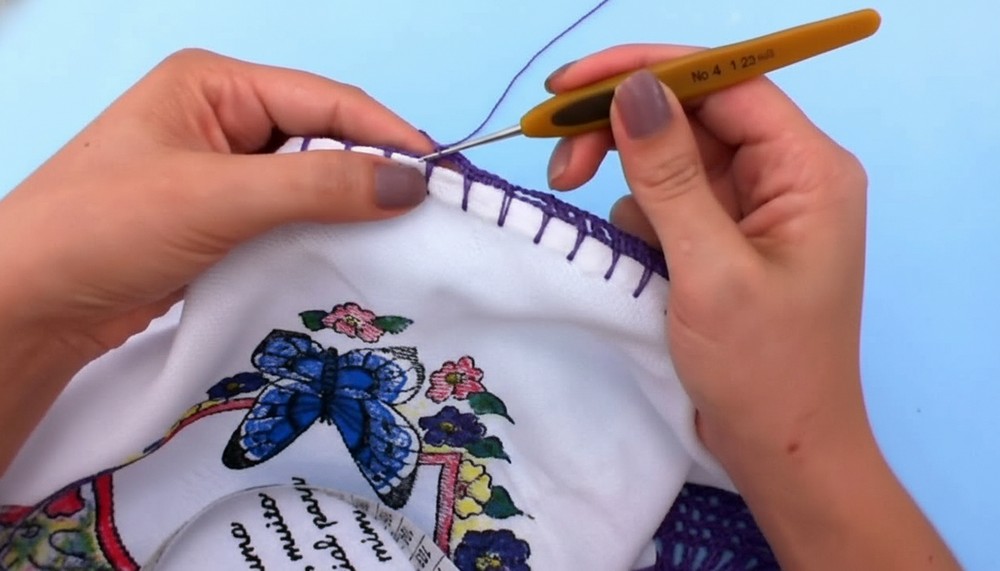
- Join yarn at the corner of your hemmed cut edge.
- Secure with two knots if needed.
- Work a base row:
- (Ch 3, sc in fabric 0.5–1 cm away): Repeat along the entire hemmed edge, keeping spacing even.
- At corners, work: (ch 3, sc in same spot) three times to curve.
- Continue around all exposed towel edges, including the new cut sides.
- Finish with sl st to starting point. Weave in ends.
4. Crochet Butterfly Motif (Make 2, one on each corner)
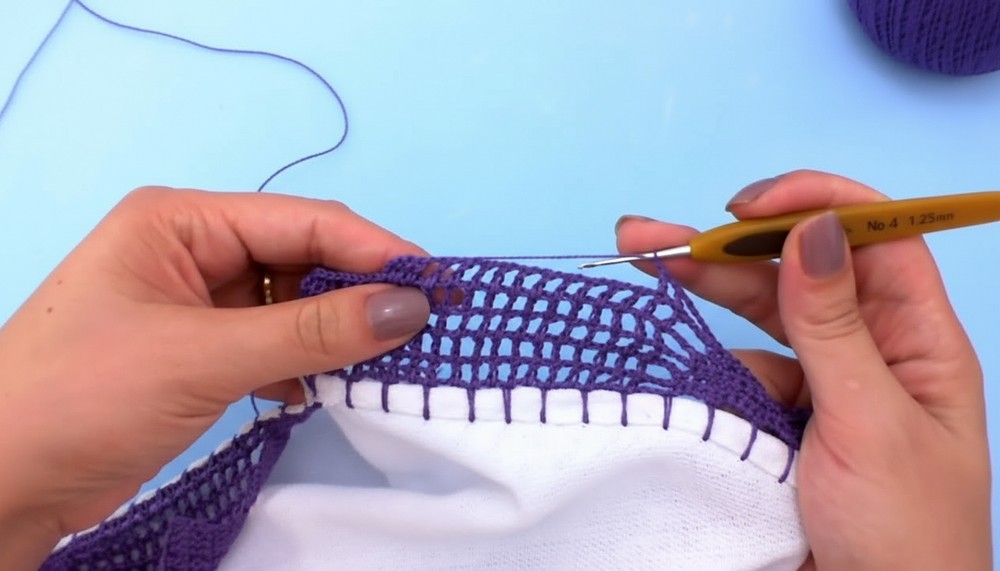
A. Butterfly Wings (worked into buttonhole base):
- With colored yarn, join at the buttonhole corner (pick a stitch in the base row).
- First Side of Wing:
- Ch 2 (counts as dc), work 2 dc in same base space, dc in next buttonhole stitch (total 4 dc).
- Ch 1, dc in next space, ch 1, dc in next buttonhole stitch; repeat until you have 9 "spaces" (as fits your towel’s size; adjust if needed).
- Butterfly Body (center):
- Ch 3, skip next space, sc in next buttonhole.
- Work 10 single crochet across (use spaces and stitches).
- Ch 3, skip one space, resume next “wing.”
- Second Side of Wing:
- Repeat Ch 1, dc in next space or stitch, etc., for 9 spaces.
- End with 4 dc at the corner.
- Finish the wing row.
B. Build Height & Shape Butterfly Wings:
- Repeat previous row:
- Ch 3, turn, dc in each dc, work (ch 1, dc in dc), etc.
- Where the "body" is, work 10 sc.
- Repeat for four rows, reducing the number of sc in the body by 2 every other row (10, 8, 6, 4, etc.).
- Continue as established;
- At each four-row interval, decrease 2 more sc at the butterfly's "body."
- Shape the wing edges: at certain rows, work fewer dc and skip/leave unworked the final 3 spaces on each end for the sloped "wing" shape.
C. Final Butterfly Rows:
- When you have reduced body to 2 sc, start finishing the edge:
- Optionally add picot stitches around the wings for extra detail.
- Fasten off and weave in ends. Block/steam as needed for crispness.

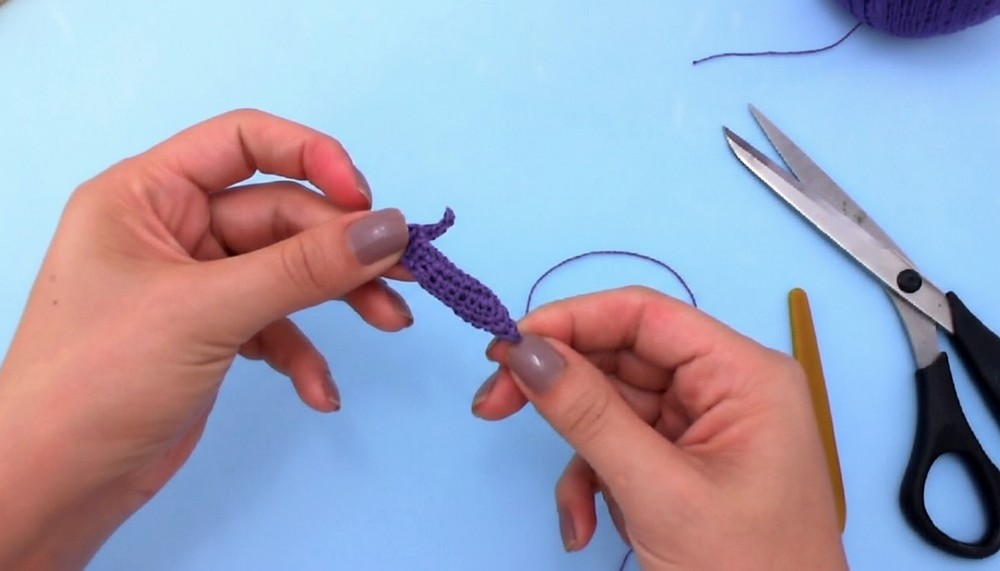
5. Butterfly Body & Antennae
- With yarn, ch 10.
- Row 1:
- Turn. Sc in each ch across for 9 sc.
- Work 1 extra sc at the end to turn and sc back along the foundation, making an oval.
- Continue for 4 rounds:
- At each "tip," add more sc to keep the curve (increase 3, then 5, then 7 on each end as instructed).
- Antennae:
- At one tip, ch 6, sc in 2nd ch from hook and across, sl st to same base point. Repeat for second antenna.
- Fold body in half lengthwise.
- Slip stitch or sew long edges together.
- Fasten off, leaving a long tail for sewing.
6. Assembly: Attach Butterfly Body
- Sew butterfly body to the center of the wings on towel's edge using a sewing needle and the long yarn tail.
- Align neatly; stitch at both “wing joins” and along the body for security.
- Weave in all ends.
Tutor’s Suggestions
- Steam or iron your finished work (with a damp cloth on top!) for best shape and crispness.
- For bigger towels, add extra wing segments or slightly more body stitches.
- Pin the butterfly body in place before sewing for accuracy.
Uses
- Kitchen towels, tea towels, napkins
- Gift or home décor
- Adds value to homemade or store-bought towels
Tip
Keep your hem and stitches even for a professional finish—use a ruler and pins, and block your butterfly for the best look! Small leftover yarns are perfect for colorful butterflies.
Conclusion
You’ve made a unique and beautiful butterfly border for towel corners! This technique not only recycles leftover yarn but brings a cheerful touch to any kitchen or gift.




Leave a Reply