
Hang stunning blooms with this Crochet Flower Wall Hanging Pattern to create a lively, charming focal point that enhances any room instantly.
Delicate floral motifs and enchanting details bring vibrant personality and elegance to any wall. Presently admired for its ability to enliven living rooms, bedrooms, and nurseries, a crochet flower wall hanging pattern offers both visual and emotional warmth. The harmonious blend of colors and textures provides a refreshing, organic accent, instantly transforming a blank space into an inviting display.
Easy Crochet Flower Wall Hanging Pattern That Looks Luxe

With the flexibility to tailor hues and dimensions, this enhancement easily suits a variety of décor styles—from minimalist sophistication to boho charm. Its lightweight design ensures effortless hanging and repositioning, ideal for seasonal updates or special occasions.
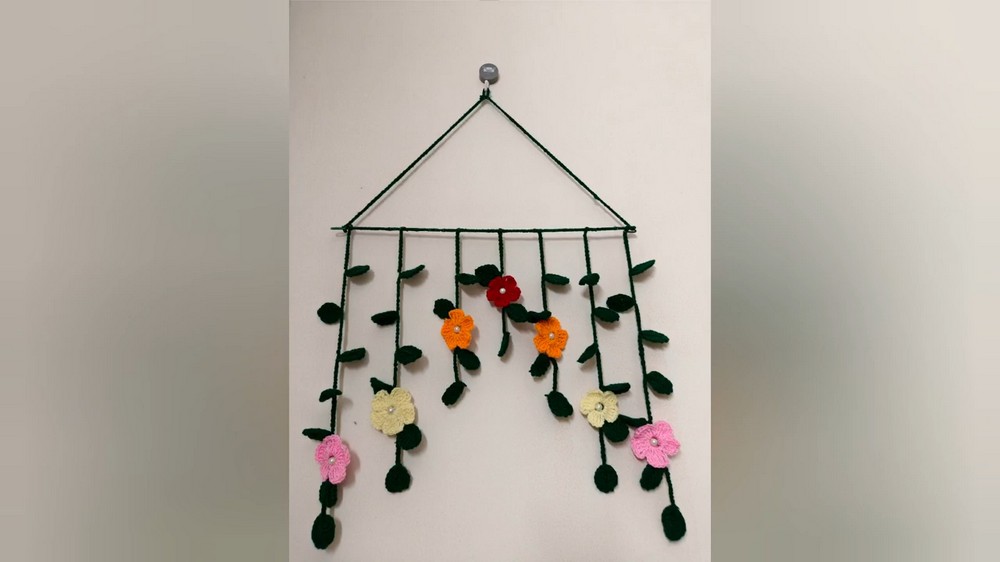
Assembling each bloom allows for enjoyable personalization, culminating in a distinctive piece that expresses thoughtful style and creativity. Perfect for gifting or elevating everyday surroundings, a crochet flower wall hanging pattern delivers lasting beauty, versatility, and a gentle reminder of the joys found in decorative artistry.
Special Features
- Realistic, textured leaves and flowers
- Customizable length, number of leaves, and colors
- Lightweight and easy to hang
- Suitable for various spaces: living room, entryway, bedroom
Level of Difficulty
Beginner-friendly
This project is great for beginners. It uses basic crochet stitches and straightforward assembly, making it accessible for anyone familiar with single, half double, and double crochet stitches.
Materials
- 2.5 mm crochet hook
- Yarn in green (leaves, stem), brown (stem stick covering), and assorted colors (flowers)
- Scissors
- Glue (for attaching and wrapping stick)
- Tapestry needle (for weaving in ends)
- Stick (for the main support)
- Optional: Hook for hanging
Tutor’s Suggestions
- Choose yarn colors to match your decor or for a more natural look.
- Adjust the number and size of leaves to fit your space.
- Make flowers in bright colors for a cheerful effect or soft tones for a subtle accent.
Step-by-Step Pattern
1. Crochet a Leaf
- Make a slip knot.
- Chain 8.
- Starting in the second chain from the hook, work:
- 1 single crochet in the next chain.
- 1 half double crochet in next chain.
- 1 double crochet in each of the next 3 chains.
- 1 half double crochet in the next chain.
- 1 single crochet in the last chain.
- Rotate your work to crochet along the other side of the starting chain:

- 1 single crochet.
- 1 half double crochet in the next chain.
- 1 double crochet in each of the next 3 chains.
- 1 half double crochet in the next chain.
- 1 single crochet in the last chain.
- Slip stitch into the first chain to join.
- Work 8 slip stitches around the space between the stitches to give the leaf its final shape.
2. Make Chains for Leaf Strands
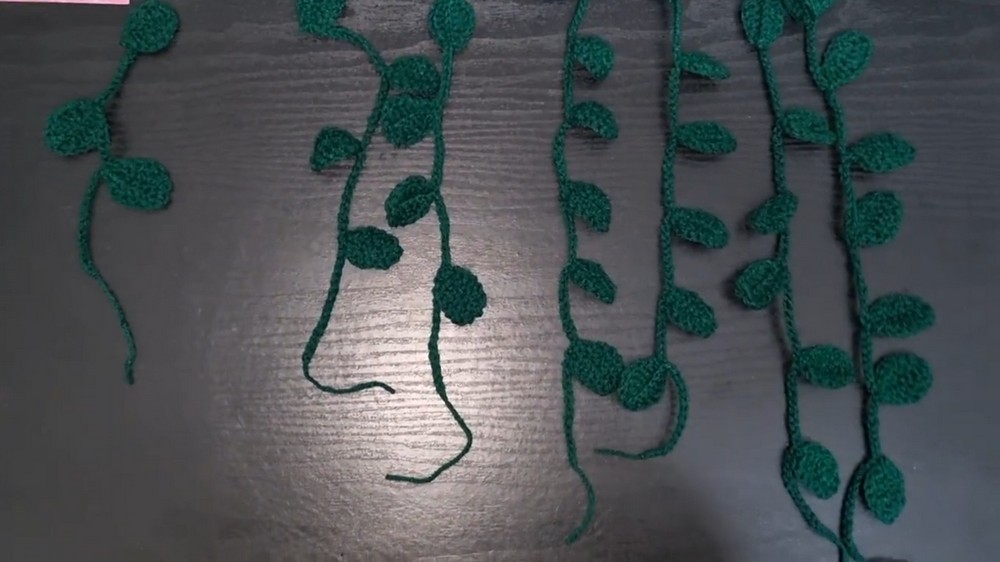
- Chain 3 (this will be the distance between leaves).
- Repeat leaf pattern as above.
- Make a total of 7 leaves for the main strand.
- Create secondary strands: make one with 6 leaves, one with 4 leaves, and another with 3 leaves for the center.
3. Assemble on Stick
- Use a stick as the base.
- Place the strand with 3 leaves at the center.
- Attach the 4-leaf strands on both sides of the center.
- Evenly space and arrange the strands along the stick.
4. Make Hanging Strings
- Make two separate chains for hanging the wall hanging.
- Attach the ends to both sides of the stick.
- Make a short chain and attach it to the center for placing on a wall hook.
5. Cover the Stick (Optional)
- Apply glue to the stick.
- Wrap brown or green yarn over the stick to cover it.
6. Crochet Flower
- Make a slip knot.
- Chain 8, then slip stitch to first chain to form a ring.
- Petal:
- Chain 4.
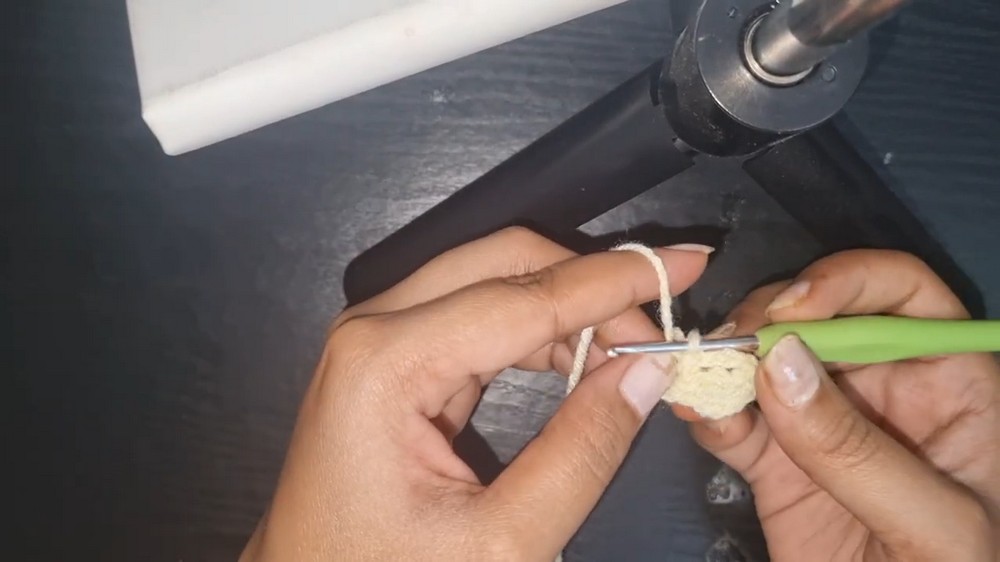
- Work 3 double treble crochets (yarn over twice for each) into the center ring.
- Chain 4 and slip stitch into ring.
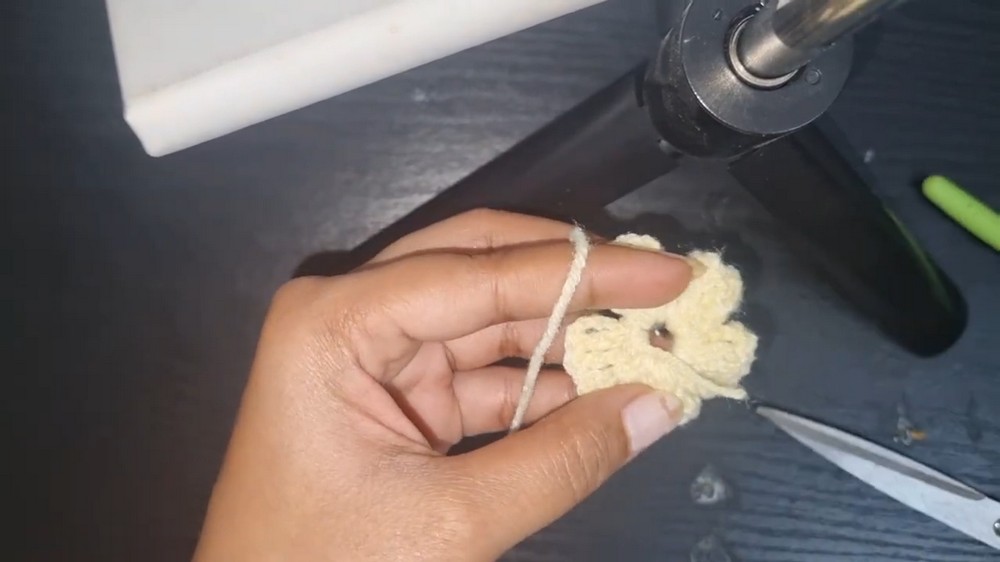
- Repeat for 5 petals in total.
- Chain 4.
- Fasten off, weave in ends, and trim any extra yarn.
- Make several flowers in different colors.
7. Attach Flowers
- Arrange and attach the flowers on the wall hanging as desired.
- Secure with needle and yarn, or glue for extra hold.
8. Finishing
- Weave in any loose ends.
- Make sure all pieces are securely attached.
Uses
- Wall decor for living rooms, bedrooms, hallways, or windows
- A natural touch for special occasions or as a gift
- Seasonal accent piece for spring and summer
Tip
For a sturdy and neat look, block each leaf before assembly—mist lightly with water, pin into shape, and let dry completely. This enhances both shape and longevity of your wall hanging.
Conclusion
A crochet leafy wall hanging instantly brightens any space with a handcrafted touch. It’s a simple yet charming project for beginners, offering endless opportunities to personalize with colors and arrangement.




Leave a Reply