
Bundle up in style with this Crochet Scarf Pattern featuring cozy stitches, warmth, and adaptable appeal for every outfits and layered looks.
Soft textures and simple lines make this accessory a favorite for many people. The crochet scarf pattern comes in many styles, from light and airy to thick and cozy, so you can use it in different seasons. It is popular because it keeps you warm and adds a special touch to any outfit. Scarves are very useful—they can be worn for warmth, as a stylish accessory, or even as a quick cover-up.
Cozy Crochet Scarf Pattern Perfect for Cool Days
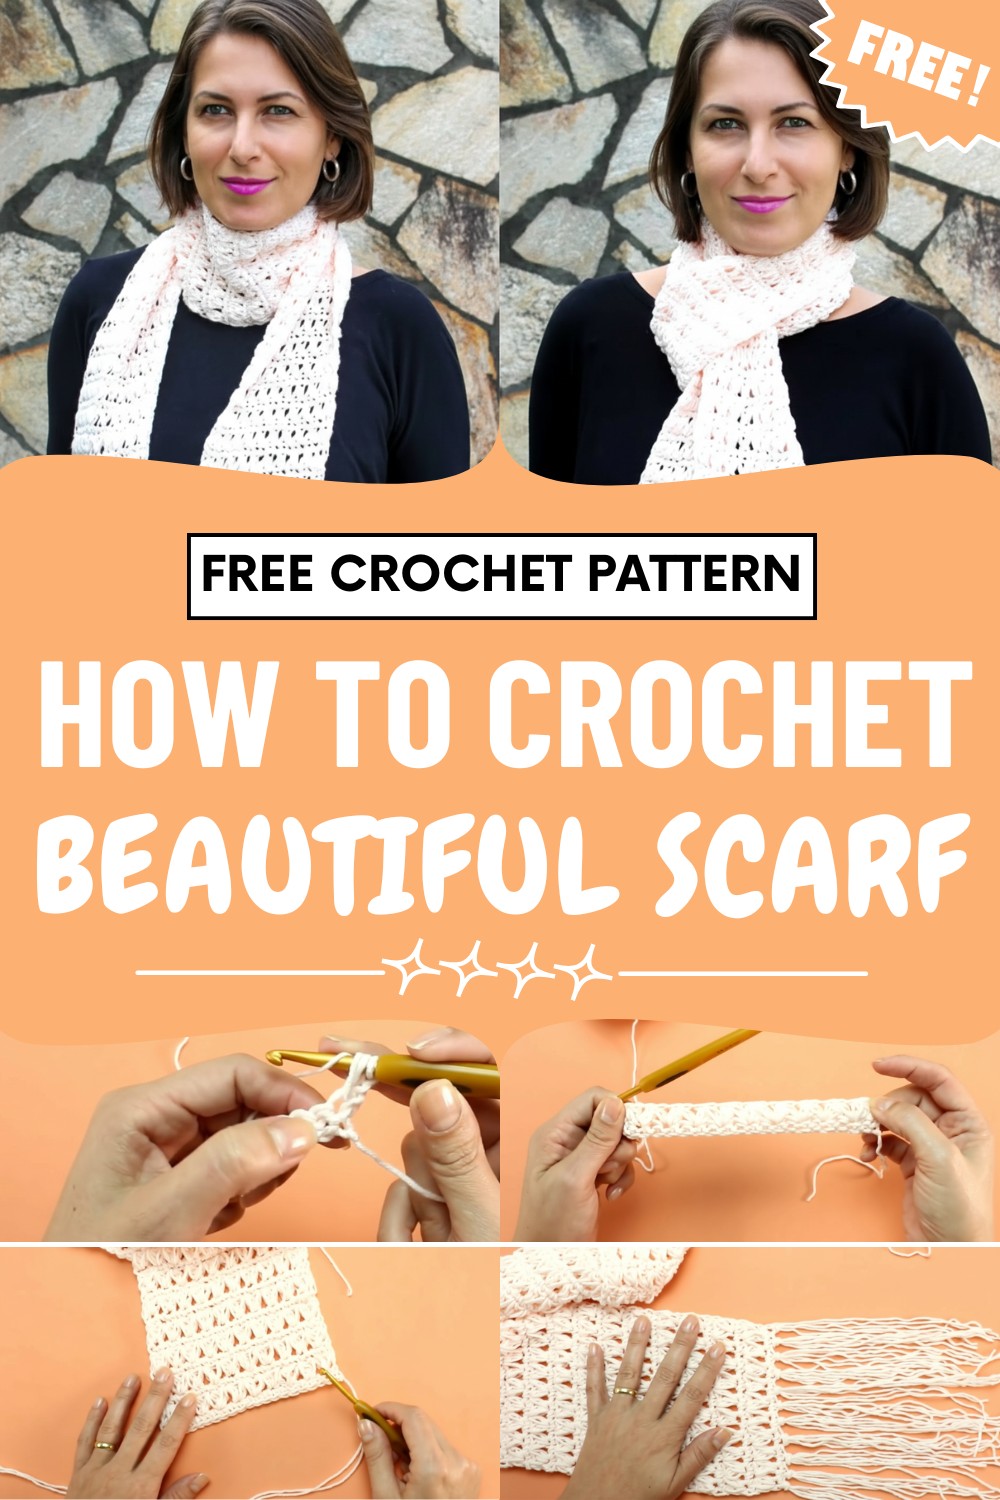
Whether you need something for a cold winter walk, a breezy spring day, or just want to dress up an outfit, a crochet scarf works perfectly. There are lots of colors, shapes, and finishes to pick from, so you can easily find one that matches your style. The scarf feels comfortable to wear and is easy to arrange, whether you let it hang, wrap it around your neck, or tie it in a knot.

Its specialty is its handmade charm and unique designs, which make it stand out. It’s more than just something to keep you warm—it’s a fun way to show off your style and add a personal touch to any look.
Fluffy Floral Crochet Scarf Pattern
Materials and Information
-
Yarn: Balloon yarn (58% cotton, 42% acrylic).
-
Quantity: 1.5 to 2 skeins (approx. 300 meters per skein).
-
Hook: 5.0 mm (Note: Even if the yarn suggests a smaller hook, use 5mm for the fluffier drape).
-
Final Dimensions: Approximately 15.5 cm wide by 1.70 meters long.
-
Stitch Logic: Worked in multiples of 2.
Step-by-Step Pattern
Phase 1: Foundation and Setup
-
Foundation Chain: Create a slip knot and work 22 chains.
-
Row 1 (Foundation Row): Skip the first chain from the hook and work 21 single crochets (sc) across.

Phase 2: The Floral Puff Stitch
-
Row 2 (Main Pattern):
-
Start: Chain 2 and turn.
-
First Puff Segment: Yarn over, insert hook into the very first stitch (at the base of the ch-2), pull up a loop (3 loops on hook). Do not close.
-
Second Puff Segment: Skip 1 stitch of the base. Yarn over, insert hook into the next stitch, pull up a loop. Yarn over again, insert into that same stitch, and pull up another loop.
-
The Join: You should now have 7 loops on your hook. Yarn over and pull through all 7 loops at once.
-
Secure: Chain 1 to close the puff "flower."
-
Repeat Sequence: * Yarn over, insert hook into the same hole where you just closed the previous puff, pull up a loop.
-
Skip 1 stitch of the base. Yarn over, insert into the next stitch, pull up a loop. Yarn over, insert into the same stitch, and pull up another loop (7 loops on hook).
-
Yarn over and pull through all 7 loops. Chain 1 to secure.
-
-
End of Row: Repeat across the row. End the last puff by working a half-double crochet (hdc) into the final stitch to keep the edge straight.
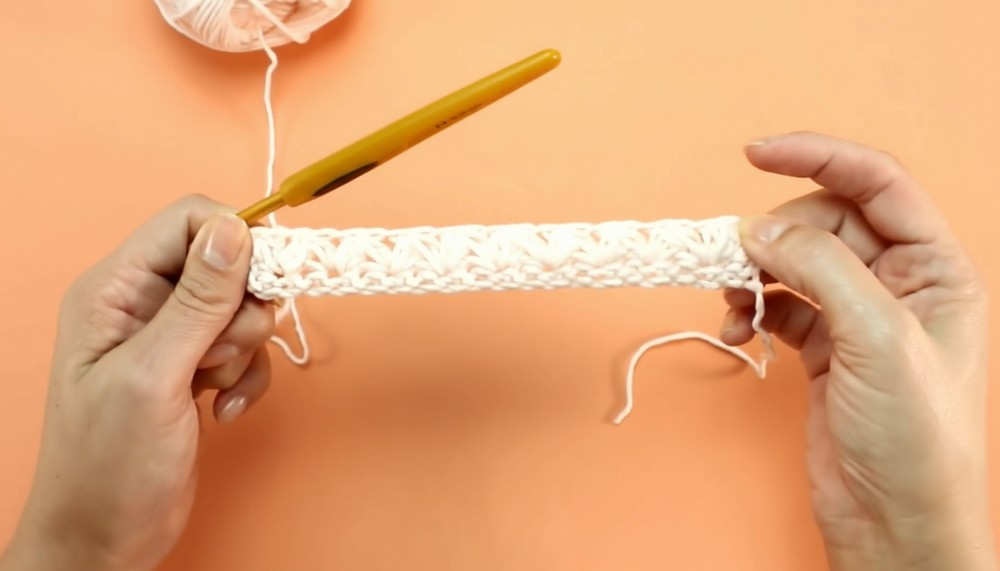
-
Phase 3: The Transition Row
-
Row 3 (Sc Row):
-
Chain 1 and turn.
-
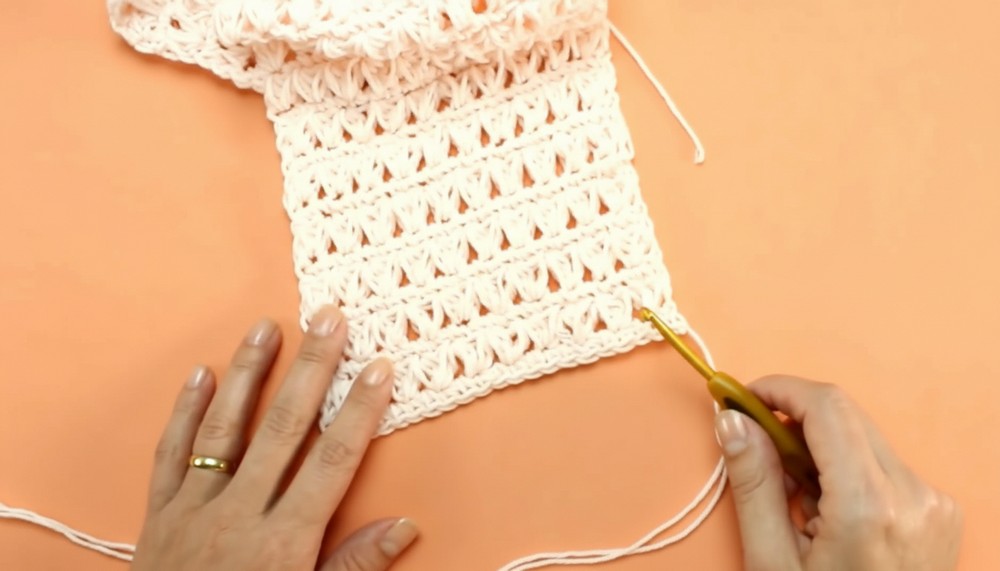
Work 21 single crochets across the row. Place 1 sc in the "eye" (hole) of each puff and 1 sc in the space between the puffs. This restores the 21-stitch count.
-
Phase 4: Growth
-
Length: Repeat Row 2 (Puff Row) and Row 3 (Sc Row) alternately until the scarf reaches your desired length (recommended: 1.70 meters).
Finishing: The Fringes (Bangs)
-
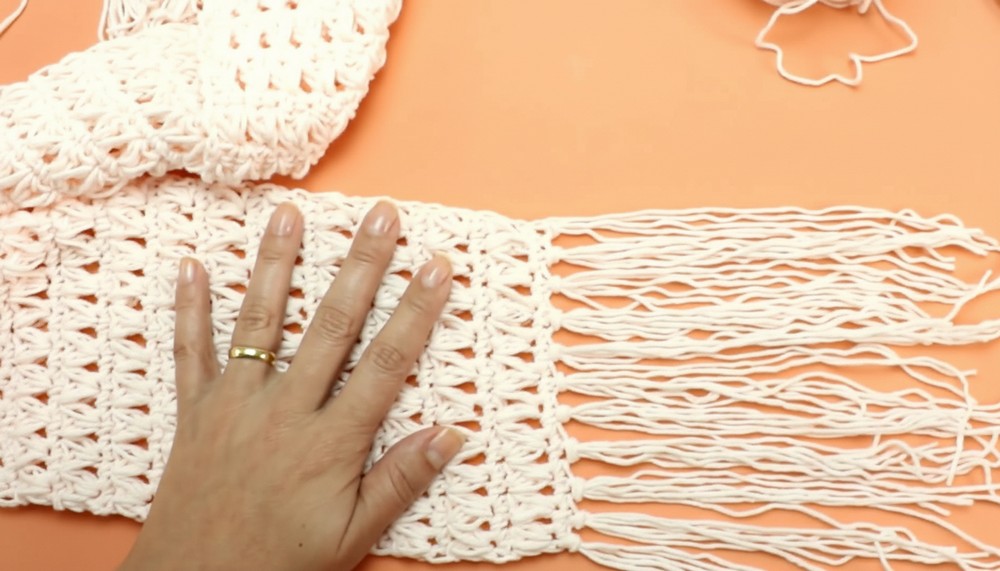
Prepare the Yarn: Cut several strands of yarn into 40 cm lengths.
-
Attach Fringes:
-
Group 3 strands together and fold them in half.
-
Use your hook to pull the folded loop through the first stitch of the scarf end.
-
Pull the loose ends through the loop and tighten to form a knot.
-
-
Spacing: Skip one stitch and repeat the application in the next stitch across both ends of the scarf.
-
Leveling: Lay the scarf flat and trim the fringe ends with scissors to ensure they are even.
Conclusion
Finishing this scarf provides you with a luxurious accessory that combines artisanal detail with ultimate comfort. The contrast between the structured single-crochet rows and the airy puff stitches creates a "floral" texture that traps warmth without adding weight. Once you trim the final fringes, your handmade scarf is ready to style for any winter outing.
Pro Tip: When pulling through the 7 loops on your hook, keep your thumb on the loops to hold them steady. This prevents the hook from snagging and ensures your "flower" puffs stay uniform and plump.




Leave a Reply