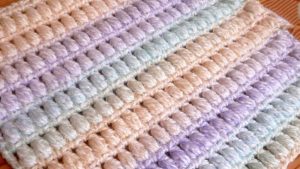
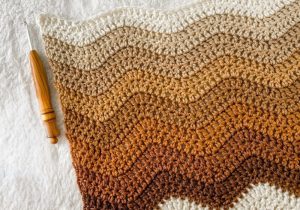
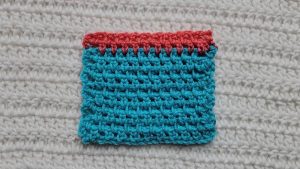
Explore the Crochet Camel Stitch Pattern in Rows to add unique horizontal ridges and a refined texture to your handcrafted items, ideal for stylish projects.
The Crochet Camel Stitch, a delightful variation designed to mimic the appearance of knitted fabric, is celebrated for its unique texture and depth. Unlike traditional crochet stitches that will work under the top two loops, the Camel Stitch ingeniously involves working into the so-called third loop, usually hidden at the back of a stitch.

Crochet Camel Stitch Pattern
This clever adjustment pushes the top two loops forward, creating a striking ribbed effect that is as visually appealing as it is tactile. Often work in the round, this stitch will also adapt for rows, broadening its versatility for an array of projects. From cozy scarves to luxurious afghans, the Camel Stitch adds a touch of elegance and sophistication, making it a favorite among crafters seeking to imbue their creations with a knit-like richness and a plush, textured finish.
Crochet Camel Stitch Pattern
Introduction
- The Camel Stitch, sometimes known as the Humpback Stitch, or half double crochet in the third loop, is a versatile stitch that mimics the look of knit fabric. It's traditionally worked in the round, but this tutorial demonstrates how to achieve this effect working in rows, which is great for projects like scarves.

Base Row Setup
- Start with a base row of normal half double crochet stitches. This means creating a chain of the required length and then half double crocheting in the third chain from the hook and each chain across.
Camel Stitch in Rows
- Chain 2 at the end of your base row. This counts as a turning chain but does not count as a stitch.
- Turn your work to start the next row. Normally, crochet stitches will work under the top two loops (forming a V) of each stitch. For the Camel Stitch, you will work into a different loop.
- Locate the third loop. This loop is found just underneath and to the side of the top two loops, slightly to the back. It is this third loop that you will work into for the Camel Stitch.
- Work half double crochets into the third loop across the row. By doing this, the top two loops will push forward, creating a ribbed, knit-like effect on the front of your work.

Working the Return Row
- At the end of the row, chain 2 (again, not counting as a stitch) and turn your work.
- Now, to maintain the ribbing on the front side as you work back across:
- Work only into the back loop of each stitch across the row. This creates a faux rib effect on the front, matching the previous row's pattern.

Continuing the Pattern
- Repeat the process for each row:
- For rows with the back of the work facing you: Use the Camel Stitch by half double crocheting into the third loop.
- For rows with the rib side facing you: Half double crochet into only the back loop of each stitch.
Conclusion
- This method alternates between rows of true Camel Stitch and rows of half double crochets in the back loop only to fake the continuation of the ribbed pattern. The Camel Stitch in rows creates a beautiful, textured fabric that mimics the look of knitting. Ideal for chunky, cozy scarves and other projects.
By following these steps and switching between working into the third loop and the back loop only. You can achieve the Camel Stitch in rows, creating a dense, textured fabric with a knitted appearance.


Leave a Reply