
Keep cozy with this Free Crochet Slouchy Beanie Pattern, ideal for warmth, relaxed fit, and adding a stylish touch to casual winter outfits.
Warmth and style come together in this relaxed accessory, making it perfect for everyday wear during cooler weather. The Crochet Slouchy Beanie Pattern fits most head shapes and complements all hair types, adding a casual yet fashionable touch to any outfit. Its textured stitches create subtle visual interest while keeping the piece soft and comfortable for long hours of wear.
Comfy Crochet Slouchy Beanie Pattern Everyone Will Want to Wear

The Crochet Slouchy Beanie Pattern allows for customization with different yarns, colors, and sizes, so each piece can reflect personal taste and style. Lightweight but snug, it keeps the head cozy without feeling bulky. This versatile accessory pairs well with jackets, scarves, or simple casual clothing, providing both practicality and charm.
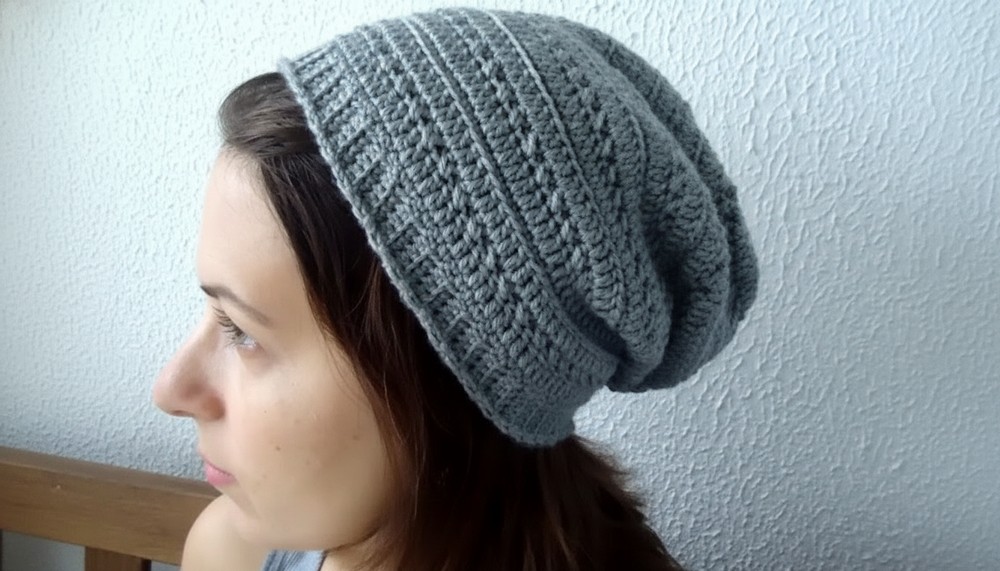
Combining comfort, ease, and modern design, it becomes a favorite choice for those seeking a stylish handmade item that works well for daily outings, outdoor activities, or relaxed weekends, adding warmth and personality to every look.
Special Features
- Soft and stretchy thanks to a wool/microfiber blend yarn
- Textured ribbed brim for grip and style
- Alternating relief and plain rows create a visual pattern
- Seamless look with invisible joining
- Adjustable width and depth for a custom fit
- Exclusive modern design
Difficulty Level
Confident Beginner to Intermediate
You'll practice crochet basics with the addition of raised (relief) stitches and decreases for shaping.
Tutor’s Suggestions
- Use flexible, fluffy yarn to achieve the best drape.
- Adjust the starting chain for wider or narrower brims.
- Stretch the brim as you measure to ensure a snug fit.
- When decreasing, distribute the decreases as evenly as possible to maintain the beanie’s shape.
Uses
- Cozy beanie for winter
- Great handmade gift
- Stylish accessory for all ages
- Unisex—just adjust the measurements
Materials
- 1 skein (100g) yarn, 50% wool and 50% microfiber in gray (or color of choice)
- 3 mm crochet hook
- Tapestry needle for finishing
- Scissors
Pattern Instructions
Brim (Work Flat)
- Foundation Chain
Make an initial loop and chain 7. - Row 1
Skip 2 chains from hook, single crochet (sc) in the third and each remaining chain across (6 sc).
Turn. - Row 2
Ch 2 (counts as first sc). For the next 5 sc, work in the back loop only to create relief. (Insert hook into the back loop of each stitch, pull up a loop, finish sc as normal).
Turn.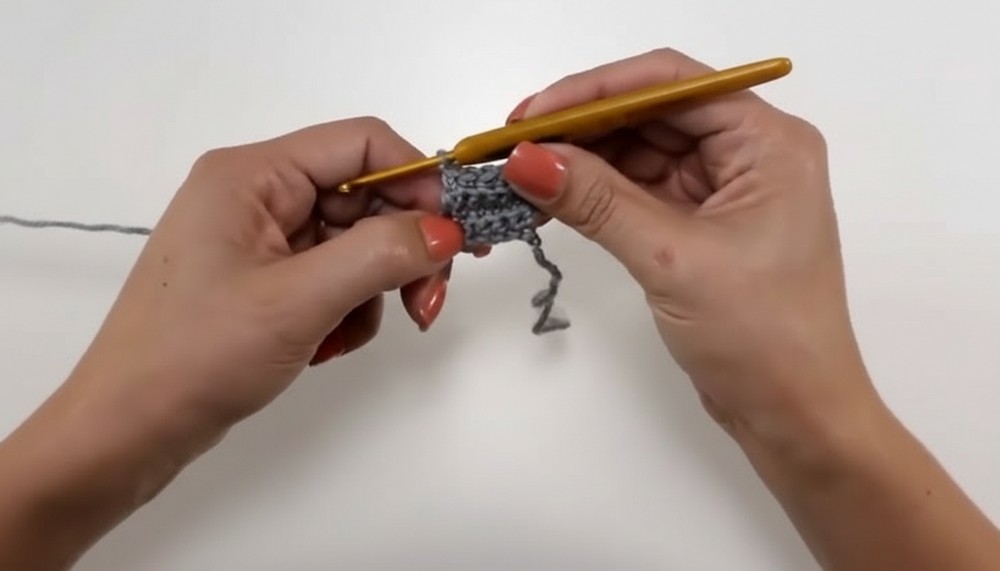
- Row 3
Ch 2 (counts as first sc). Work 1 sc in each st across, through both loops (regular sc).
Turn. - Row 4
Ch 2. Work 5 sc back loop only, turn.
Repeat Rows 3 and 4, alternating plain and relief (back loop) rows.
Tip: Work relief (back loop) rows when the starting yarn tail is on your right. - Continue until brim measures 47 cm
Check the fit by stretching the strip around your head—the two ends should just meet for a snug fit. - Join the short ends with slip stitch
With the right (relief) side facing out, align the two ends. Insert your hook through the back loop of both ends and slip stitch across to create a nearly invisible seam.
Do not fasten off.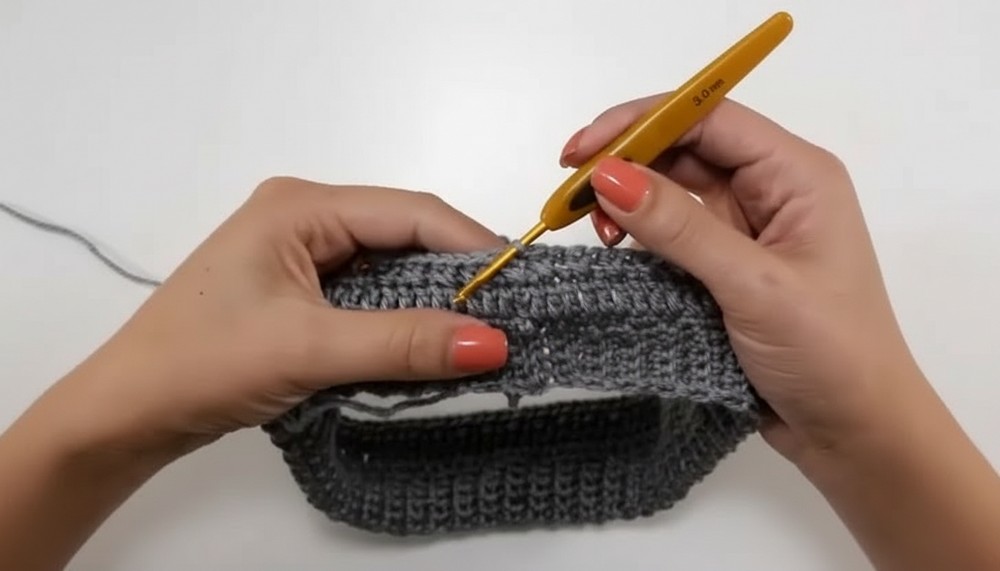
Hat Body (Worked in the Round)
- Pick up stitches around the brim edge
Ch 2 (counts as first sc). Work 1 sc per row-end around the edge of the brim to close gaps and make a neat edge. Join with a slip stitch to the second ch. - Row 1 (Double Crochet Round)
Ch 3 (counts as first dc). Work 1 double crochet (dc) in each sc around. Join with slip stitch to ch-3. - Row 2 (Crossed Half Double Crochet Row)
Slip stitch to next st. Ch 2 (counts as first hdc). Skip one st, hdc in next st, go back and hdc in skipped st. Repeat * around. Join with slip stitch to ch-2. - Row 3 (Double Crochet Round)
Ch 3, dc in each st around. Join. - Row 4 (Relief Single Crochet Row)
Ch 2 (counts as sc). Sc in back loop only of each st around for relief texture. Join.
Main Pattern Sequence
- Repeat Rows 1–4 for the pattern:
- Double crochet round
- Crossed half double crochet round
- Double crochet round
- Relief single crochet round
- Continue pattern until the hat measures 15 cm total height (including the brim), or 13 cm without the brim.
Tip: Add extra rows for a slouchier hat.
Decreasing the Crown
The decreases only happen in the double crochet (dc) rounds.
- First decrease round:
Evenly decrease 10 dc around (e.g., dc in next 7, dc2tog (double crochet two together); repeat, adjusting as needed for your stitch count). Join.
Stitch count decreases by 10 each round. - Continue pattern sequence (with decreases in dc rounds only):
On each dc round, decrease 10 stitches, spacing decreases evenly.
Crossed half double crochet and relief sc rounds remain regular, no decreases. - Decrease intervals:
As you lose stitches, decrease every 7, then 6, then 5 stitches, etc., until you’re down to just a few. - Final decrease dc round:
Work dc2tog for every stitch (decrease all the way around). Close with slip stitch. - Closing the opening (top):
Switch to sc for the final fewer rounds. Work sc2tog (sc two together) all the way around until only a few stitches remain.
Fasten off, thread yarn tail on tapestry needle, weave through remaining stitches, pull tight to close. Secure with a knot, and weave in tail on the inside.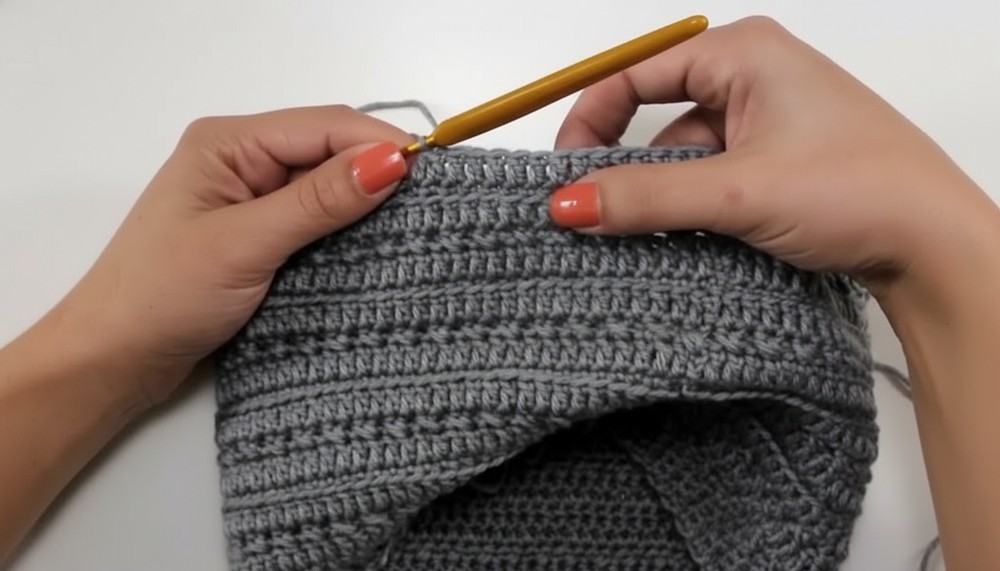
Finishing
- Use the tapestry needle to weave in the starting and ending yarn tails on the inside.
- Take care not to pucker the fabric when weaving.
- Work all ends in neatly for a professional finish.

Tip
Maintain even tension, especially on the relief and crossed stitch rows, for a consistent, smooth fabric and a hat that holds its shape.
Conclusion
You now have a cozy, stretchable, and stylish beanie made with beautifully textured stitches and a custom fit! Enjoy your new accessory or share it as a thoughtful handmade gift.




Leave a Reply