
Style your hair with this Crochet Heart Scrunchie Pattern, showcasing soft textures, playful hearts, and charming details for everyday looks.
Tiny Crochet Heart Scrunchie Pattern Perfect for Accessories

The repetitive, structured stitches provide a satisfying and relaxing experience, supporting skill development while allowing creative experimentation with colors, yarns, and sizes. Beyond aesthetics, the scrunchie’s soft construction protects hair and maintains hold throughout the day.

Its charming design blends functionality with elegance, turning an everyday hair accessory into a statement piece. Combining practicality, comfort, and visual appeal, this pattern results in a delightful addition to both wardrobe and hair styling routines.
Special Features
- Cute love heart design: Stand out with a sweet heart shape, great for gifts or themed outfits.
- Beginner-friendly: Uses basic stitches and a simple construction method.
- No sewing required: Slip stitches make seaming fast and easy.
- Customizable: Make it in any color to suit any season or personal style.
- Quick to make: Whip up a scrunchie in about an hour.
Level of Difficulty
Beginner to Confident Beginner: If you know basic stitches (chain, single, half double, double, treble), you can do this!
Tutor’s Suggestions
- Best Yarn: Soft cotton or acrylic 4-ply yarn is ideal for year-round wear and comfort.
- Best Hair Tie: Use a small, thin elastic or hair tie for a neat look. Avoid bulky rubber bands for the best results.
- Sizing: Finished size is about 10x10 cm, but you can adjust this by changing the chain length or hook size.
Materials
- 50g 4-ply (category 2/light) yarn (any color; red, pink, and white are classics)
- Crochet hook: 3.5 mm and 4 mm
- Hair tie (preferably slim, about 5–6 cm diameter)
- Scissors
- Yarn (darning) needle
- Optional: Measuring tape
Pattern Instructions
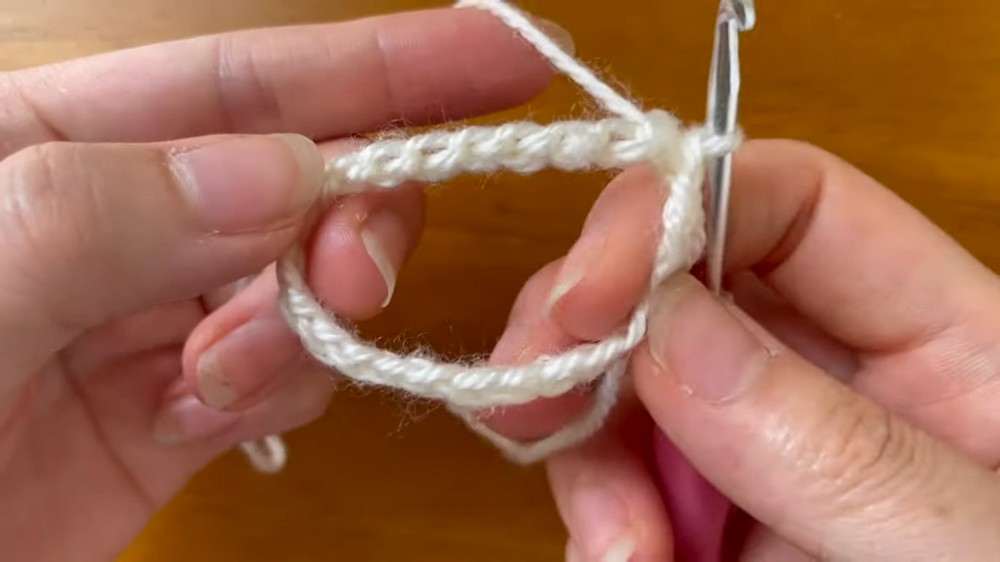
1. Make the Heart Base (First Side)
- Foundation:
- With 3.5 mm hook, make a slip knot.
- Ch 24. Check chain isn’t twisted, join into a ring with a slip stitch into first chain.
- Round 1:
- Ch 2 (counts as first dc).
- Dc in each st around.
- (24 dc). Join with sl st to ch 2.
- Round 2:
- Ch 2 (counts as first dc).
- Dc in each st around.
- (24 dc). Join with sl st to ch 2.
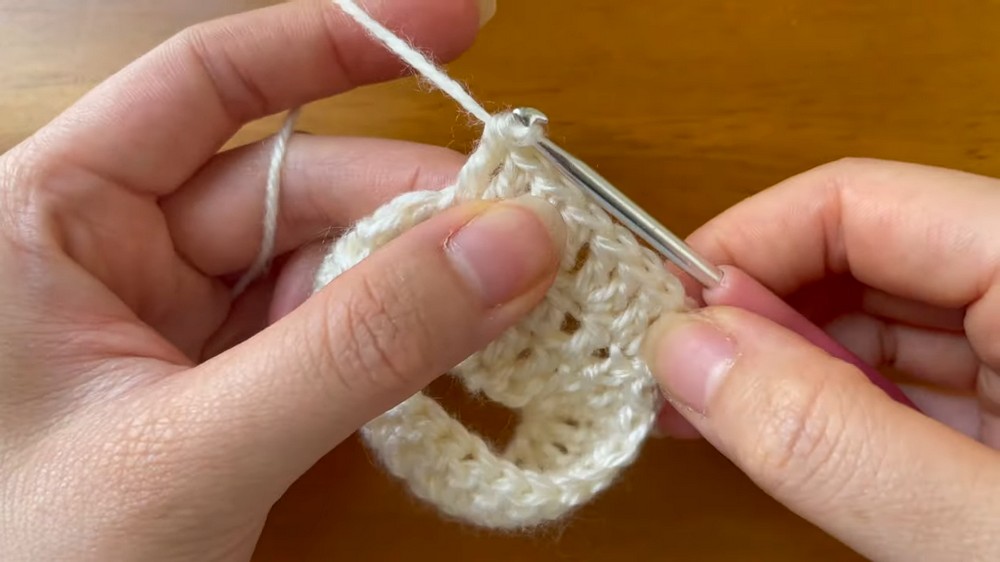
- Round 3 (Increase):
- Ch 2 (counts as first dc).
- 1 more dc into base of ch 2 (increase).
- 1 dc in next st, 2 dc in next st; repeat around.
- By end: 36 dc. Join with sl st.
2. Make the Heart Shape (First Side)
- Switch to 4 mm hook.
- Start heart curve:
- Ch 1, skip 1 st, hdc in next.
- In next st: dc, then tr.
- For next 3 sts: (2 tr in each st) — 6 tr.
- Next 2 sts: dc in each.
- Next st: 2 hdc in same st.
- Next 6 sts: sc in each.
- Next st: hdc.
- Next st: 2 dc in same st.
- Next st: tr (this is the point of the heart).
- Next st: 2 dc in same st.
- Next st: hdc.
- Next 6 sts: sc in each.
- Next st: 2 hdc in same st.

- Next 2 sts: dc in each.
- Next 3 sts: (2 tr in each st) — 6 tr.
- Next st: tr, then dc in same st.
- Next st: hdc.
- Skip next st, sl st into initial ch 1 at start.
- Finish off the first heart; leave a 10 cm tail for weaving in.
3. Make the Second Heart (Other Side)
- Repeat Steps 1 and 2:
- Attach new yarn at chain ring base (foundation ring).
- Using 3.5 mm hook, repeat Rounds 1–3 for second side.
- Switch to 4 mm hook, repeat heart shaping as above.
- At finish, leave a 10 cm tail for weaving in.
4. Join, Seam, and Finish
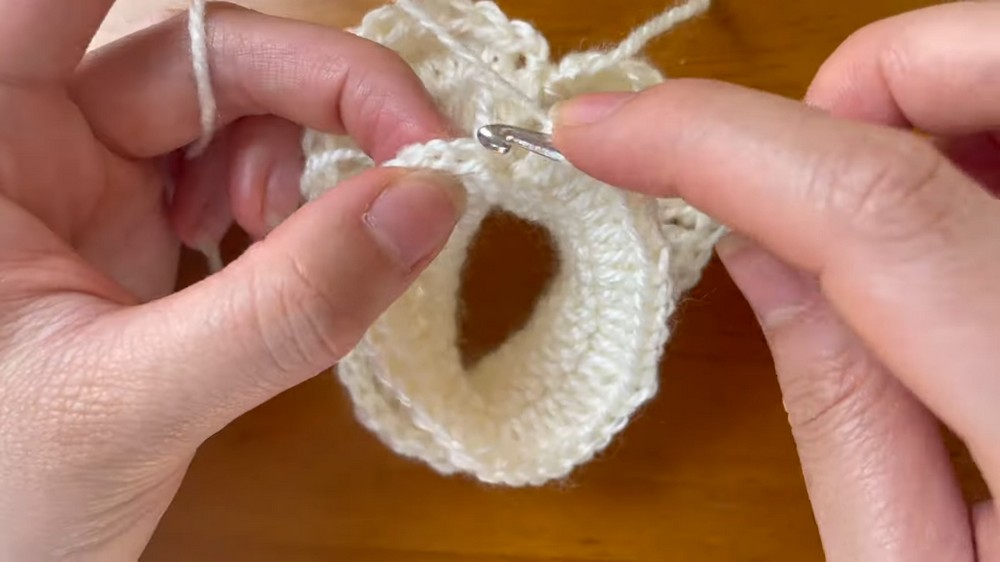
- Add Hair Tie:
- Twist the hair tie once to make it double and slip it between the two crochet hearts to enclose it.
- Seam Hearts Together:
- With 3.5 mm hook and matching yarn, join both hearts by working slip stitches through both layers, all around the edge.
- Pul stitches up a bit (not too tight) for a smooth seam.
- Finishing:
- Cut yarn, leave a long tail, weave in all ends with a yarn needle.
- If any ends stick out or the seam feels bulky, gently stretch and adjust before wearing.
Uses
- Wear year-round as a cute accessory, not just on Valentine’s Day!
- Use as a gift, party favor, or stocking stuffer.
- Crochet in school or team colors—for spirit days or events!
Tip
Switch to a larger hook for the heart shaping rows.
This makes it fluffier and more rounded, highlighting the heart design!
Conclusion
You’ve made a charming love heart scrunchie that’s perfect for gifting or everyday wear. This quick project helps you master increasing, shaping, and working in the round—all while creating a show-stopping hair accessory.
Leave a Reply