
Wear airy comfort daily with this Crochet Mesh Top Pattern, featuring breezy texture, relaxed fit, and easy layering for warm days outdoors.
Lightweight layers bring ease and confidence to warm weather dressing, offering comfort without sacrificing style. The Crochet Mesh Top Pattern features open stitches that allow airflow while forming a flattering silhouette suitable for everyday wear or vacation looks. Its breathable structure makes it ideal for summer outings, beach cover-ups, or layering over tanks and dresses. Flexible sizing and stitch placement support easy adjustments, ensuring a comfortable fit across body types.
Sleek Crochet Mesh Top Pattern for Warm-Weather Looks

Visual texture adds interest without heaviness, creating a modern yet relaxed appearance that pairs well with jeans, skirts, or shorts. Repeating stitch sequences encourage focus and rhythm, making the process enjoyable while improving consistency and tension control. Soft yarn choices enhance comfort against the skin and maintain durability through regular use.
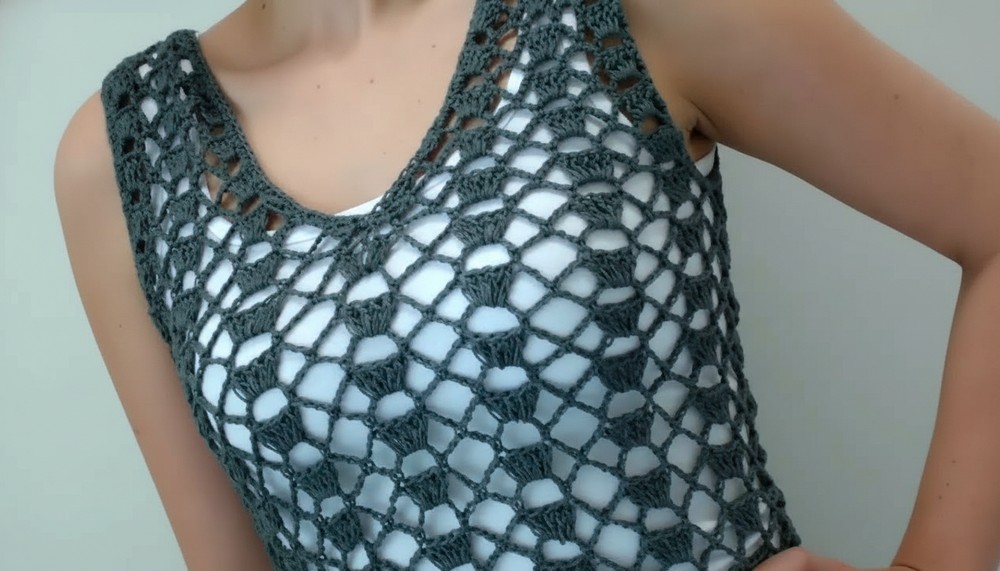
Beyond function, the finished top delivers effortless elegance, blending casual charm with versatility. This design suits minimalist wardrobes and bold color palettes alike while providing a stylish option everywhere.
Special Features
- Tubular Crochet Base: No traditional foundation chain! The base is created using alternating chains and double crochets, offering stretch and visual interest.
- Openwork Motif: Groups of double crochets and chain spaces create a light, lacy effect ideal for warm weather.
- Shaped Neckline & Armholes: Detailed decrease instructions shape the neckline and armholes for a tailored fit.
- Seamless Construction: Crocheted in the round and in parts, with minimal seams.
- Neat Edging: Finished with rounds of single crochet for stability and polish.
Level of Difficulty
Intermediate Beginner
Must be comfortable with working in the round, double crochet, chain spaces, decreases, and reading sequential instructions.
Materials
- Summer cotton yarn, 100g (thicker, 100% cotton)
- Crochet hook size 5 (2.5mm)
- Scissors
- Stitch markers or contrasting yarn
- Tapestry needle (for weaving in ends)
- Measuring tape
Step-by-Step Pattern
1. Tubular Foundation (Waist Band/Body Base)
- Make a slip knot.
- Ch 3.
- Yarn over, insert hook into first chain, dc into that chain.
- To continue:
a. Ch 3.
b. Yarn over, insert hook into the space between the chain-3 and previous dc, dc into this space. - Repeat the To continue step until your cord measures about 84 cm (or until it comfortably fits around your waist when gently stretched—remember 100% cotton stretches with wear).
- Tip: Ensure you end with an even number of segments.
- Join ends without twisting into a ring using a slip stitch, aligning your circle so it’s flat.
2. Begin Main Body Pattern
Round 1
- Ch 3 (counts as first dc), make 4 dc into the same space (total 5 dc group).
- Ch 3, skip 1 segment from base, single crochet (sc) into next.
- Repeat:
- Ch 3, skip 1 segment, 5 dc in next segment.
- Ch 3, skip, sc in next.
- Continue until the round is complete.
- Join with slip stitch into the third chain of the first 5-dc group.
Round 2 (Chain Loops Row)
- Ch 2 (acts as sc), then ch 6.
- Sc in last dc of previous 5-dc group.
- Repeat: Ch 6, sc in first dc of next 5-dc group.
- Continue this alternation (6-ch loops, sc in first and last dc of every 5-dc group).
- End round with slip stitch to 2nd chain of the round’s start.
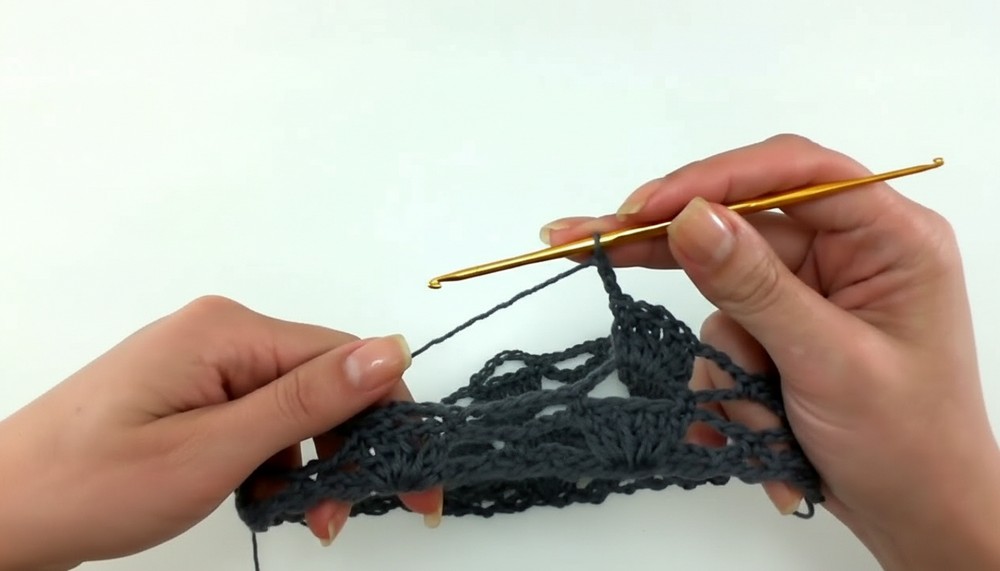
Round 3: Repeat Round 1
- In each ch-6 space, work:
a. 5 dc group
b. Ch 3, sc in next loop
Continue. - Follow this 2-row pattern (5-dc groups row/chain loop row) until your tube measures 34 cm in height.
3. Shaping the Neckline and Armholes
Preparation
- Lay flat and place a stitch marker at the joining seam on the side.
- You should have 13 groups (for reference, adjust proportionally for your size), divide: 7 for front, 6 for back.
Marking Front Neckline
- Count 1–7 groups for the front, with the 4th group as the center.
- Mark the first, center, and just after the 3rd group for reference with contrasting yarn.

Begin Front Neckline Decreases
First Row (Chain Loops):
- Attach yarn at the marked chain space before group 1.
- Ch 2 (acts as sc), ch 3 (half of ch-6).
- Sc in first dc of next group.
- Continue: Ch 6, sc in last dc of group, ch 6, sc in first dc of next, until reaching center group.
- For center, ch 3 (half loop), sc in third dc of center group to split for V-neck.
Turn work; follow for each row:
- Work cluster and chain-loops rows, but always finish short on the side to create decreases. (Never go all the way to the previous edge; stop at the penultimate sc—this shapes the V).
- Start reducing the number of dc in each group (from 5 to 4, then to 3) as the width diminishes.
- When chain loops become too narrow, move to ch-5 or ch-4 as needed to fit.
- Continue shaping for around 19 cm height and 6 cm wide at the straps.
- Repeat exactly for other shoulder/neckline section.
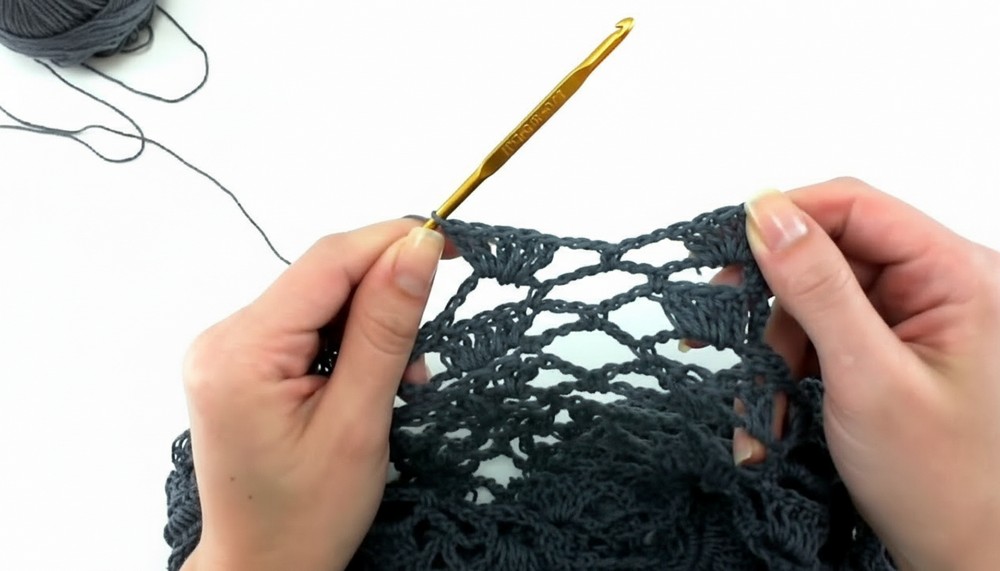
Shape the Back
- With piece laid flat, attach yarn at corresponding chain spaces at the back.
- Work in same 2-row sequence as the tube, but only decrease on armhole sides, not center.
- Stop at same strap height (19 cm high, 6 cm wide).
4. Join Shoulders
- With tank top inside out, align straps.
- Slip stitch or single crochet the straps together at the top, matching stitches neatly.
- Fasten off and weave in all ends.
5. Finishing Edges
- With the right side out, work one round of single crochet around:
- The neckline/V-neck (including back)
- Each armhole
- This stabilizes and beautifies the edges.
- Join rounds with slip stitch and weave in ends.

Tutor's Suggestions
- Always measure as you go, comparing width/length to a well-fitting tank top or your template.
- Use stitch markers to clearly mark center V and armhole shaping.
- Try on the piece for fit before finishing seams and edges.
Uses
- Wear as a light summer top, over a camisole, bralette, or swimsuit.
- Use as a layering vest over shirts or dresses.
- Great for beachwear.
Tip
Use a tank top that fits you well as a template for shaping the neckline and armholes for perfect results. Always allow for a bit of stretch when measuring cotton yarn!
Conclusion
You have completed a stylish and versatile V-neck crochet tank top! This project teaches you seamless starts, tubular construction, lace motifs, and neat finishing.




Leave a Reply