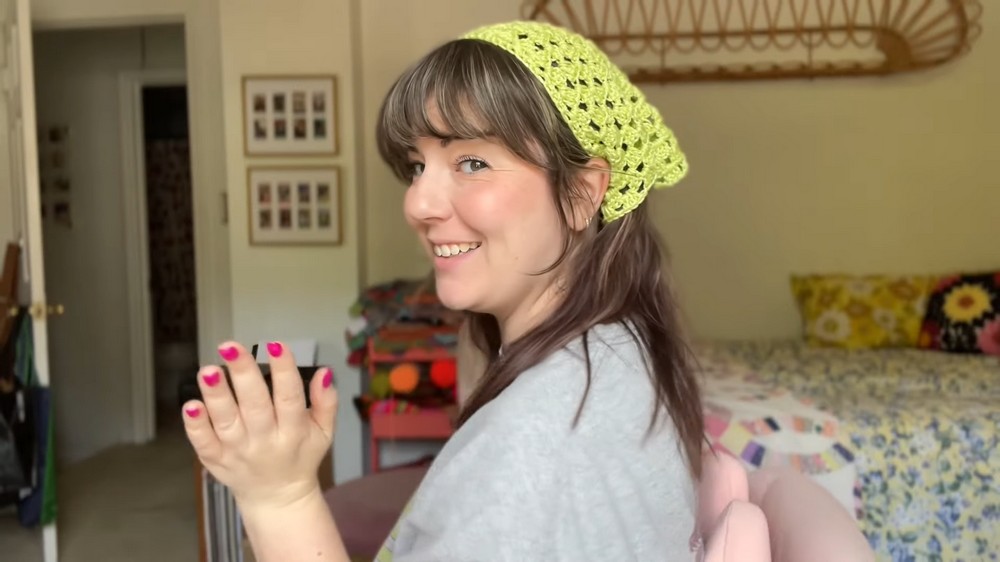
Embellish your everyday look with a crochet smaller headband, blending lightweight comfort and versatility into a stylish accessory.
A quiet revolution in personal style has emerged through crochet smaller head bandana. Far from being just a fashion statement, this charming accessorie balance simplicity with functionality. They’re ideal for keeping hair in place while out and about or for adding a subtle yet captivating touch to everyday outfits. Their appeal lies in their understated elegance, offering both practicality and a unique lift to your look without overwhelming the overall ensemble.
Sleek Crochet Smaller Head Bandana for Fashion-Lovers

Unlike larger headpieces or bulky scarves, this bandana offer a perfect blend of lightweight comfort and adaptability. Made from breathable yarns, they allow for effortless wear throughout the day. Whether it’s warm weather or a fast-paced day filled with errands, this bandana comfortably sit without causing irritation or discomfort. Their crocheted nature means each piece has its own personality, shaped by the stitches and colors chosen in their design.
They also hold a personal touch, making them a meaningful gift for loved ones or a satisfying project for yourself. With widespread versatility, this smaller bandana are more than just an accessory—they’re a practical addition to routines and wardrobes alike. Use them to tame frizz, brighten up an outfit, or simply enjoy a delicate blend of utility and style every day.
Materials Needed
Ally uses lightweight and drapey yarns to produce a soft, wearable fabric.
Supplies Required:
- Yarn: Weight 3 yarn, such as Lion Brand’s True Boo or Coboo.
- Crochet Hook: 3.75mm (adjust to a size between 3.5mm and 4mm depending on your desired fabric stiffness).
- Scissors
- Needle: For weaving in ends.
Ally urges you to pick yarns that are gentle and soft to touch for optimal results.
Step-by-Step Guide
Crochet bandanas are a stylish and versatile accessory, but traditional designs often have trouble fitting well, especially for thinner-haired individuals or those with smaller head circumferences. In her first-ever pattern, creator shares a modified bandana pattern that tackles these issues, offering a design that fits snugly and comfortably without adding unnecessary bulk.
This pattern is perfect for beginners who are somewhat familiar with basic crochet stitches, as it focuses primarily on the construction process rather than individual stitch techniques. creator also explains the pattern’s design logic, helping crocheters understand its benefits and ensure a successful result.
Level of Difficulty
The pattern is rated as "Beginner-Friendly," provided you already know how to:
- Create a magic circle or chain-slip stitch loop,
- Perform basic stitches (e.g., double crochet, single crochet, slip stitch),
- Chain and weave ends.
If you're a complete newbie, creator recommends first reviewing foundational crochet pattern before diving into this project.
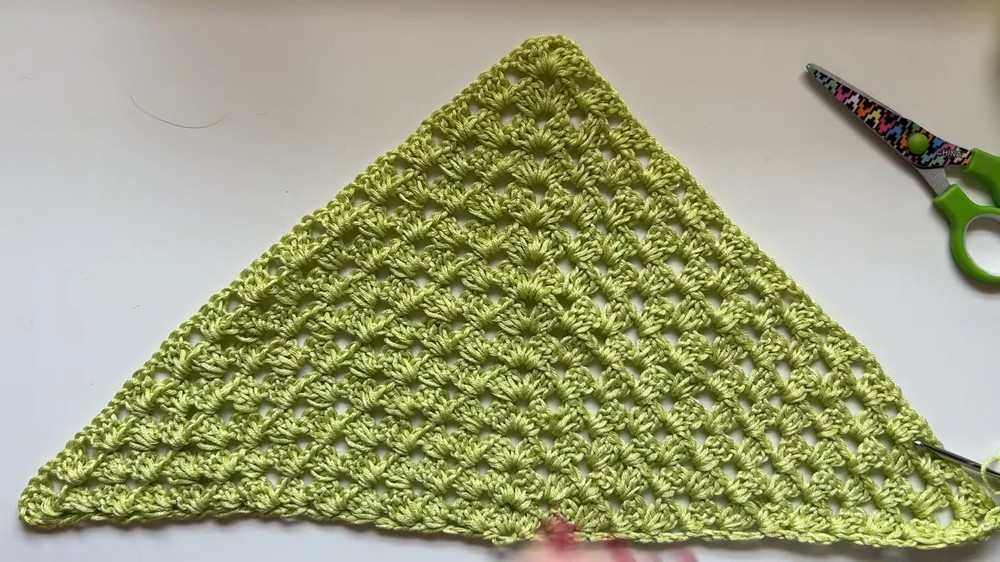
Special Features of the Bandana
crochet bandana design differs from traditional triangular patterns. Here's what makes creator bandana unique:
- Custom-Fit Shape: Starts as a regular triangle but modifies construction to avoid bulky sides near the ears.
- Flat Edges: Thanks to clever shaping using granny stitches and double crochets, the bandana lies flat and securely around the head.
- Perfect Back Length: Designed to end at the base of the skull for a stylish yet practical look.
- Adjustable Size: The bandana’s size is customized to fit your exact head circumference.
Step-by-Step Construction Process
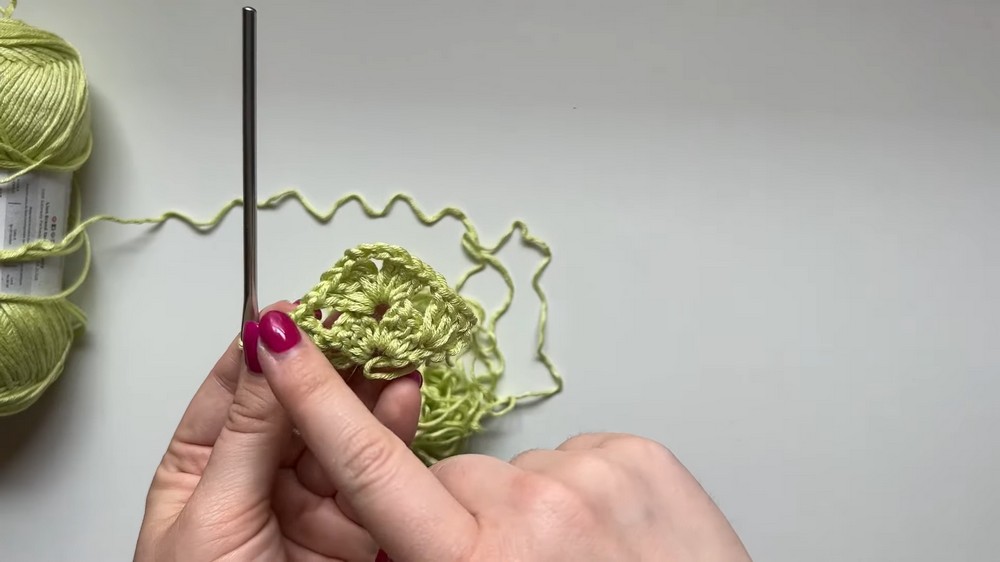
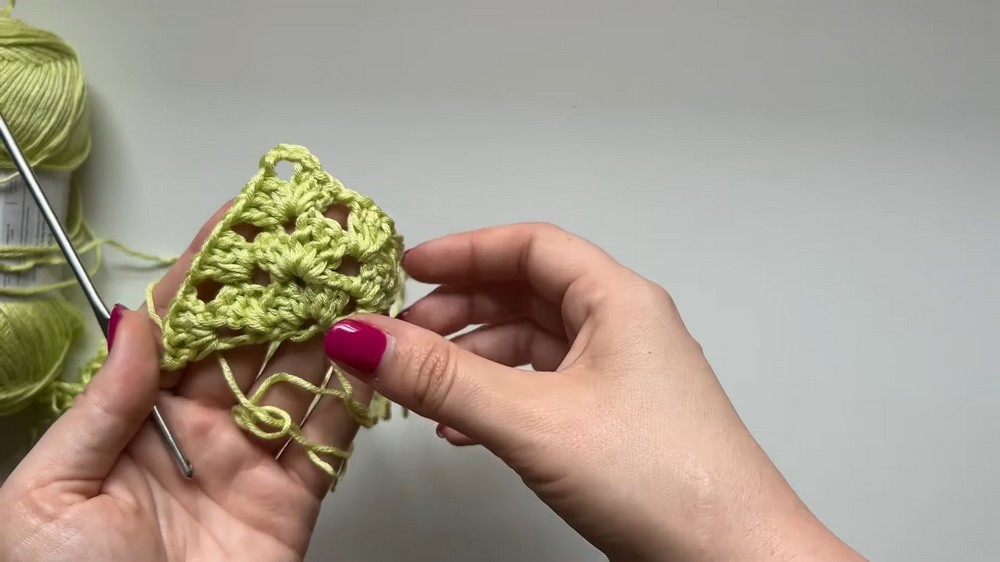
1. Create the Base Triangle
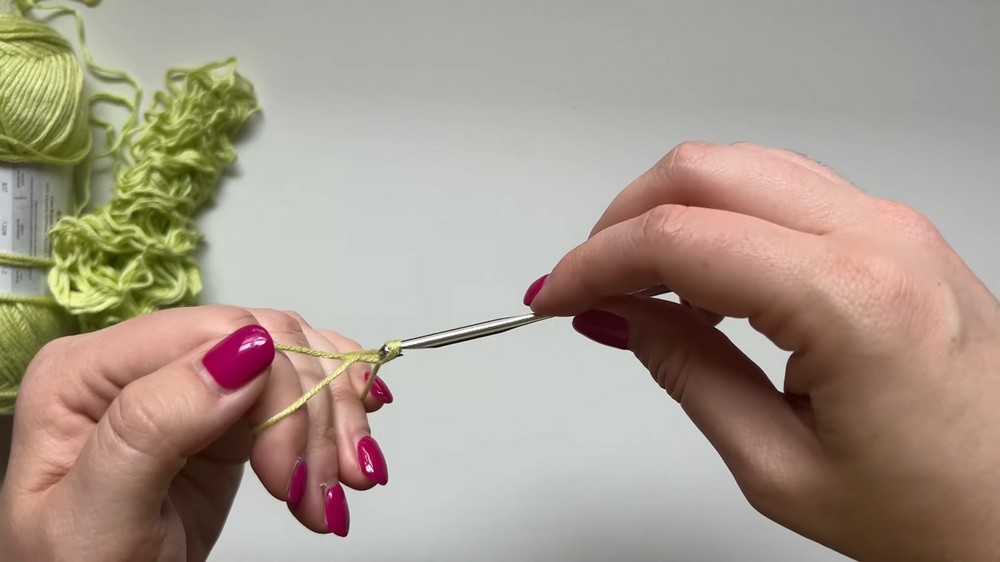
- Start with a magic circle (or chain 4 slip-stitch loop).
- Begin building the triangle using granny stitches (groups of 3 double crochets).
- Add a chain 3 at each corner to create sharp points.
- Continue the rows, increasing the triangle’s width and height until its base fits snugly around the circumference of your head.
- Finalize the base by ensuring the ends of the triangle just barely touch when wrapped around the head.
2. Modify the Shape to Avoid Bulk
- Cut the yarn after completing the baseline triangle.
- Attach the yarn at a gathered midpoint row.
- Begin working new rows that extend triangularly upward without increasing width at the sides. This modified construction eliminates bulk near the ears.
- Continue the extension rows until you reach the desired length, adjusting based on your head shape.
3. Add the Ties
- Attach yarn at the corner of the triangle.
- Crochet chains (~10 inches or longer depending on your preference).
- Single crochet back along the chain for a sturdy tie.
- Repeat the process for the opposite triangle corner, ensuring both ties are equal in length.
4. Add a Clean Edge
- Slip stitch across the base of the triangle, adding single crochets for a neat and finished look.
5. Weave in Ends and Block
- Carefully secure all ends to ensure the bandana doesn’t unravel.
- Block the bandana for a polished shape and proper fit.
Tutor’s Suggestions
- Measure carefully as you build the base triangle—ensure just the right circumference to avoid bulk.
- For the ties, crochet long enough chains for bows and adjust based on personal fit.
- Use lightweight yarns for a soft, flowy fabric that complements the design.
- Use stitch markers to keep track of where your extensions rows begin and stop.
Uses
This crochet bandana can be a stylish accessory worn:
- Outdoors as sun protection or while gardening,
- As a decorative hairpiece,
- Around the house for a casual look,
- Tied around the neck or wrist for added flair.
Conclusion
In this beginner-oriented pattern, introduced a custom-fit bandana pattern that solves common issues like floppy sides and excess bulk. By modifying the traditional triangle design and using granny stitches strategically, the result is a practical and stylish project. With lightweight yarns and a straightforward process, this bandana is perfect for anyone looking for both comfort and style in their crochet accessories.
Tip
If the yarn used is "splitty," like creator mentioned, take extra care to ensure your hook works cleanly with the yarn strands. Spend a bit more time on stitches like the magic circle and ties to prevent fraying or uneven finishes.
This pattern provides easy-to-follow steps for making a functional yet elegant bandana, and creator personable teaching style makes her debut pattern engaging and approachable.


Leave a Reply