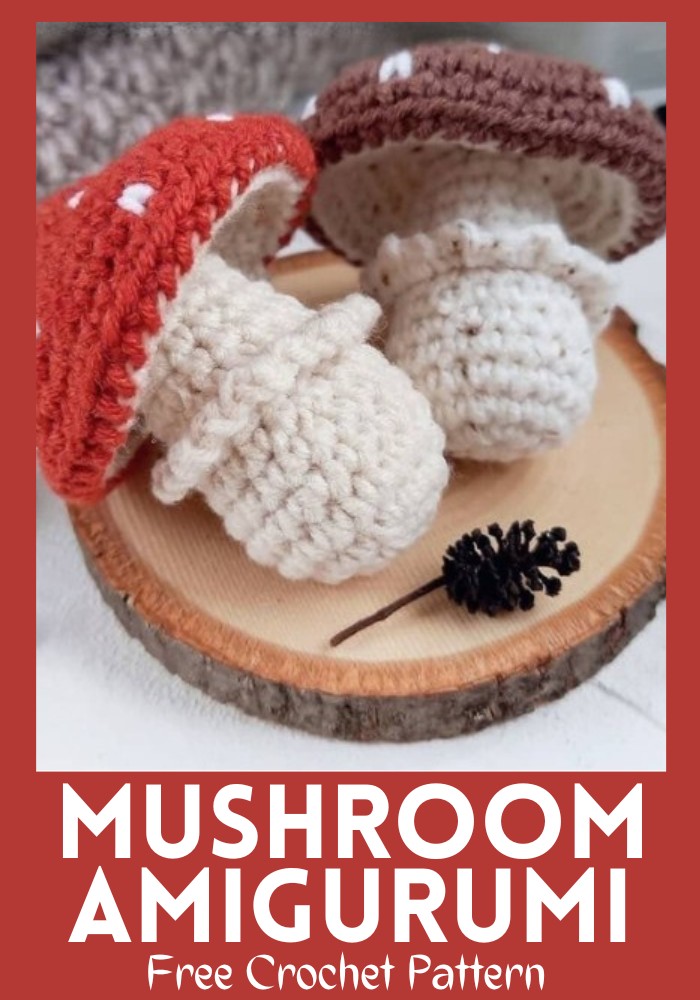
"Make an adorable crochet mushroom amigurumi with this free pattern, featuring easy steps and delightful details for a charming addition to your collection."
Mushrooms are like tiny umbrellas popping up from the earth, with round tops and short, stubby stems. In the wild, they can be all kinds of colors and sizes. But the ones we will make with this simple crochet pattern are extra special. They're not just any mushrooms; they're soft to the touch, look very cute, and have a kind of charm that makes everyone love them. It's a fun way to spend some time, and in the end, you'll have these really adorable crochet creations. They'll be so soft and pretty that you'll want to create a whole bunch of them to keep for yourself or to give to your friends. Let's get started on this fun crochet adventure together!
Charming Crochet Mushroom Amigurumi
Introduction
Delight in the creation of these enchanting crochet mushroom amigurumi, designed to captivate with their unique charm and softness.
Appearance and Look
-
Soft to the Touch:
- These crochet mushrooms are crafted with soft yarn, making them irresistibly plush and huggable.
-
Adorable and Charming:
- Cute Design:
- The mushrooms boast an adorable look with their rounded tops and stems, evoking a sense of whimsy and magic.
- Irresistible Charm:
- Their distinct charm makes them universally loved and appreciated by anyone who sees them.
- Cute Design:
Usability and Appeal
-
Enjoyable Crafting Experience:
- Fun Activity:
- Crocheting these mushrooms is a delightful way to spend your time, resulting in a joyful and satisfying experience.
- Endearing Creations:
- By the end of the project, you’ll have created these lovely crochet mushrooms that are sure to bring a smile.
- Fun Activity:
-
Versatile Use:
- Personal Collection:
- Due to their softness and beauty, you'll find yourself wanting to make plenty to keep for yourself.
- Thoughtful Gifts:
- These crochet mushrooms also make wonderful, heartfelt gifts for friends and family, adding a personal touch to your presents.
- Personal Collection:
Conclusion
Embrace this fun crochet journey and enjoy making these charming and delightful crochet mushroom amigurumis that spread joy and warmth.
Making Your Crochet Mushroom Amigurumi
Materials
- Yarn:
- Alize Cotton Gold: 36, brick red (330m/100g)
- YarnArt Jeans: 5, cold beige (160m/50g)
- YarnArt Jeans: 01, white (160m/50g)
Tools:
- Crochet hook 2-2,5 mm
- Yarn needle
- Scissors
- Stitch markers
- Fiberfill
Abbreviations
- mr - magic ring
- ch — chain stitch
- sc - single crochet
- inc - increase
- dec - decrease
- FLO-front loops only
- BLO - back loops only
- (...) x n — repeat the section in brackets n times
- The number in brackets at the end of each round shows the total number of stitches
Step by step Pattern

Stem
- Use cold beige yarn.
- Rnd 1: 7 sc in a mr (7)
- Rnd 2: 7 inc (14)
- Rnd 3: (1 sc, inc) x 7 (21)
- Rnd 4-6: 21 sc (21) - 3 rounds
- Rnd 7: (5 sc, dec) x 3 (18)
- Rnd 8: 18 sc (18)
- Rnd 9: BLO 18 sc (18)
- Rnd 10: (7 sc, dec) x 2 (16)
- Rnd 11: 16 sc (16)
- Begin stuffing the stem and continue stuffing as you go.
- Rnd 12: 3 sc, dec, 6 sc, dec, 3 sc (14)
- Rnd 13: 14 sc (14)
- Rnd 14: (5 sc, dec) x 2 (12)
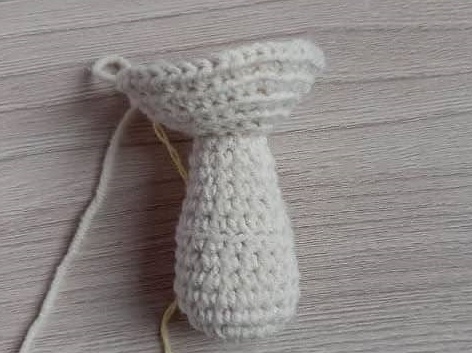
- Rnd 15: FLO - (1 sc, inc) x 6 (18)
- Rnd 16: BLO - 1 sc, inc, (2 sc, inc) x 5, 1 sc (24)
- Rnd 17: BLO (3 sc, inc) x 6 (30)
- Rnd 18: BLO-2 sc, inc, (4 sc, inc) x 5, 2 sc (36)
- Rnd 19: BLO (5 sc, inc) x 6 (42)
- Fasten off and weave in the yarn end.

- Rnd 1: 5 sc in a mr (5)
- Rnd 2: 5 inc (10)
- Rnd 3: (1 sc, inc) x 5 (15)
- Rnd 4: 1 sc, inc, (2 sc, inc) x 4, 1 sc (20)
- Rnd 5: (3 sc, inc) x 5 (25)
- Rnd 6: 2 sc, inc, (4 sc, inc) x 4, 2 sc (30)
- Rnd 7: (5 sc, inc) x 5 (35)
- Rnd 8: 3 sc, inc, (6 sc, inc) x 4, 3 sc (40)
- Rnd 9: (19 sc, inc) x 2 (42)
- Rnd 10: 42 sc (42)
- Fasten off and leave a long tail for sewing.

- Switch to brick red yarn, yarn over, and pull the yarn through these loops. This creates V-shaped spots.
- Make spots in a chaotic order.
- Start making spots in the third round and crochet them each odd round in a checkerboard pattern.
- If you want, you can make spots in each round but not in the last one.

Assembly
- Sew the cap to the stem. Sew it, inserting the needle into half
- Loop of both pieces.
- Do not stuff the cap.
- Fasten off and hide all the yarn ends.

- Attach the yarn to the round with front loops (round 9) and work the following: (ch 1, 1 sc, ch 2, 1 sc) to the end of the round. Slip stitch into the first stitch of the round. Fasten off and weave in the end.

Cap
- Use brick red yarn. You can embroider the spots on the cap or crochet them while making the cap. Make a spot as follows.
- Insert the hook into the next stitch and make a yarn over with white yarn. There are two loops on the hook: white and brick red.

Designer: Amiany.design On Instagram


Leave a Reply