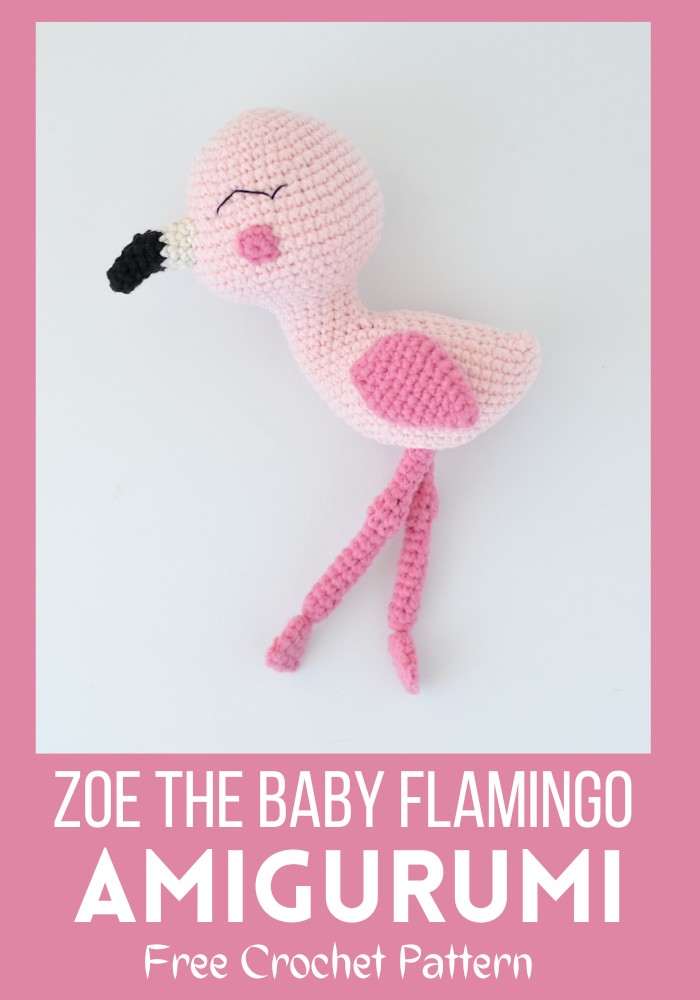
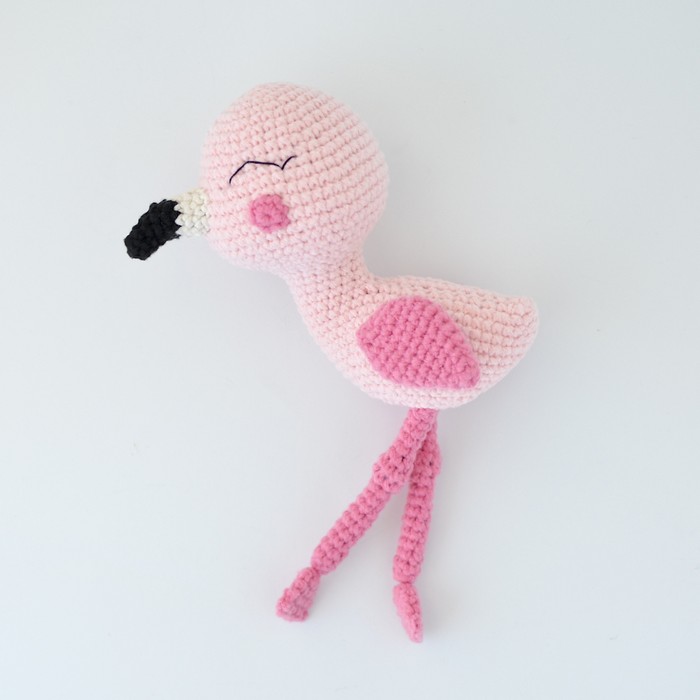
Bring a splash of color and cuteness to your collection with the Free Crochet Baby Flamingo Amigurumi Pattern, an easy and delightful project for all crochet fans.
Experiencing the charm and softness of Crochet Zoe The Baby Flamingo that brings a wave of delight to any crocheter's heart. This pattern, with its detailed and easy-to-follow instructions, transforms yarn into a comforting companion for little ones. It's refreshing to see such creativity and thoughtfulness in choosing safe materials and vibrant colors.
Crochet Zoe The Baby Flamingo

Appearance and Look of the Crochet Baby Flamingo Amigurumi
Adorable and Lifelike Design:
- Essence of a Baby Flamingo: This pattern beautifully captures the delicate and charming features of a baby flamingo, making it a delightful addition to any crochet collection.
- Endearing Features: With its tiny beak, round body, and short legs, the amigurumi is designed to mimic the look of a real baby flamingo, exuding cuteness and appeal.
Simplicity and Accessibility:
- Beginner-Friendly: The blend of simplicity in the pattern ensures that crocheters of all levels, including beginners, can successfully complete this project.
- Detailed Instructions: Clear and concise instructions make the process smooth and enjoyable, ensuring a satisfying crafting experience.
Great Gift Idea:
- Precious Gift: The finished baby flamingo makes a heartwarming gift for loved ones, suitable for occasions like baby showers, birthdays, or as a thoughtful handmade present.
- Versatile Use: Whether used as a decorative piece, a cute toy, or a keepsake, this amigurumi offers versatile appeal.
Conclusion
The Free Crochet Baby Flamingo Amigurumi Pattern combines a lifelike and endearing design with simplicity, making it a joyful project for crocheters of all skill levels. Its detailed features and accessibility ensure a delightful crafting experience, resulting in a precious gift that's sure to bring smiles.
Materials Needed:
- Yarn: Lion Brand® FEELS LIKE BUTTA® in colors: #101A Pink (A), #140M Dusty Pink (B), #153 Black (C), #100 White (D)
- Hook: Size F (3.75 mm)
- Additional Materials: Poly Stuffing, Black embroidery floss, Tapestry Needle
Abbreviations:
- beg = begin(ninig)
- ch = chain
- rep = repeat
- rnd(s) = round(s)
- sc = single crochet
- hdc = half double crochet
- sl st = slip stitch
- st(s) = stitch(es)
Gauge:
18 sc + 20 rows = about 4 in. (10 cm).
Pattern:
Head and Body:
- With A, make a magic ring.
- Rnd 1: Work 6 sc in ring.
- Rnd 2: 2 sc in each st around = 12 sc.
- Follow the increasing pattern until Rnd 21 with specific increases at each round ending with 18 sc in Rnd 21.
- From Rnd 22 to Rnd 25: 1 sc in each st around = 18 sc.
- At Rnd 26, create the neck transition and continue increasing for the body following the pattern up to Rnd 40, closing off with sc2tog around = 8 sc. Fasten off.
Cheeks (make two):
- Start with B, make a magic ring, work 6 sc in ring, and fasten off leaving a long strand.
Beak:
- With C, make a magic ring, work 5 sc in ring.
- Increasing pattern until Rnd 6, finishing with 10 sts.
- Change to D at Rnd 7, 1 sc in each st around for 2 more rounds. Fasten off.
Legs (make two):
- Start with B, follow a pattern from Rnd 1 to Rnd 18, increasing at Rnd 11, and continue with consistent sc for the rest, fasten off.
Feet (make two):
- Begin with B, make a magic ring and follow the pattern through to Rnd 4, then do not stuff and create a flat base at Rnd 5.
Wings (make two):
- Start with B, go through a pattern of increases from Rnd 1 to Rnd 11, and close up the Wing with no stuffing, flattening the last round.

Finishing:
- Sew the beak between specific rounds and add the cheeks and wings at the specified rounds.
- With embroidery thread, embroider eyes.
- Attach all pieces as directed, and weave in the ends for a neat finish.


Leave a Reply