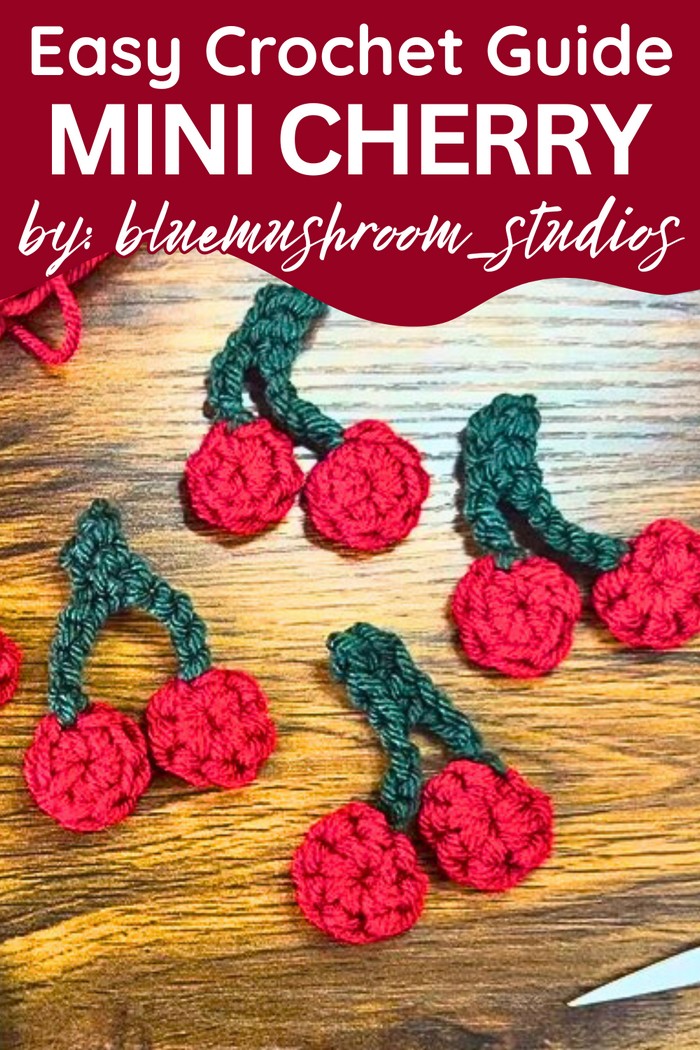
Design irresistibly cute crochet cherries with this fun, perfect for elevating your creations with stylish decor, jewelry, and accents.
Cherries have long symbolized sweetness and charm, making them a favorite design element for handmade creations. Crochet cherries take that timeless appeal to a whole new level, offering versatility and style for various projects. Tiny, vibrant, and full of personality, these adorable designs can be used in countless ways from fashionable jewelry, eye-catching appliqués, and delightful decor that brightens any room. With the right crochet technique, cherries come to life in a playful yet elegant way, becoming conversation starters wherever they are featured.
Fun Crochet Cherries Pattern for Creative Decor
Their compact size makes them the ideal addition to hair accessories or as accents for bags, hats, or scarves. Beyond fashion, they offer endless possibilities for home decoration add them to table runners for a fruity flair, or hang them as part of a whimsical garland. Another benefit lies in their simplicity; they are perfect for crocheters of all skill levels, whether you’re learning new techniques or looking for a quick and satisfying project.
The satisfaction of making crochet cherries lies not only in their beauty but also in their ability to bring joy to others. Handmade pieces carry a unique story, and these delightful cherries promise to add charm and character to any creation while showcasing your love for creativity.
Materials Needed
- Size 4 medium weight yarn in red and green.
- Size G (4.5 mm) crochet hook.
- Scissors.
- A small yarn needle.

Step-by-Step Guide
Creating the Cherry Base
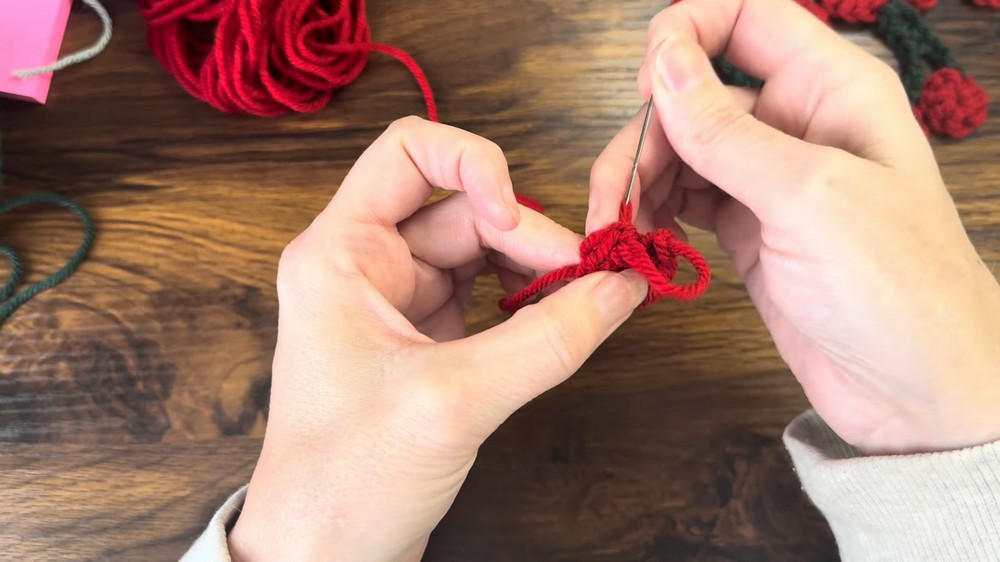
- Form the Foundation Circle:
- Begin with a slip knot and chain four stitches.
- Slip stitch into the first chain to close the circle.

- Crocheting the Cherry:
- Perform eight single crochets into the circle. If you prefer, you can start with a magic circle.
- After your third single crochet, optionally tuck in your yarn tail.
- Finish and Close the Circle:
- Cut the yarn, leaving a small tail.
- Use a yarn needle to sew the tail through the first single crochet stitch, pulling tight for a clean finish.
- Tuck the yarn tail in by threading it around the ‘spine’ of the circle.
- Repeat for Second Cherry:
- Follow the same steps to create a second cherry base.
Making the Stem
- Attach the Yarn:
- Start with a slip knot and choose any stitch from the edge of your cherry to attach the stem.
- Slip stitch into the chosen edge of the cherry.

- Create the Stem Shape:
- Chain seven stitches.
- Turn and single crochet into the third chain from the hook.
- Continue with four additional chains.
- Take the second cherry and slip stitch it to the stem.
- Finalizing the Stem:
- Cut the yarn and pull through, making a secure and tidy attachment.
- Use a needle to tuck in any loose ends around the spine of the cherries.

Conclusion
With just a few steps, you can craft these lovely crochet cherries, perfect for diverse creative projects. Their charming simplicity makes them an excellent addition to any crochet enthusiast’s repertoire. Whether used as earrings, garlands, or decoration, these cherries are sure to make a delightful impression.
Leave a Reply