
Spread joy and giggles with this Free Crochet Love Otter Amigurumi Pattern with this cute mini buddy brings heartwarming fun for all ages.
Perfect for expressing affection and warmth through playful design, the Crochet Love Otter Amigurumi Pattern enchants those who give or receive it. With an adorable otter holding a vivid heart, the finished piece radiates sweetness and charm, making it an ideal choice for Valentine’s Day, anniversaries, or thoughtful surprises. The pattern is accessible for beginners and engaging for those with experience, offering clear instructions and a rewarding project.
Kawaii Crochet Love Otter Amigurumi Pattern You Can’t Resist
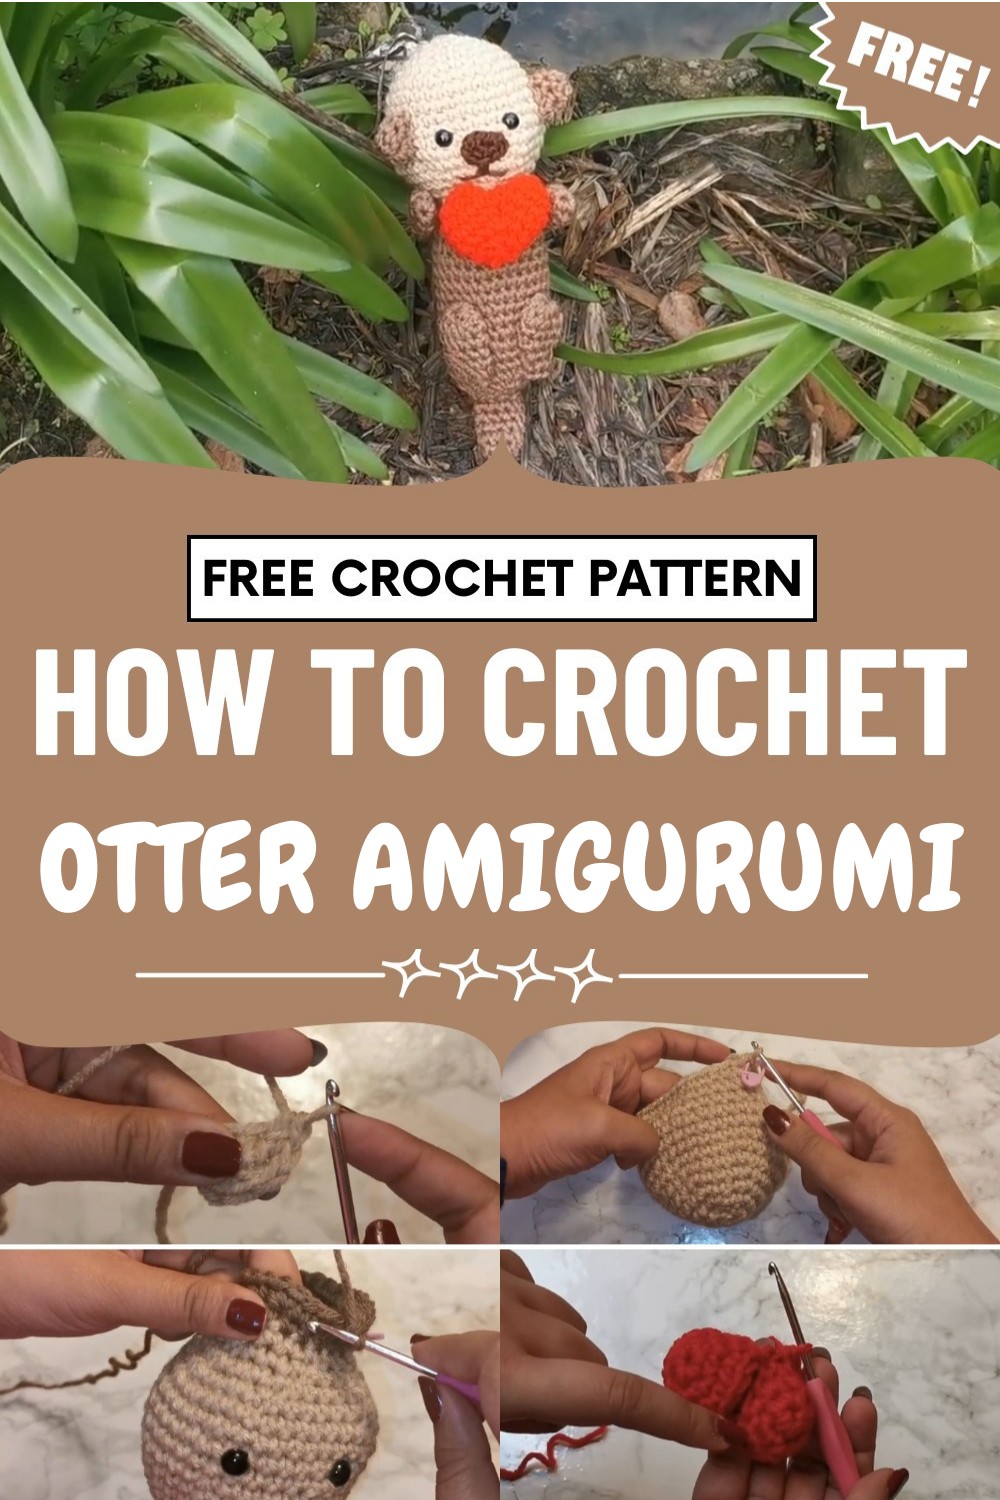
Its versatile form means it easily becomes a treasured keepsake, a nursery accent, or a desk companion sure to spark daily smiles. Plush and endearing, the otter brings personality to any space while celebrating the joy of thoughtful giving.
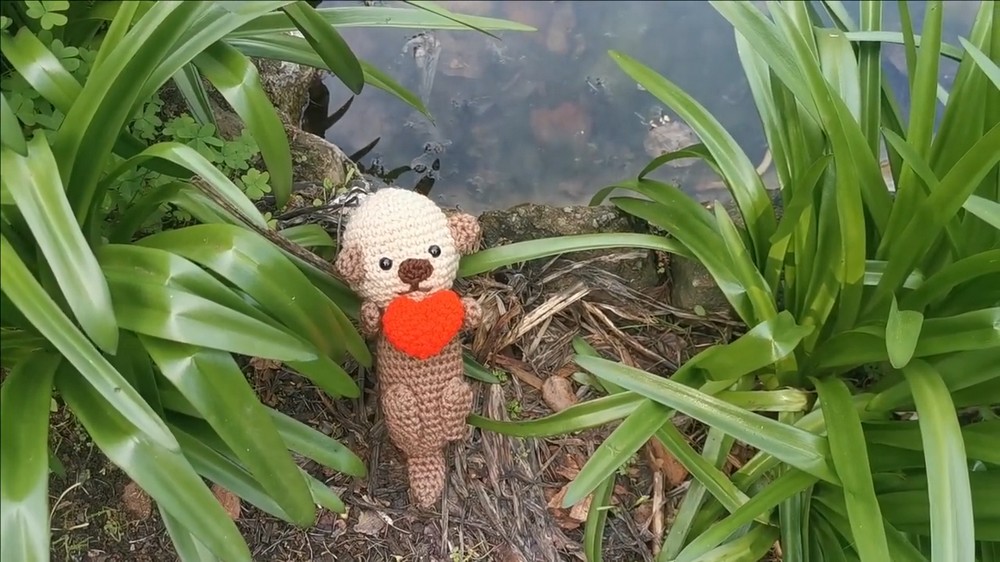
With every stitch, this pattern transforms simple yarn into a lasting symbol of love, friendship, and cheerful whimsy—a reminder that heartfelt gestures can make any moment memorable.
Special Features
- Cute otter holds a detachable or sewn-in puffy heart
- Minimal sewing required
- Perfect for gifting or decorating
- Beginner to intermediate skill level
- Uses basic single crochet and simple shaping
Materials
- Medium (4) worsted weight yarn:
- 3 shades of brown (dark, medium, light)
- Black or darkest brown (nose)
- Red (heart)
- 3.5 mm crochet hook
- Polyester fiberfill or pillow stuffing
- Stitch marker
- Yarn needle
- Scissors
- 2 safety eyes with backings
Finished Size
- Size will vary, but generally fits in your hand (about 4-6" tall depending on yarn & hook)
Tutor's Suggestions
- Use a smaller hook than recommended to achieve tighter, neater stitches for amigurumi.
- Stuff firmly, but not so much that it stretches the stitches.
- Safety eyes are best for child-friendly projects, but you can embroider eyes if preferred.
- You can sew the heart to the hands or leave it as a separate play object.
Abbreviations
- MR: Magic Ring
- SC: Single Crochet
- INC: Increase (2 SC in same stitch)
- DEC: Decrease (single crochet 2 together)
- Ch: Chain
- St, sts: Stitch, stitches
- ( ) x N: Repeat directions in parentheses N times
Pattern
Head
- With lightest brown yarn, make a magic ring.
- Rnd 1: 6 SC in MR. (6)
- Rnd 2: INC around. (12)
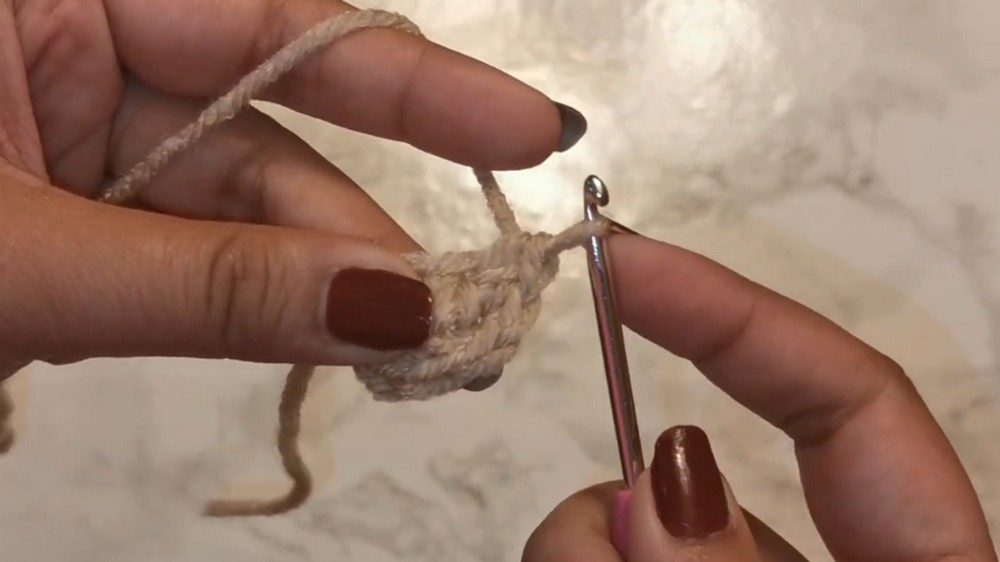
- Rnd 3: (SC, INC) x 6. (18)
- Rnd 4: (2 SC, INC) x 6. (24)
- Rnd 5: (3 SC, INC) x 6. (30)
- Rnd 6: (4 SC, INC) x 6. (36)
- Rnd 7-10: SC in each st around. (36 per row, 4 rows)
- Rnd 11: (5 SC, INC) x 6. (42)
- Rnd 12-14: SC around. (42 per row, 3 rows)
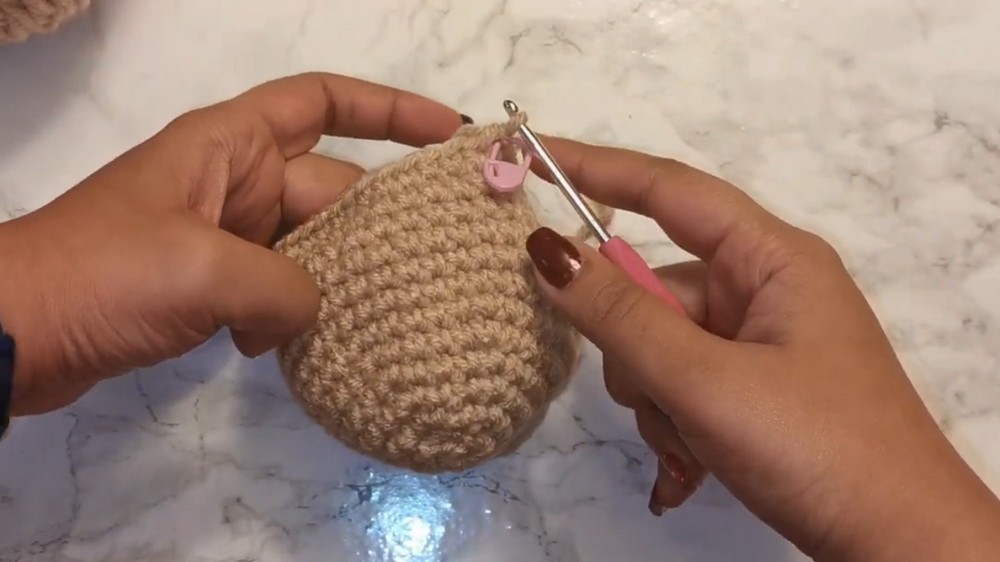
- Rnd 15: (5 SC, DEC) x 6. (36)
- Rnd 16: (4 SC, DEC) x 6. (30)
- Rnd 17: (3 SC, DEC) x 6. (24)
- Attach safety eyes between Rnds 10 & 11, with about 5 sts between them.
- Rnd 18: (2 SC, DEC) x 6. (18)
- Stuff head firmly.
Body
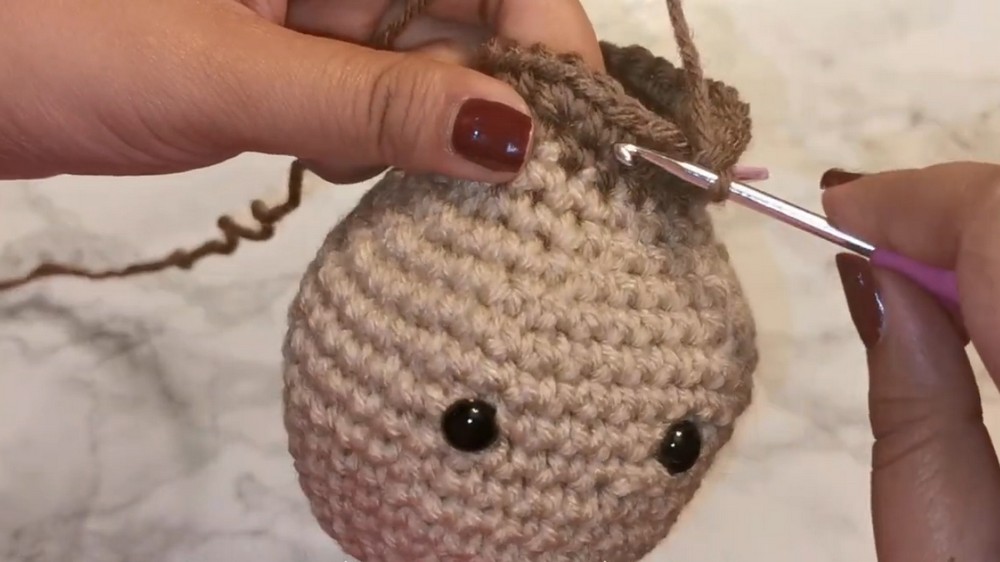
- Switch to darker brown.
- For neat color change: On last SC of previous round, finish with new color.
- Rnd 19: 6 SC in new color, finish color change, cut old color. SC around to complete 18 SC.
- Rnd 20: SC around (18)
- Rnd 21: (2 SC, INC) x 6 (24)
- Rnd 22: (3 SC, INC) x 6 (30)
- Rnd 23-33: SC around. (30 per round, 11 rounds)
- Rnd 34: (3 SC, DEC) x 6 (24)
- Rnd 35: (2 SC, DEC) x 6 (18)
- Add stuffing.
- Rnd 36: (SC, DEC) x 6 (12)
- Rnd 37: DEC around. Close and fasten off.
Nose
- With dark brown, Ch 4.
- Into 2nd ch from hook, SC in next 2 sts, 3 SC in last st.
- Turn, SC along the other side: SC in next 2 sts, 2 SC in next, join with sl st.
- Sew onto face under the eyes, above neck-join.
- Embroider small mouth with extra yarn.
Ears (make 2)
- With beige or preferred color, MR.
- Rnd 1: 6 SC in MR.
- Rnd 2-3: SC around (6)
- Fasten off, leave tail. Sew to head at sides above eye-line. No stuffing needed.
Forearms (make 2)
- MR, 6 SC in MR.
- Rnd 2-7: SC around (6 per round)
- Fasten off, leave long tail. Sew to sides of body so hands can come together.
Feet/Legs (make 2)
- MR, 10 SC in MR.
- Rnd 2-3: SC around (10 per round)
- Rnd 4: (3 SC, DEC) x 2 (8)
- Rnd 5-6: SC around. (8)
- Rnd 7: (2 SC, DEC) x 2 (6)
- Fasten off, leave tail. Sew at body’s base, beside tail.
Tail
- MR, 3 SC in MR.
- Rnd 2: INC around (6)
- Rnd 3: (SC, INC) x 3 (9)
- Rnd 4-8: SC around (9 per round, 5 rounds)
- Fasten off. Sew to bottom of body.
Heart (make 2 pieces)
- With red, MR.
- Rnd 1: 6 SC in MR.
- Rnd 2: INC around (12)
- Rnd 3: SC around (12)
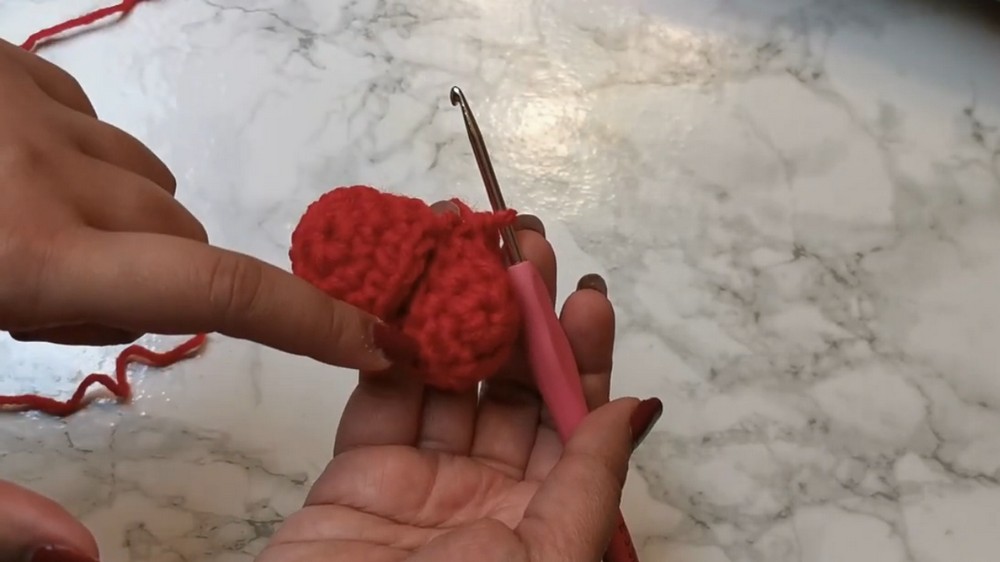
- Fasten off first piece. Don't cut yarn on second piece.
Join:
6. Place a SC into each stitch of both pieces to join as you go (forming a heart shape).
- You’ll have 24 sts total.
- Where the pieces touch, leave 4 sts unworked on each side.
7. Work in round: (2 SC, DEC) x 4 (12)
8. (SC, DEC) x 4 (8)
9. Lightly stuff as you go.
- DEC around, close and fasten off.
- Whipstitch open middle seam if needed to finalize the heart shape.
Assembly
- Sew the forearms in position so the hands meet or overlap.
- Stitch or tie heart in place between the hands, or leave it loose for a separate toy.
- Attach feet at bottom of body and tail at center back.
- Adjust face details as needed for your preferred expression.
Uses
- Sweet Valentine or friendship gift
- Unique nursery or desk decor
- Thoughtful keepsake
Conclusion
You now have a cuddly otter with a plush heart, ready to spread love and smiles to anyone who receives it! With simple stitches, minimal sewing, and an adorable finish, it’s a wonderful project for crafters of all levels.
Tip:
Try using embroidery floss for tiny features (mouth, eyebrows) for extra sharp facial details.




Leave a Reply